Introduction to config promotion (Early Access)
Config Promotion is an Early Access feature.
Overview
The config promotion feature is designed to simplify the process of replicating service configurations across different namespaces or environments.
When you set up new environments for testing or live purposes, the config promotion feature gives you the following advantages.
- Time-saving: Streamlines the configuration replication process, saving valuable time and resources.
- Consistency: Ensures uniformity across namespaces or environments, reducing the risk of differences that may impact gaming experience.
- Efficiency: Automates the configuration replication, allowing developers to save valuable time and effort and enables them to focus on critical aspects of game development, innovation, and delivering a polished game experience.
Config promotion workflow
The config promotion process consists of the following high-level stages:
- Export Configuration: In this initial step, the configuration is extracted from the source namespace or environment.
- Import Configuration: Once the configuration is successfully exported, it is ready to be deployed in the target namespace or environment. Game developers access the admin console, navigate to the desired target, and import the configuration. The configuration settings are then applied to the new namespace or environment
By following these two fundamental stages, config promotion simplifies the process of replicating configuration across namespaces or environments, allowing game developers to ensure consistency and efficiency.
Handling rollbacks and edge cases
Config promotion comes with a robust system to handle rollbacks and address potential edge cases that may arise during the configuration replication process. This section provides guidance on managing such scenarios.
Rollback procedure
- Save a Snapshot: When importing configuration, the admin can save a snapshot of the configuration before the import. So that the admin can do a rollback if there are problems with the imported configuration.
- Identify Configuration Changes: In the event that a configuration deployment leads to unexpected issues or undesired outcomes, identify the specific changes that need to be rolled back.
- Access Configuration History: Access the config promotion history to locate the previous version of the configuration that was functioning as expected.
- Restore to Previous Configuration: Once the previous configuration is identified, initiate the rollback process by restoring the prior configuration to the target namespace or environment.
Edge cases guide
- Partial Configurations: In cases where only certain modules of the configuration need to be replicated, follow the standard config promotion workflow, but ensure that only the relevant settings are imported into the target namespace or environment.
- Validation and Testing: Before deploying a configuration across critical environments, consider testing the changes in a non-production or testing environment to validate the effects and ensure they meet the desired outcomes.
- Error Handling: In case of any errors encountered during the config promotion process, refer to the system logs or error messages to identify the root cause. Troubleshoot the issue and repeat the necessary steps to ensure a successful configuration deployment.
Create new template
Before we begin the config promotion process, you must create a template that contains a list of modules to be used for exporting configuration. This allows you to quickly export configuration without manually selecting which modules to export. You can also capture custom export properties for specific modules.
Follow the steps below to create a new template:
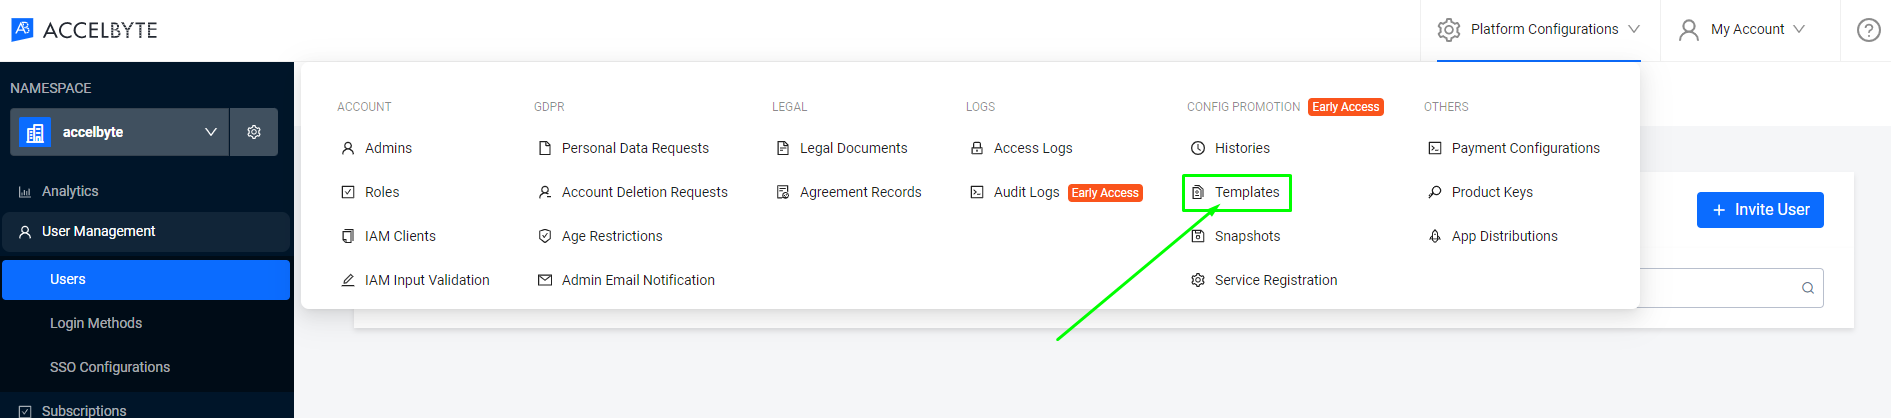
Access the Templates menu, navigate to the Platform Configuration located at the top right corner of the Admin Portal, and click on Templates.
Here is what the Templates page looks like:
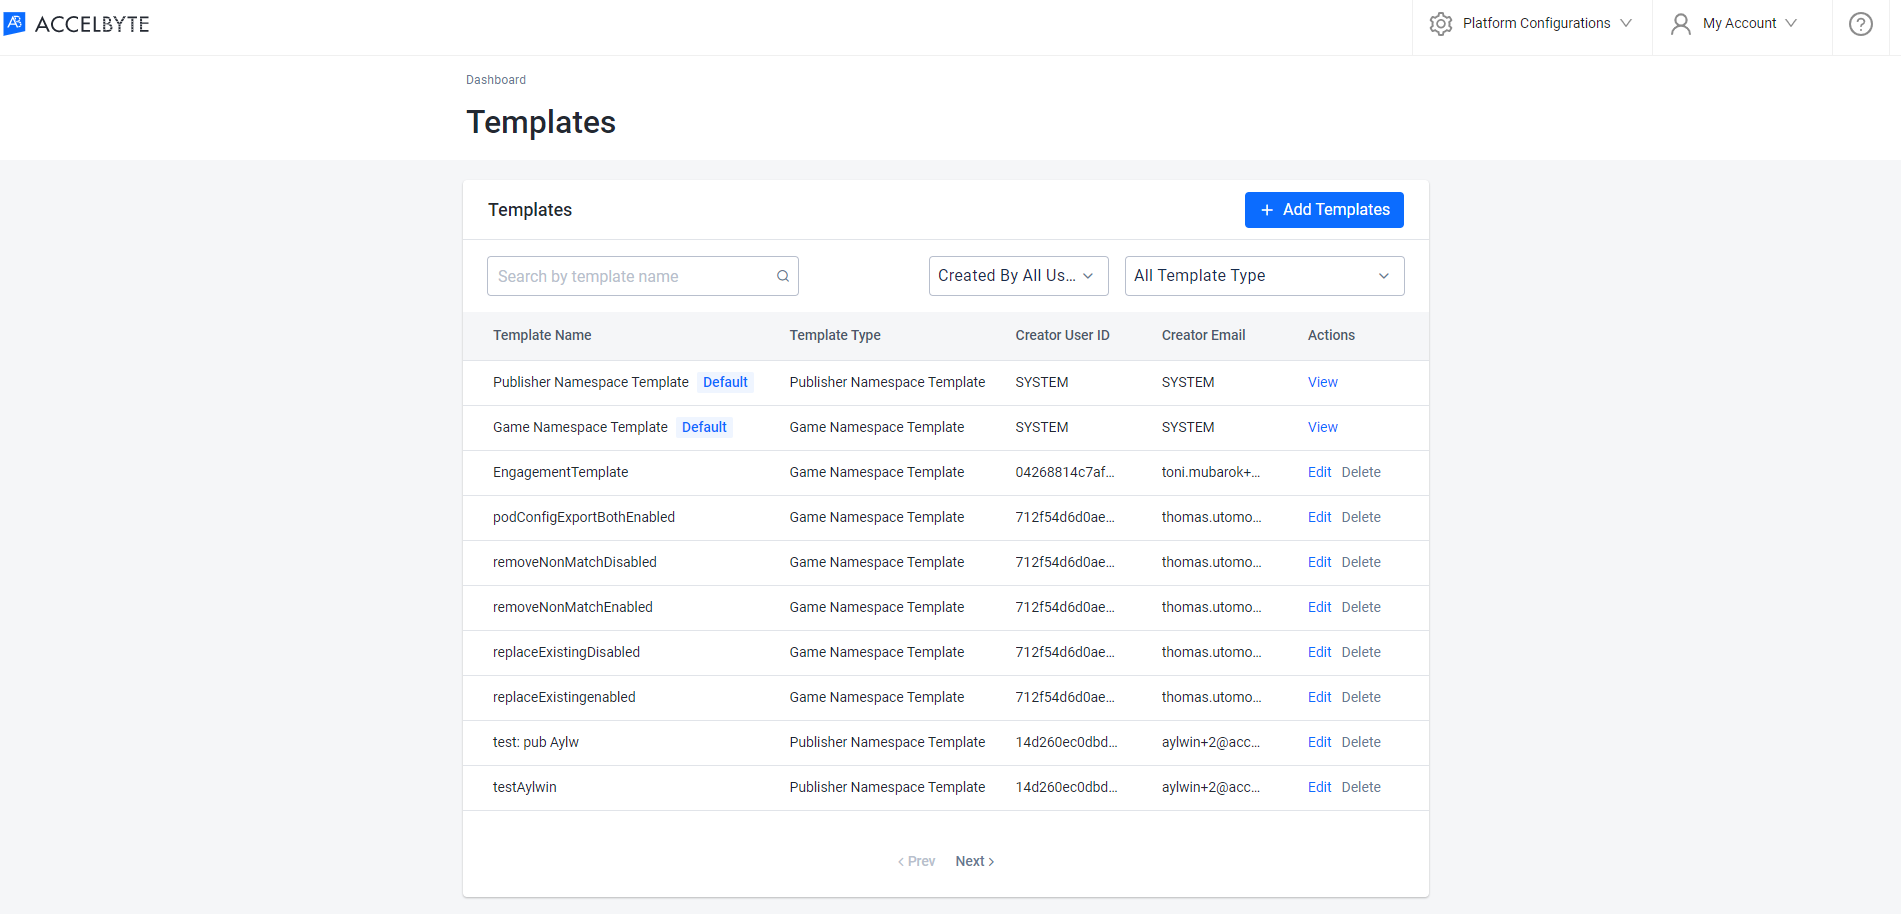
Click the Add Templates button.
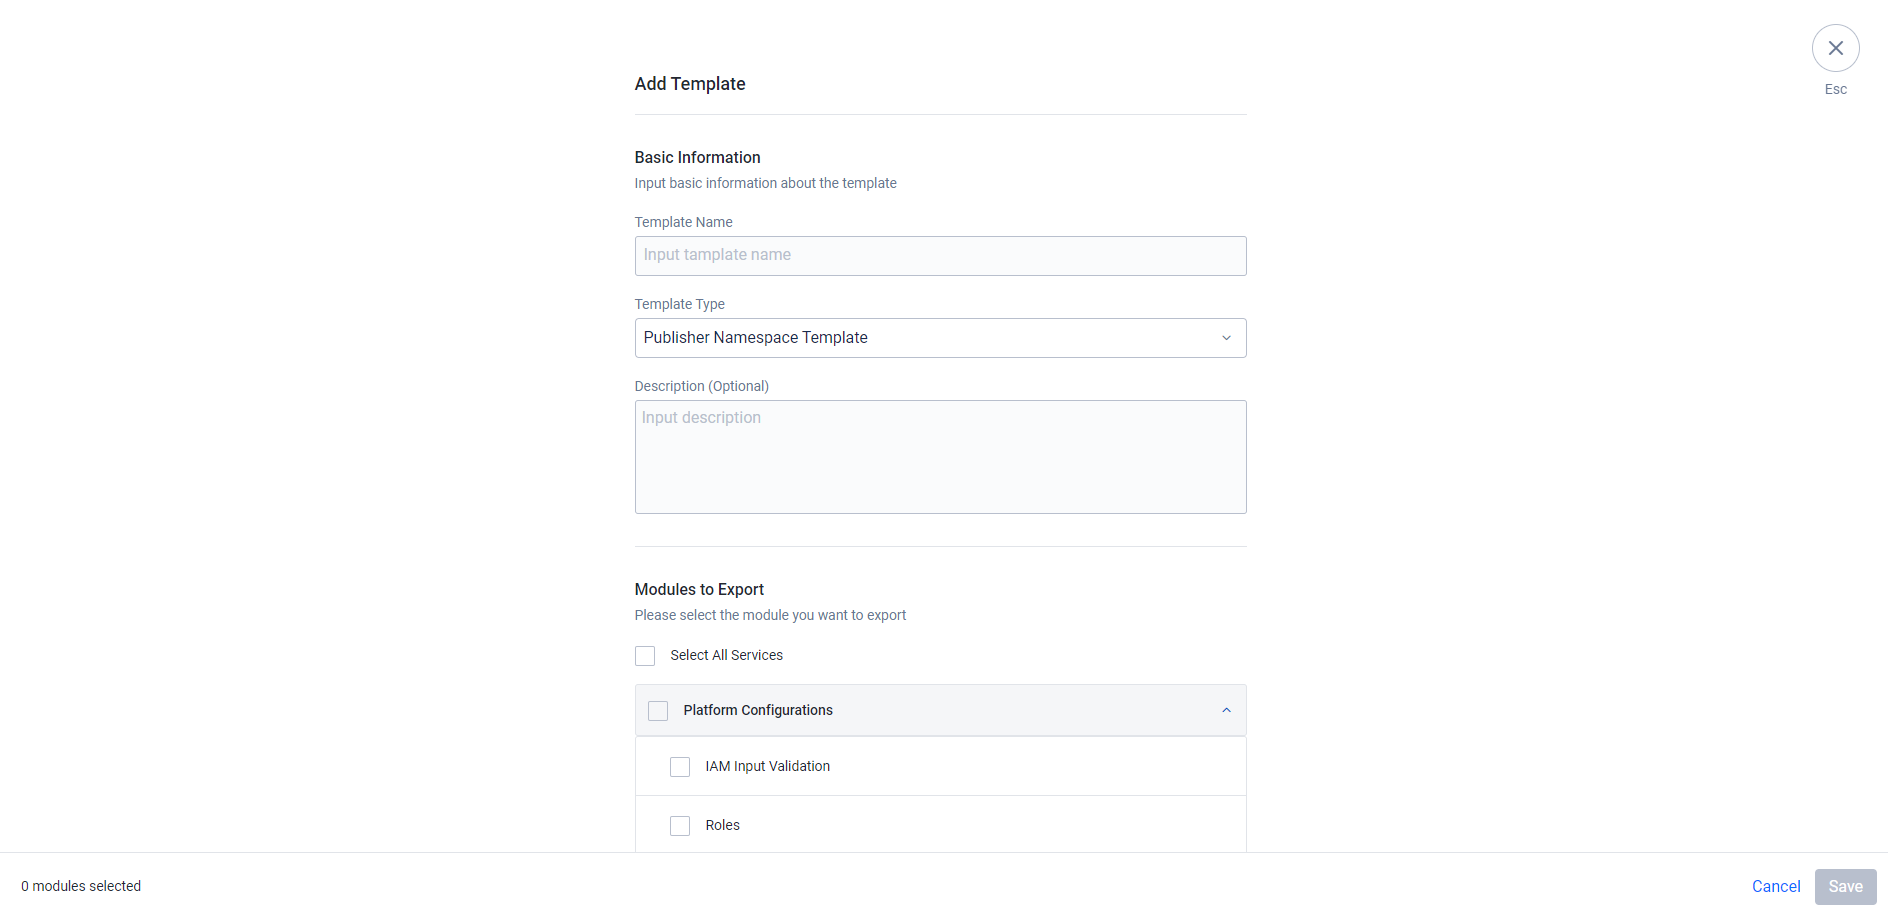
Type in the name of the template.
Set the template type.
- Select Publisher Namespace Template to create a template for a publisher namespace.
- Select Game Namespace Template to create a template for a game namespace.
infoThe available module lists may vary for for each namespace type, so be sure to choose the correct template type you want to create.
(Optional) Add a description for the new template.
Select the modules you want to include in your template. You can also modify the Export Properties for each module.
Click the Save button to create the new template.
By following these steps, you can easily create a new template and include the settings and modules you want to use for future configuration. You can also perform quick template creation while exporting configuration, which can save time and streamline the process. However, there is a default template that you can use and can be changed during the export process.
You can still modify the module list on the template used during the export process.
Export configuration
By exporting your configuration, you can create a backup copy of your current configuration settings or transfer your configuration to another namespace or environment. Follow the steps below to Export Configuration:
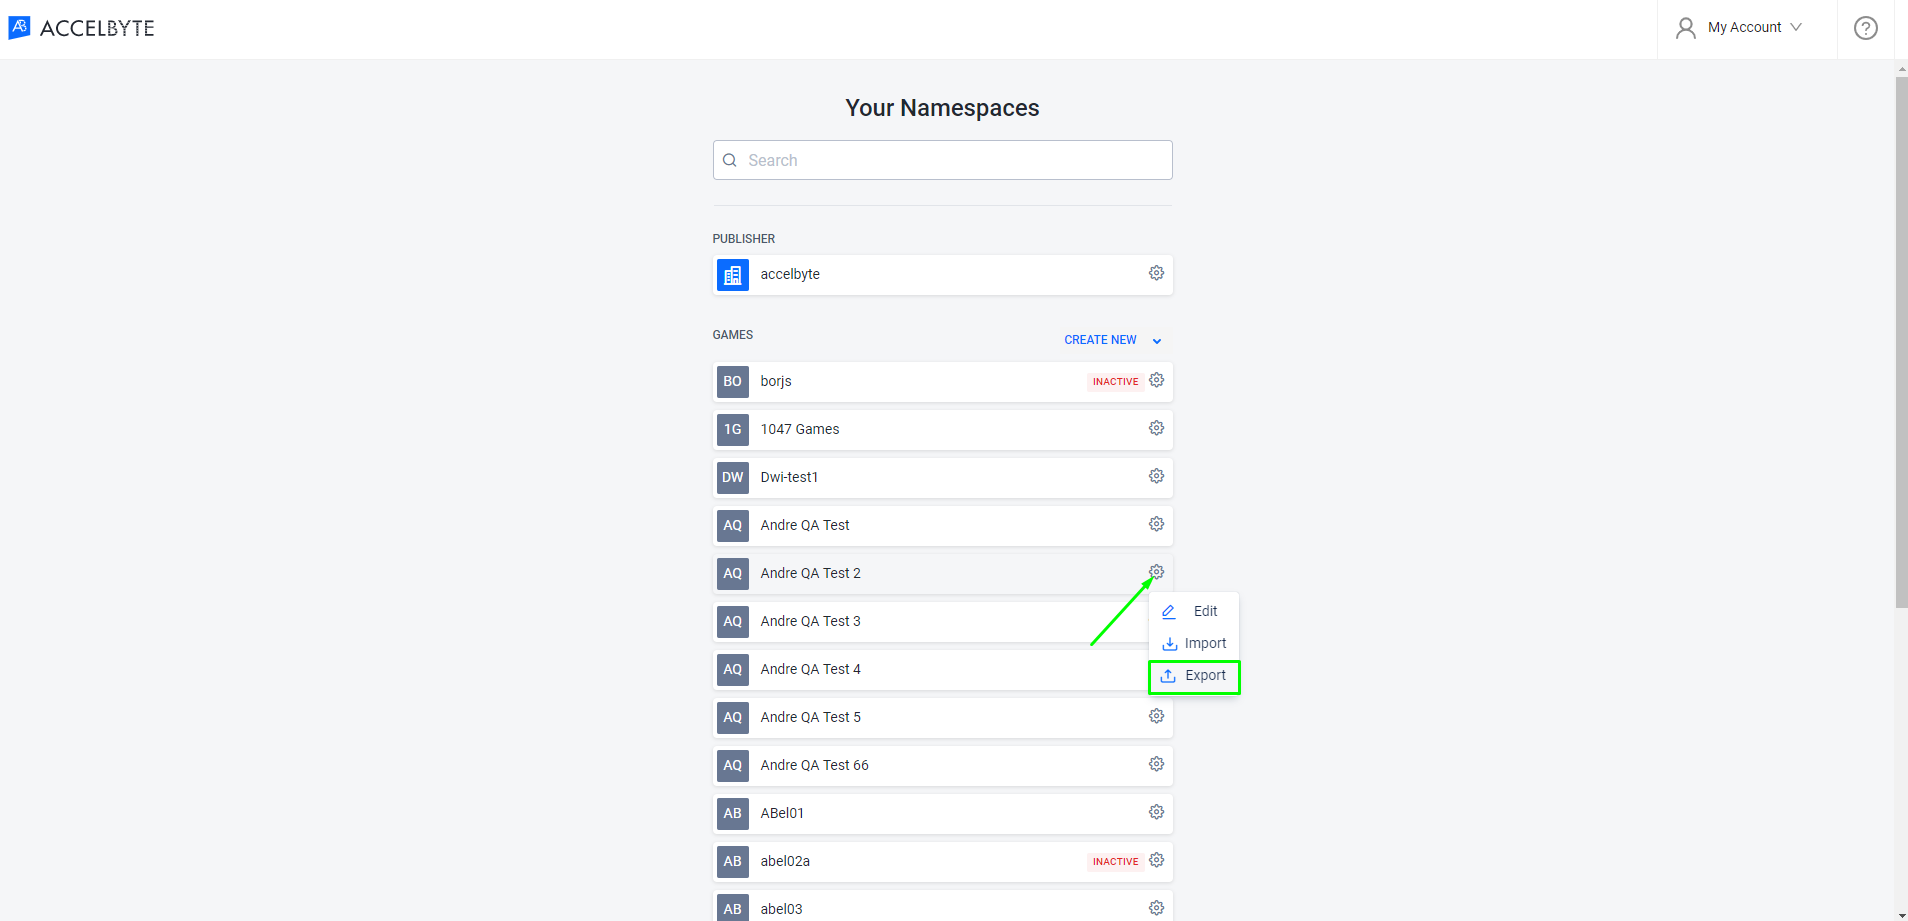
Access namespace selection page.
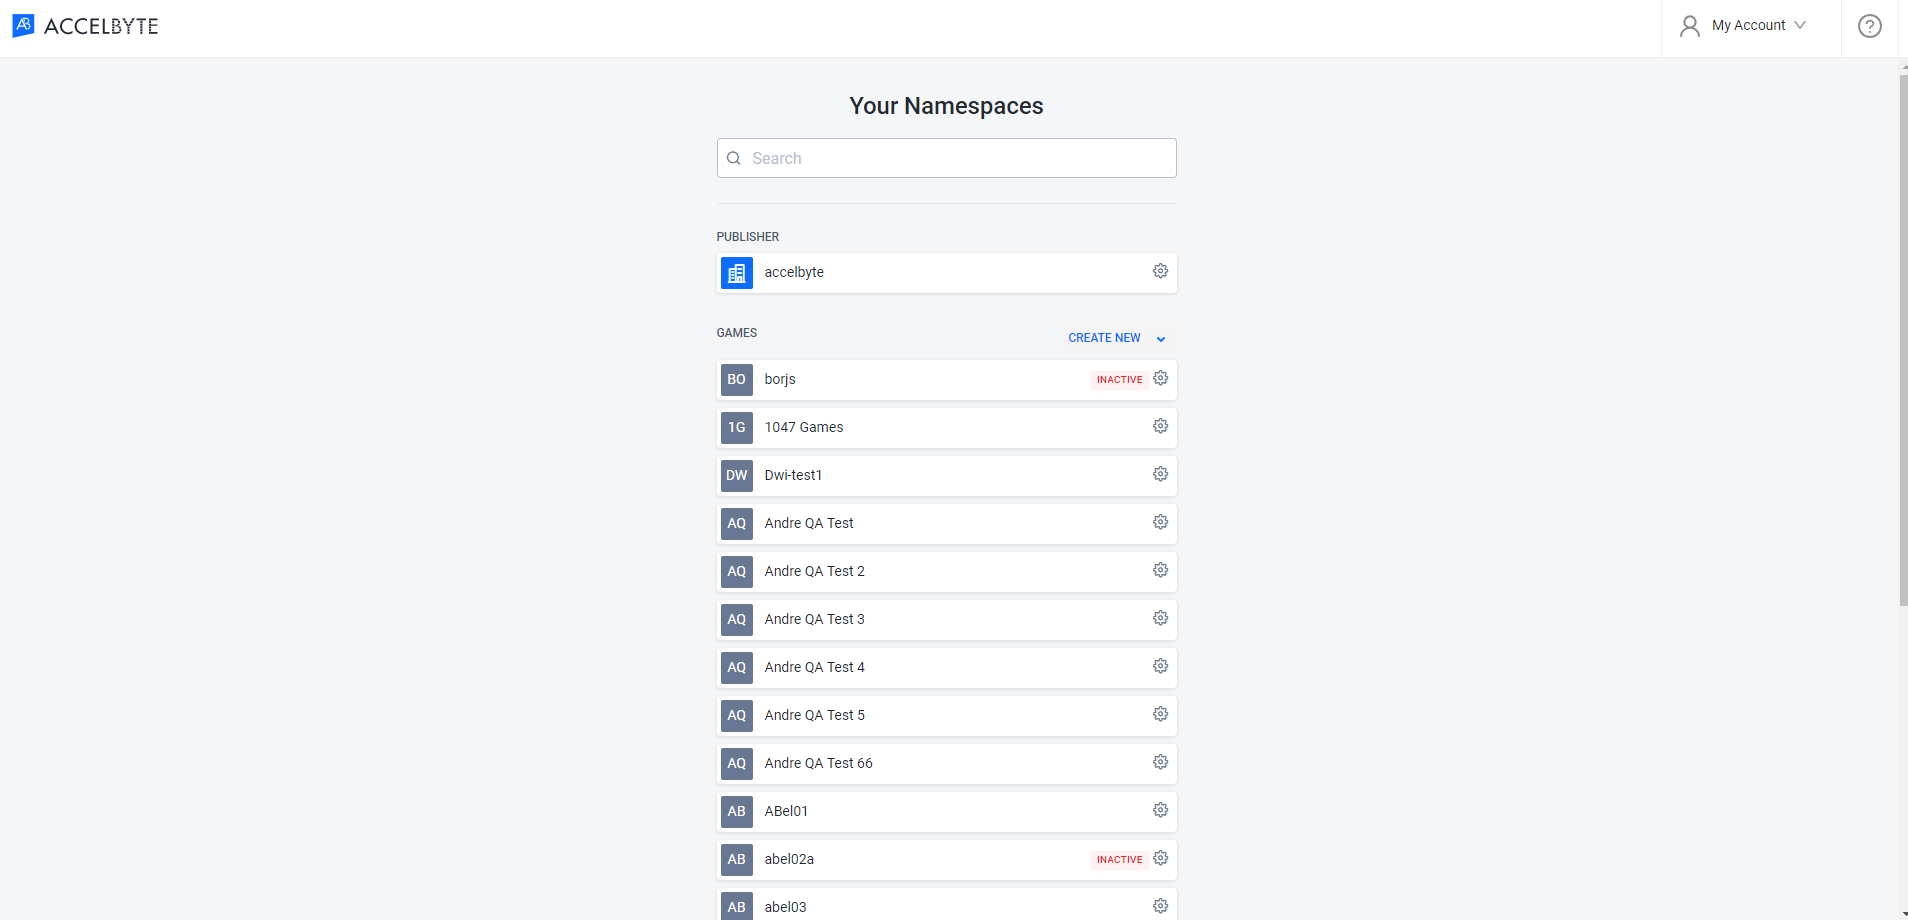
Select the namespace with the configuration you want to export.
Click the gear icon on the selected namespace, then click the Export button.
On the Export page, select the Export Template you want to use. You can also create a new template from here
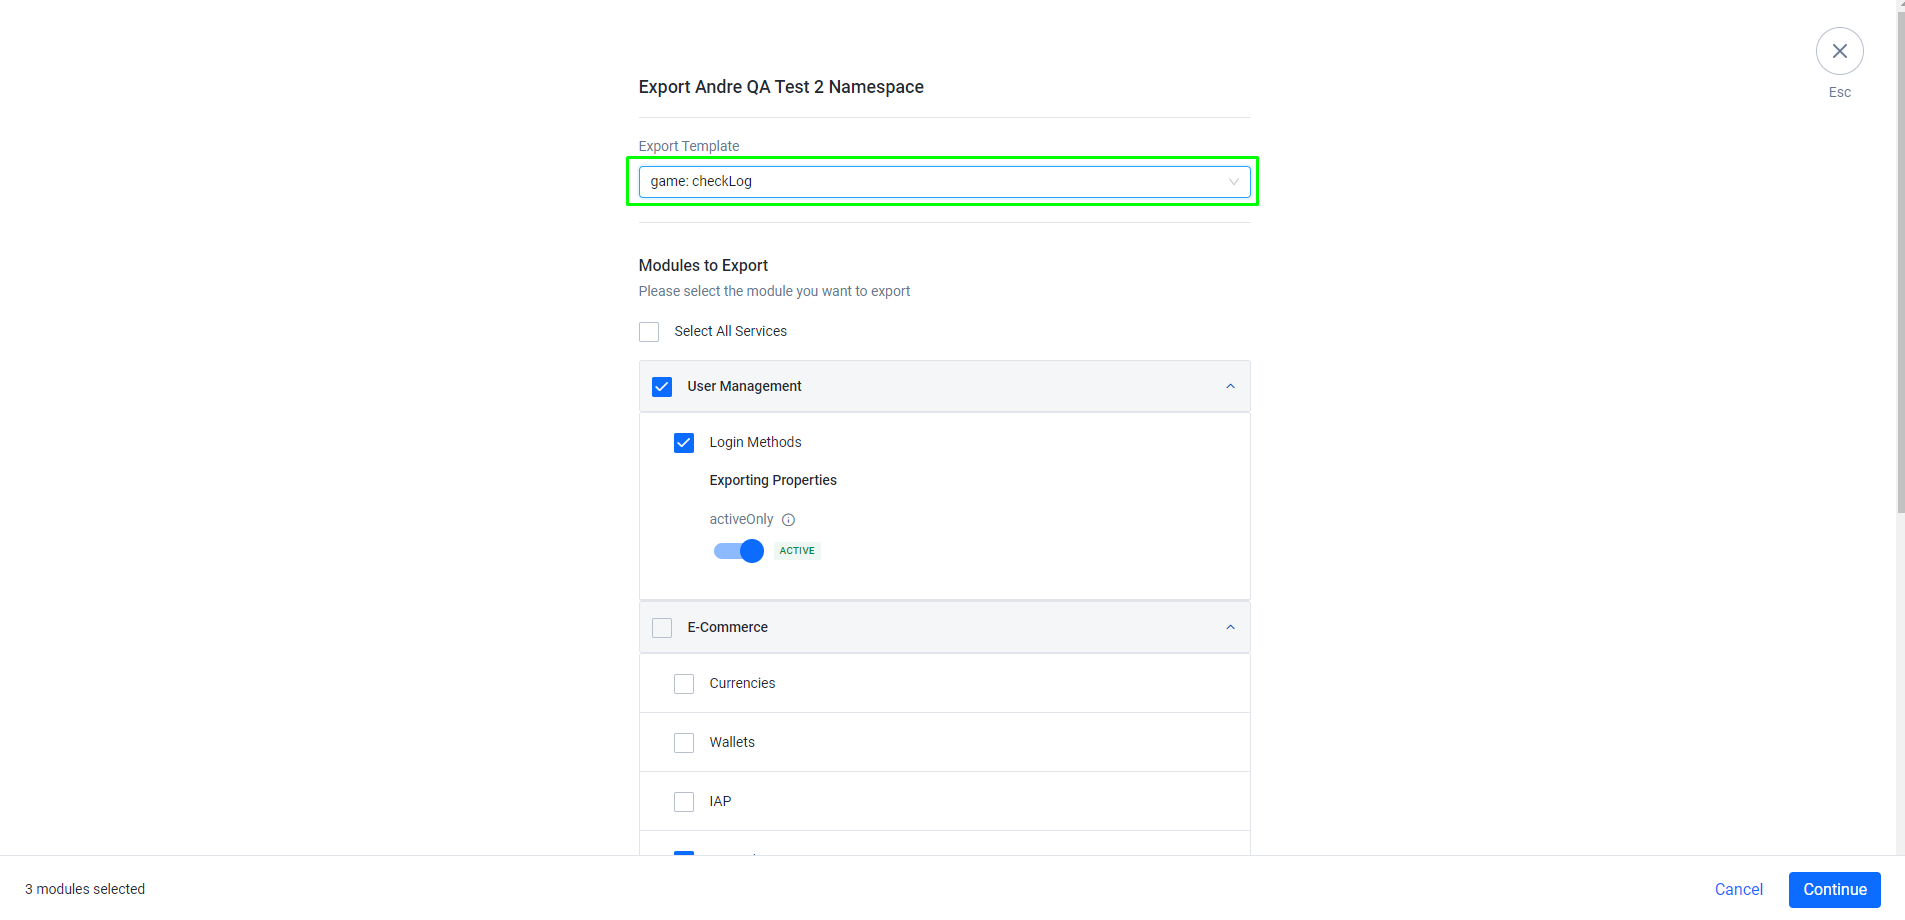
After selecting the template, make sure that the selected modules are correct. You can also modify the selected modules in the selected template and modify the custom export properties.
Click the Continue button.
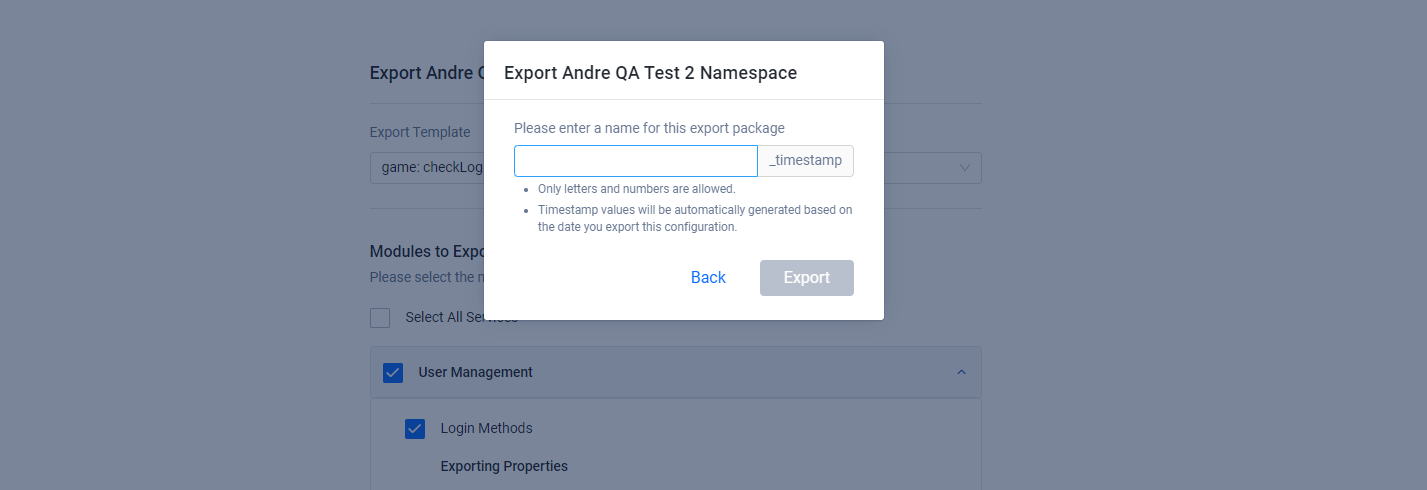
Type in the package name. This will be used as the exported file name. Then, click Export.
Wait for the export process to complete. Once the export is complete, you will see a success message. The file will be automatically uploaded to S3.
 note
noteRemember to check that you have selected the correct namespace and modules before exporting, and wait for the export process to complete before closing the window.
Troubleshooting
If you encounter any issues while exporting your configuration, try the following troubleshooting steps:
- Check if you have the necessary permissions to perform the export configuration.
- Verify that your network connection is stable and the internet speed is good.
- If you receive any error message, check the error logs in the Export Result page or Export Histories page to view the error logs and determine the cause of the error.
Import Configuration
Import Configuration allows you to import a previously exported configuration package into your target namespace or environment. This feature can be useful when you need to deploy the same configuration across different namespace and environments. Follow the steps below to Import Configuration:
Access namespace selection page.
Select the namespace you want to import the configuration.
Click the gear icon on the selected namespace, then click the Import option.
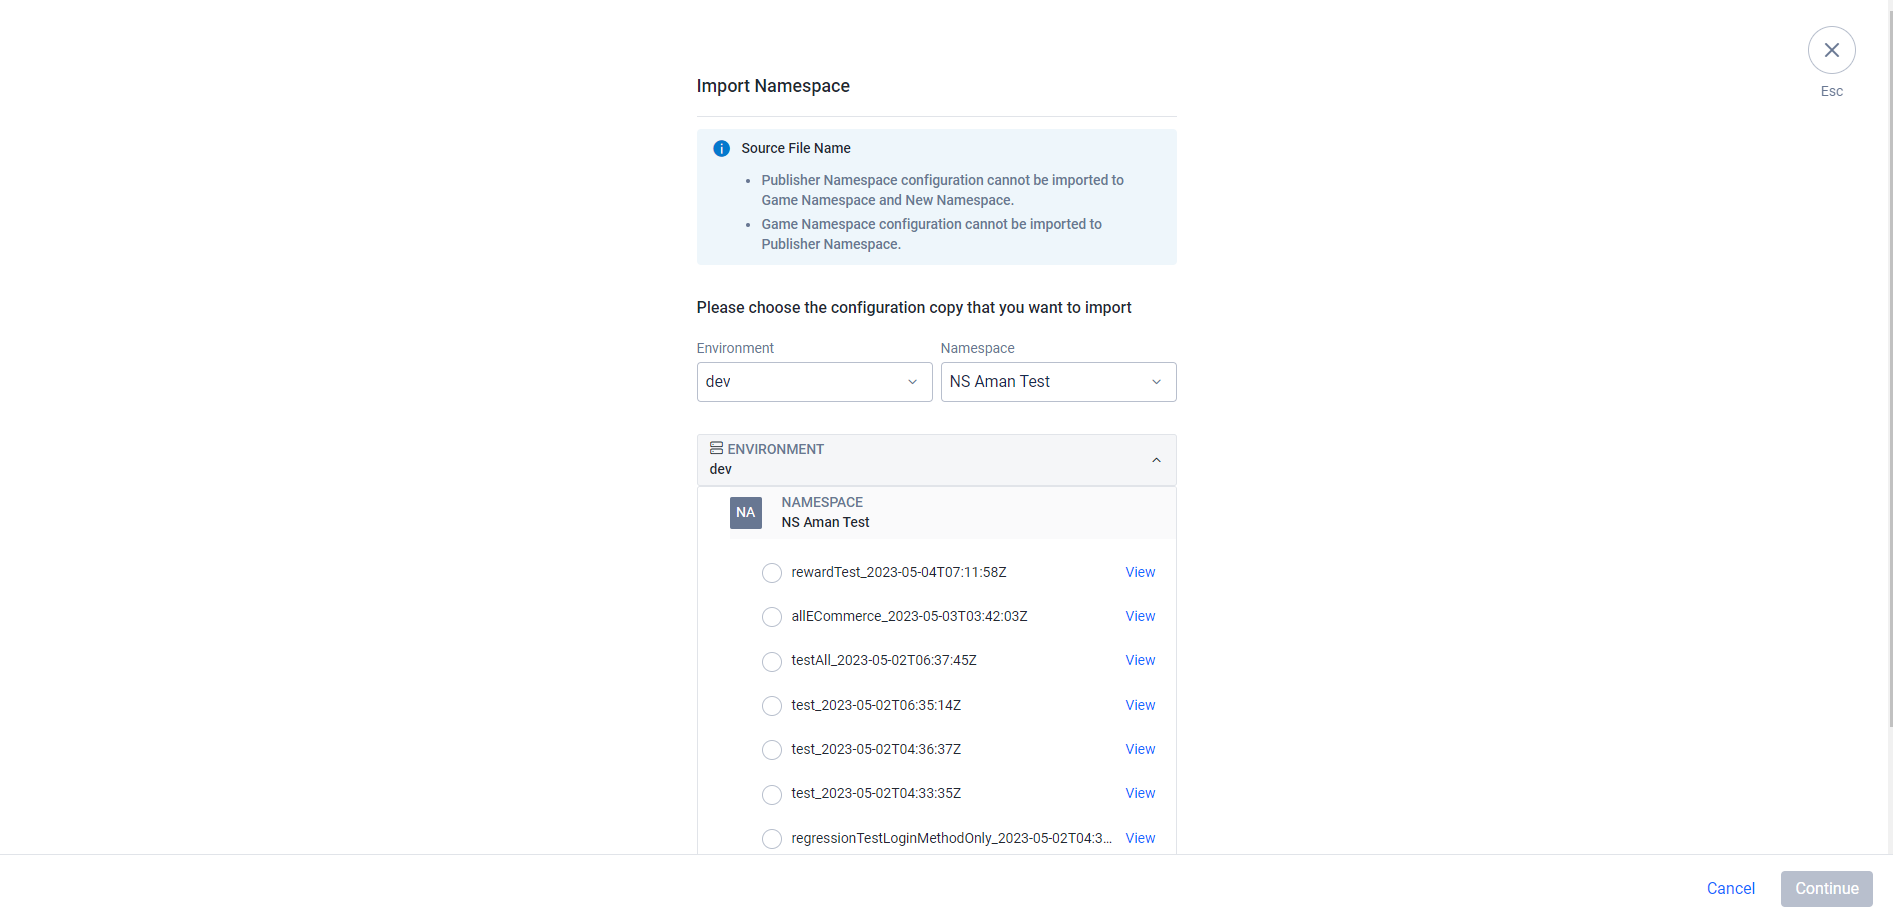
On the Import Configuration page, select the exported file for the specific namespace and environment, then click Continue.
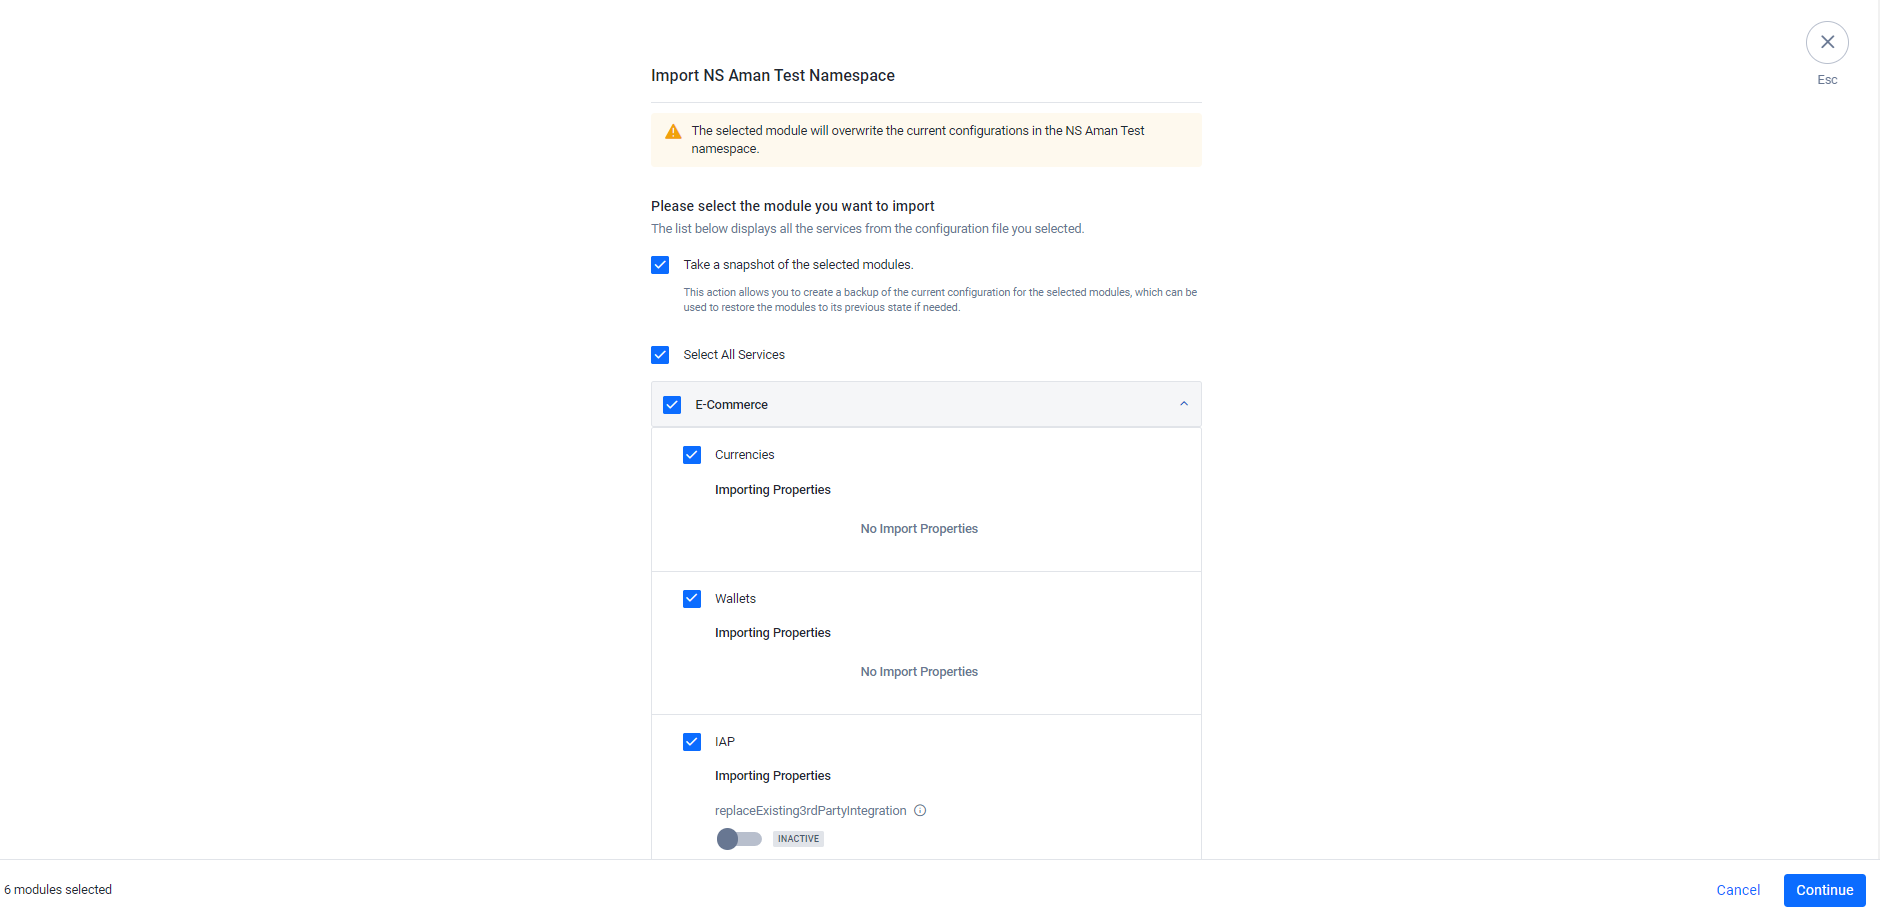
Confirm the modules that will be imported. On this page you can choose to create a snapshot or not. You can also choose which modules to import from the available modules in the exported file and modify the custom import properties as well. After that, click Continue to proceed.
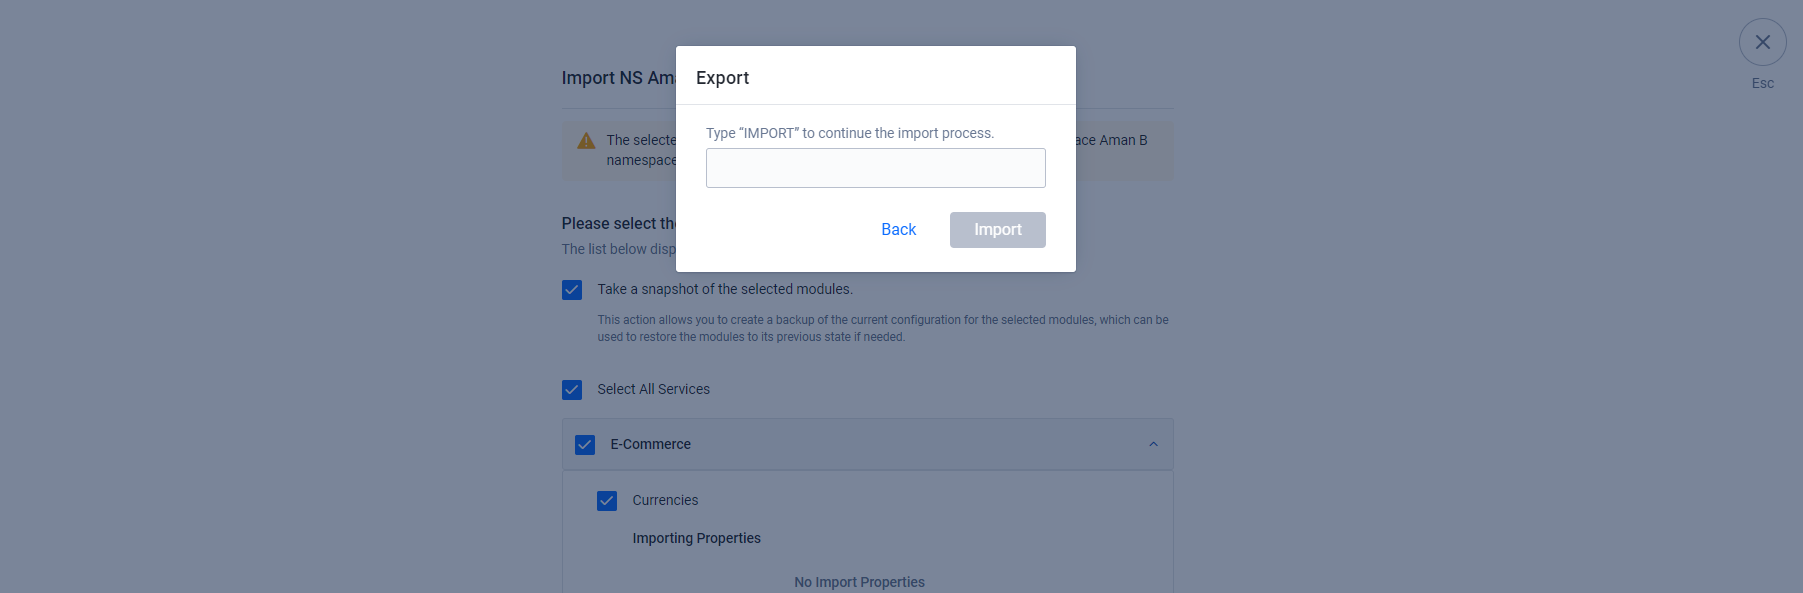
Type IMPORT in the input field to confirm that you want to import the module, and then click Import.
dangerAny existing configuration with the same name or identifier may be overwritten during the import process.
Wait for the import process to complete. Once the import is complete, you will see a success message indicating that you successfully imported the configuration.

After completing the Import Configuration, the selected configuration will be imported to the specified namespace and environment. Make sure to verify that the imported configuration is correct and functional.
Troubleshooting
If you encounter any issues while importing your configuration, try the following troubleshooting steps.
- Check if you have necessary permissions to perform the import configuration.
- Make sure the file being imported is the correct type and intended for the targeted namespace.
- Verify that the network connection is stable and the internet speed is good.
- Double-check that the import properties you set are correct and matches with what you need.
- If you encounter incomplete configuration during the import process, check the warning message given and fix the affected module configuration. This can happen when the module has dependencies with other modules, which causes the missing configuration
- If you receive any error messages, check the error logs in the Import Result page or Import Histories page to view the error logs and determine the cause of the error.
Restore configuration
If you need to restore a previous configuration, you can use the Restore feature in the Snapshots menu.
Follow these steps to restore a configuration:
Access the Snapshots menu, navigate to the Platform Configuration located in the top right corner of the Admin Portal and click on Snapshots.
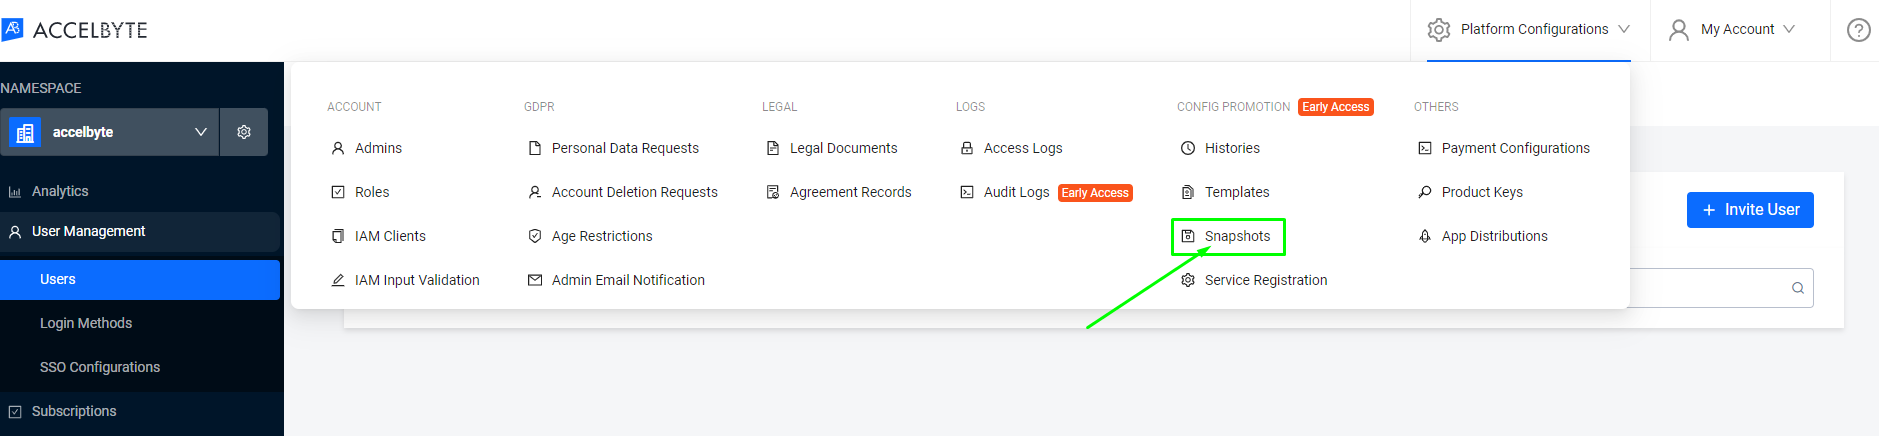
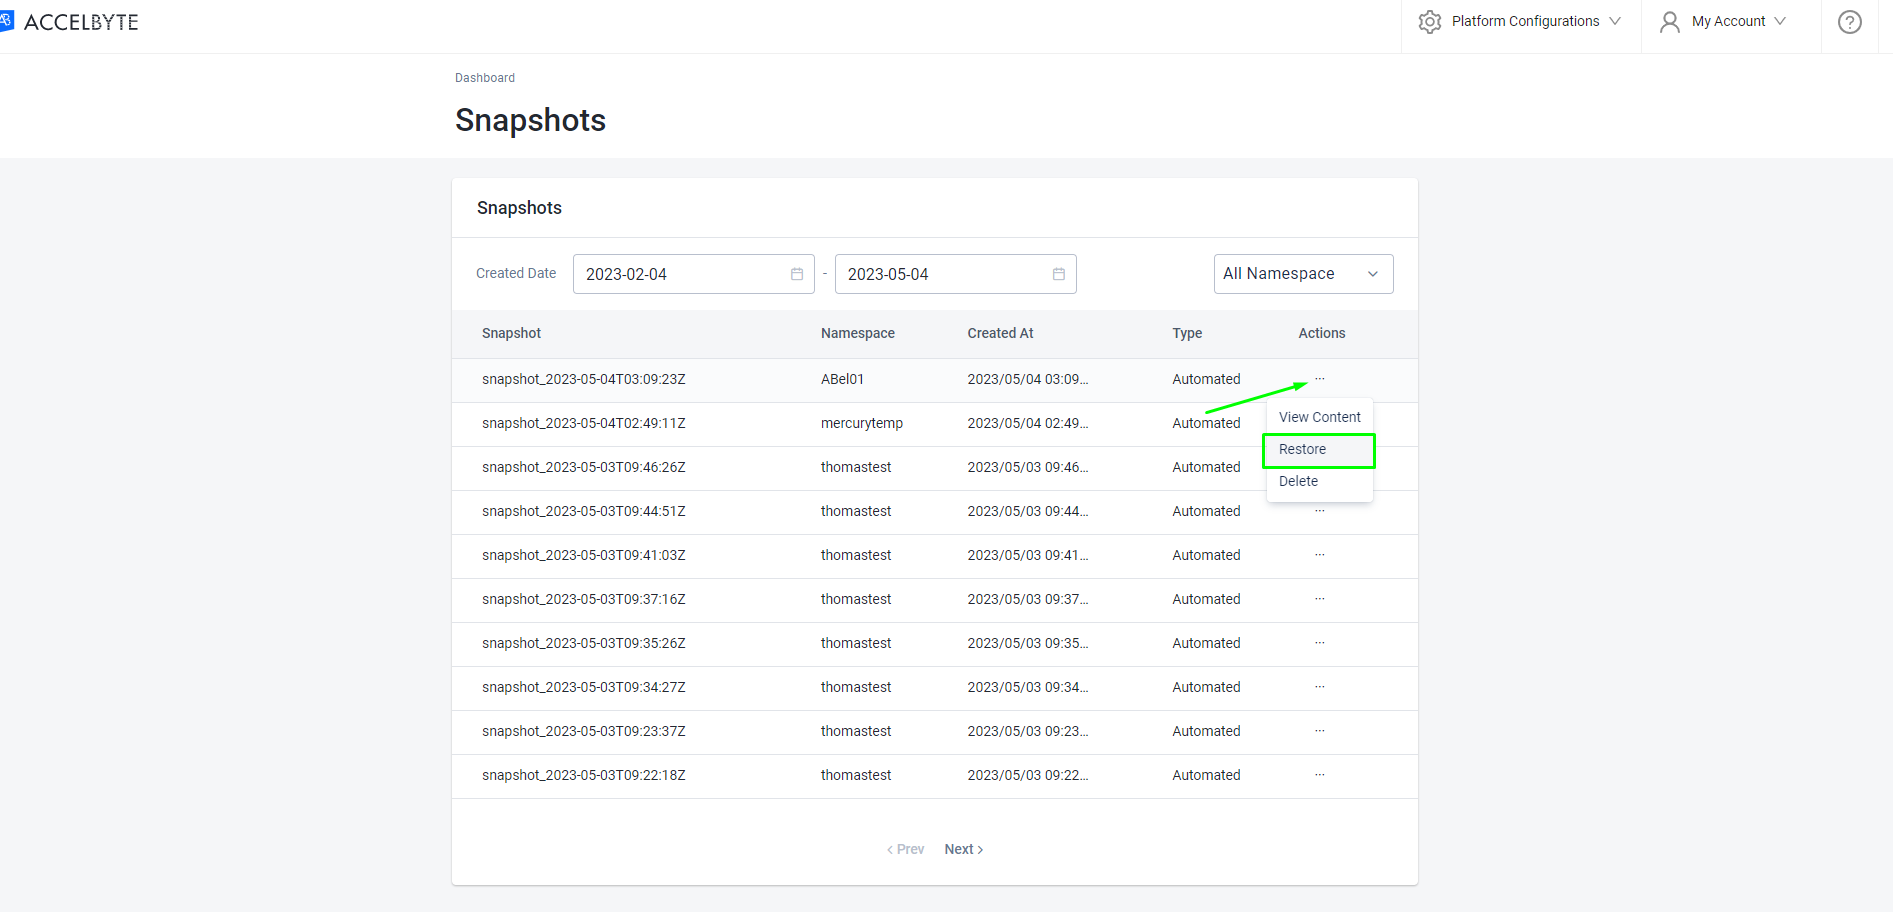
Here is what the Snapshots page looks like:

Select the snapshot you want to restore.
Click the ellipsis menu for the snapshot you want to restore and select Restore option.
Review the Restore Configuration to ensure that you have selected the correct snapshot
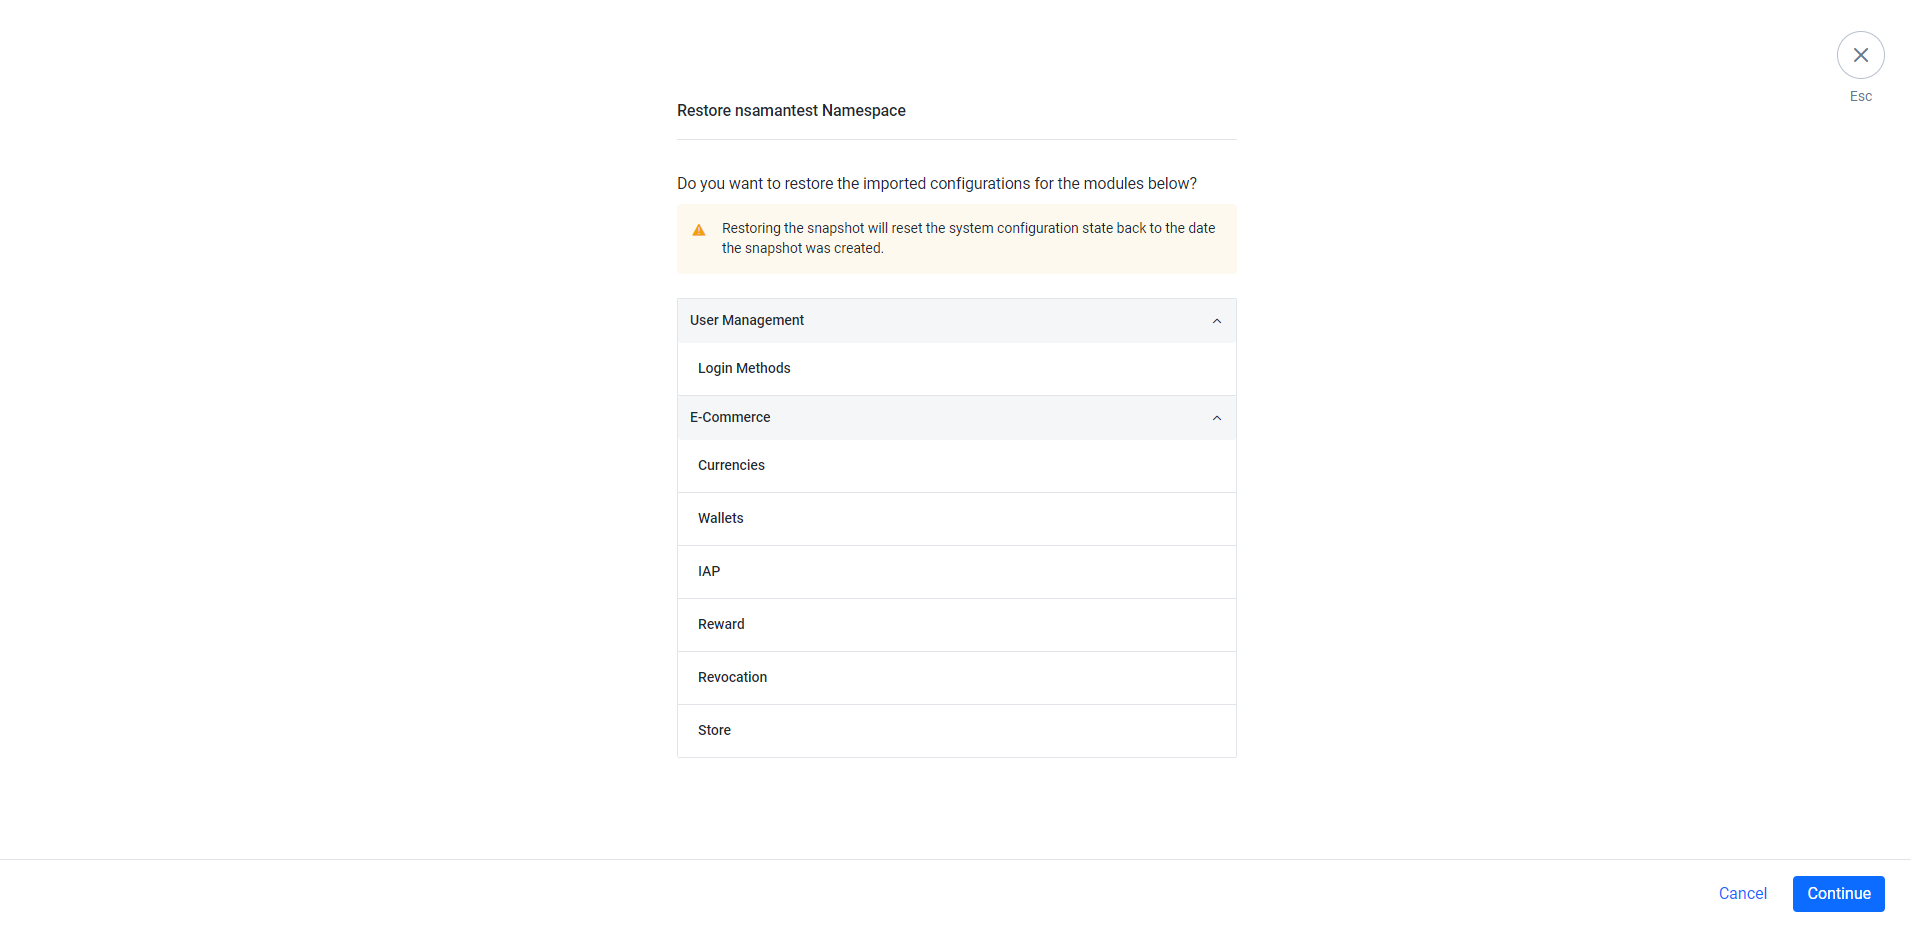
Click Continue button.
Type RESTORE in the input field to confirm that you want to restore the selected snapshot, and then click Restore.

Wait for the restore process to complete. Once the restoration is finished, you will see a success message indicating that your previous configuration has been restored to the selected snapshot.
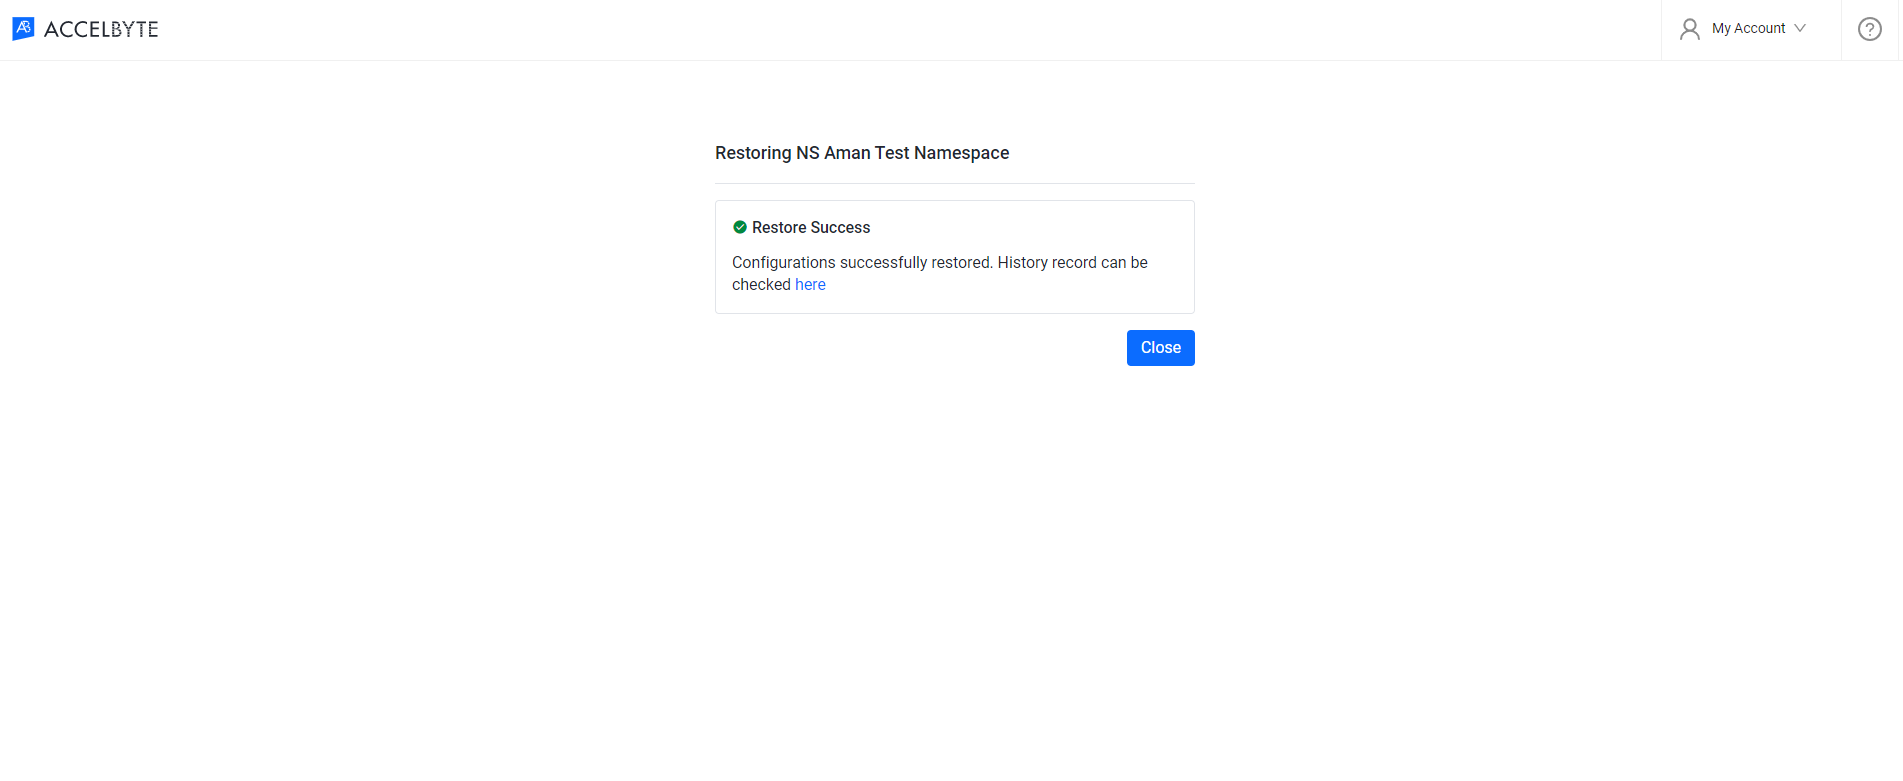
Once the restore is complete, your previous configuration will be restored to the selected snapshot. Please note that any changes made before the restore will be lost.
Troubleshooting
If you encounter any issues while importing your configuration, try the following troubleshooting steps.
- Check if you have necessary permissions to perform the restore configuration.
- Ensure that your network connection is stable and the internet speed is good.
- If the configuration is not restored to its previous state, ensure that the file used for the restore process has been reviewed before restoring.
- If you encounter incomplete configuration during the restore process, check the warning message given and fix the affected module configuration. This can happen when the module has dependencies with other modules and there is a configuration change on that dependency module before restoring, which causes the missing configuration.
- If you receive any error message, check the error logs in the restore result page or restore histories page to view the error logs and determine the cause of the error.
Configuration history
This menu is where you can find a list of all the Export, Import, and Restore actions performed on your configurations using config promoter. This menu provides an overview of all the changes made to your configuration, allowing you to track the history of your settings and identify any issues.
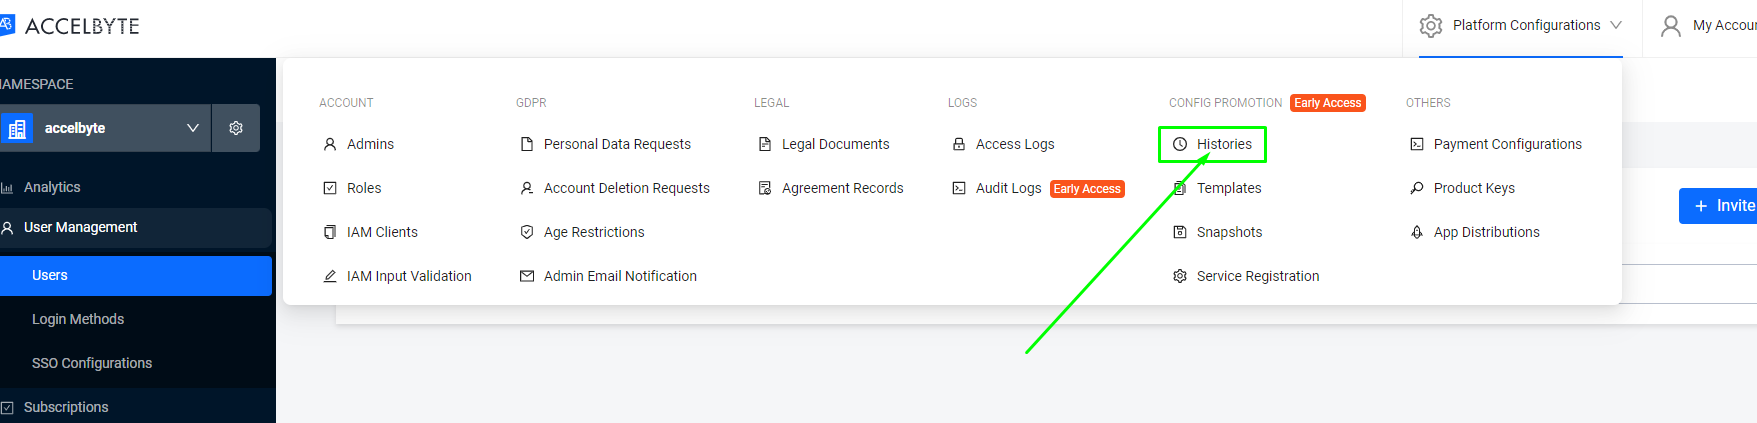
Access Histories menu
To access the Histories menu, click Histories on the Platform Configuration section at the top-right corner of the Admin Portal.
Export histories
In the Export Histories tab, you will see a list of all the exported configuration, including the target namespace, the date and time each export was performed, the users who performed the export, and the status of the export (i.e., SUCCESS or ERROR).
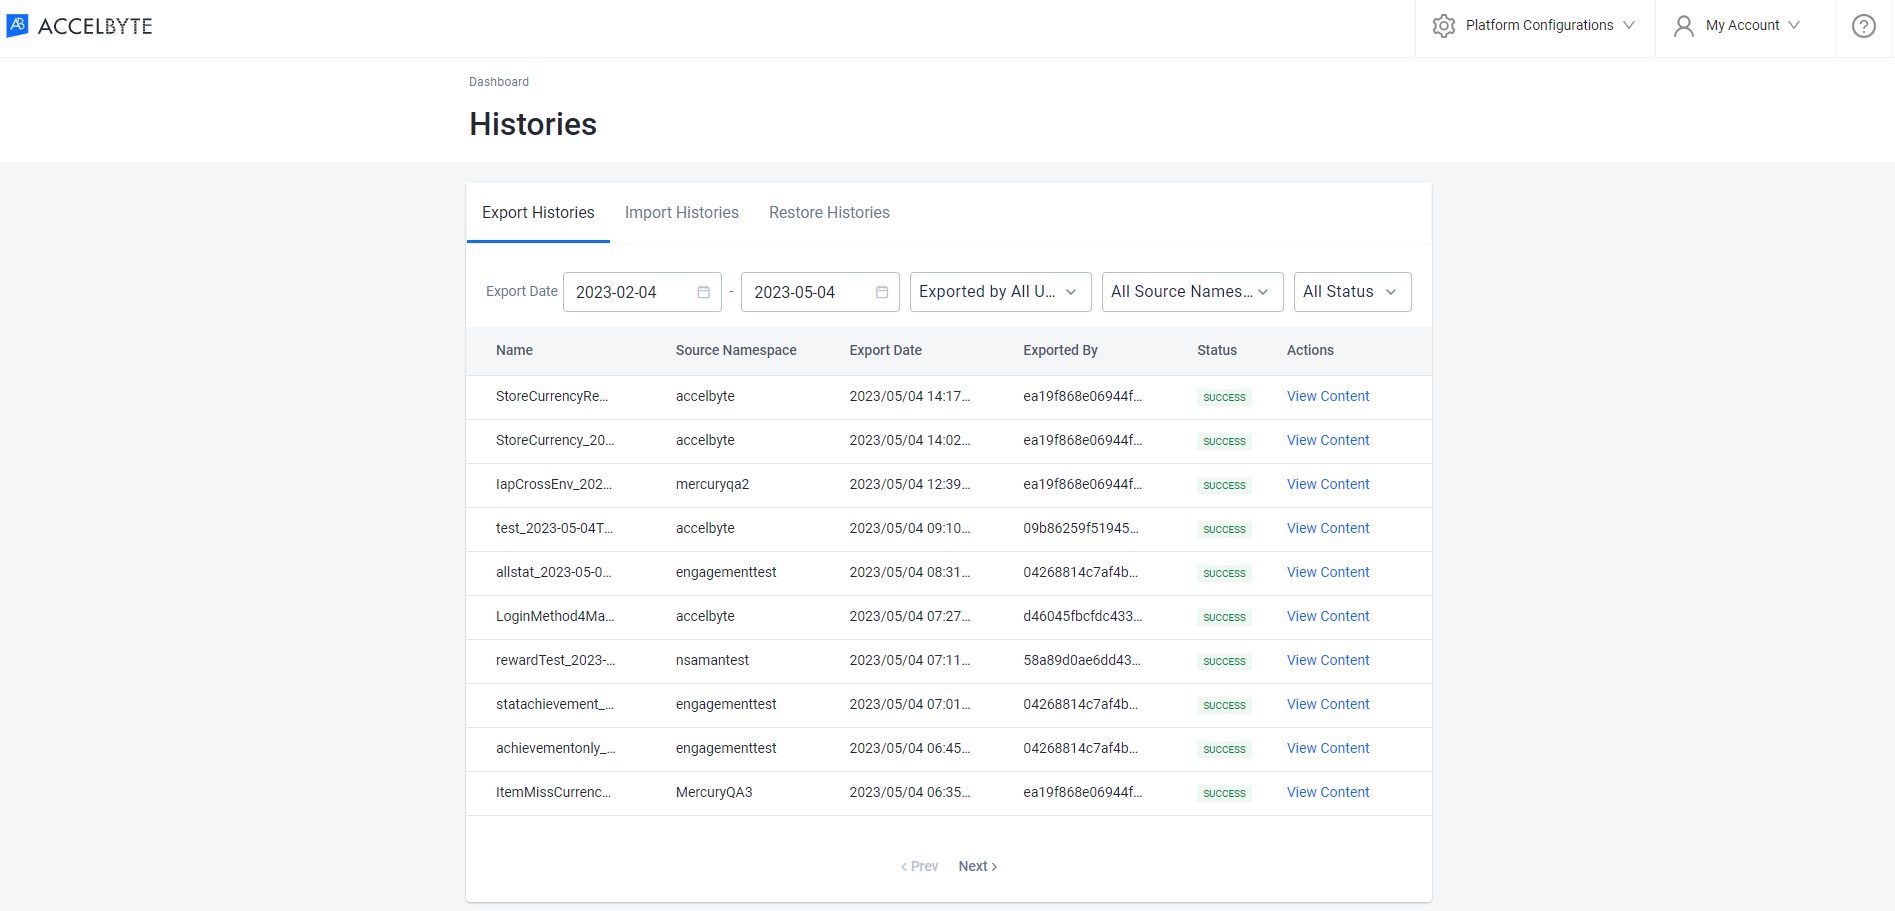
On this page, you can view the content of the exported file, which includes a list of modules that have been exported. To view the content of a specific export, click its ellipsis menu under the Actions column and select View content.
You can also check the error logs of a failed export. To view the error logs of a specific export, click its ellipsis menu under the Actions column and select Error Logs.
Import histories
In the Import Histories tab, you will see a list of all the imported configuration. In each imported configuration on the list, you will also see its source environment, source namespace, target namespace, the date and time the import was performed, the user who performed the import, and the status of the import (i.e., SUCCESS or ERROR).
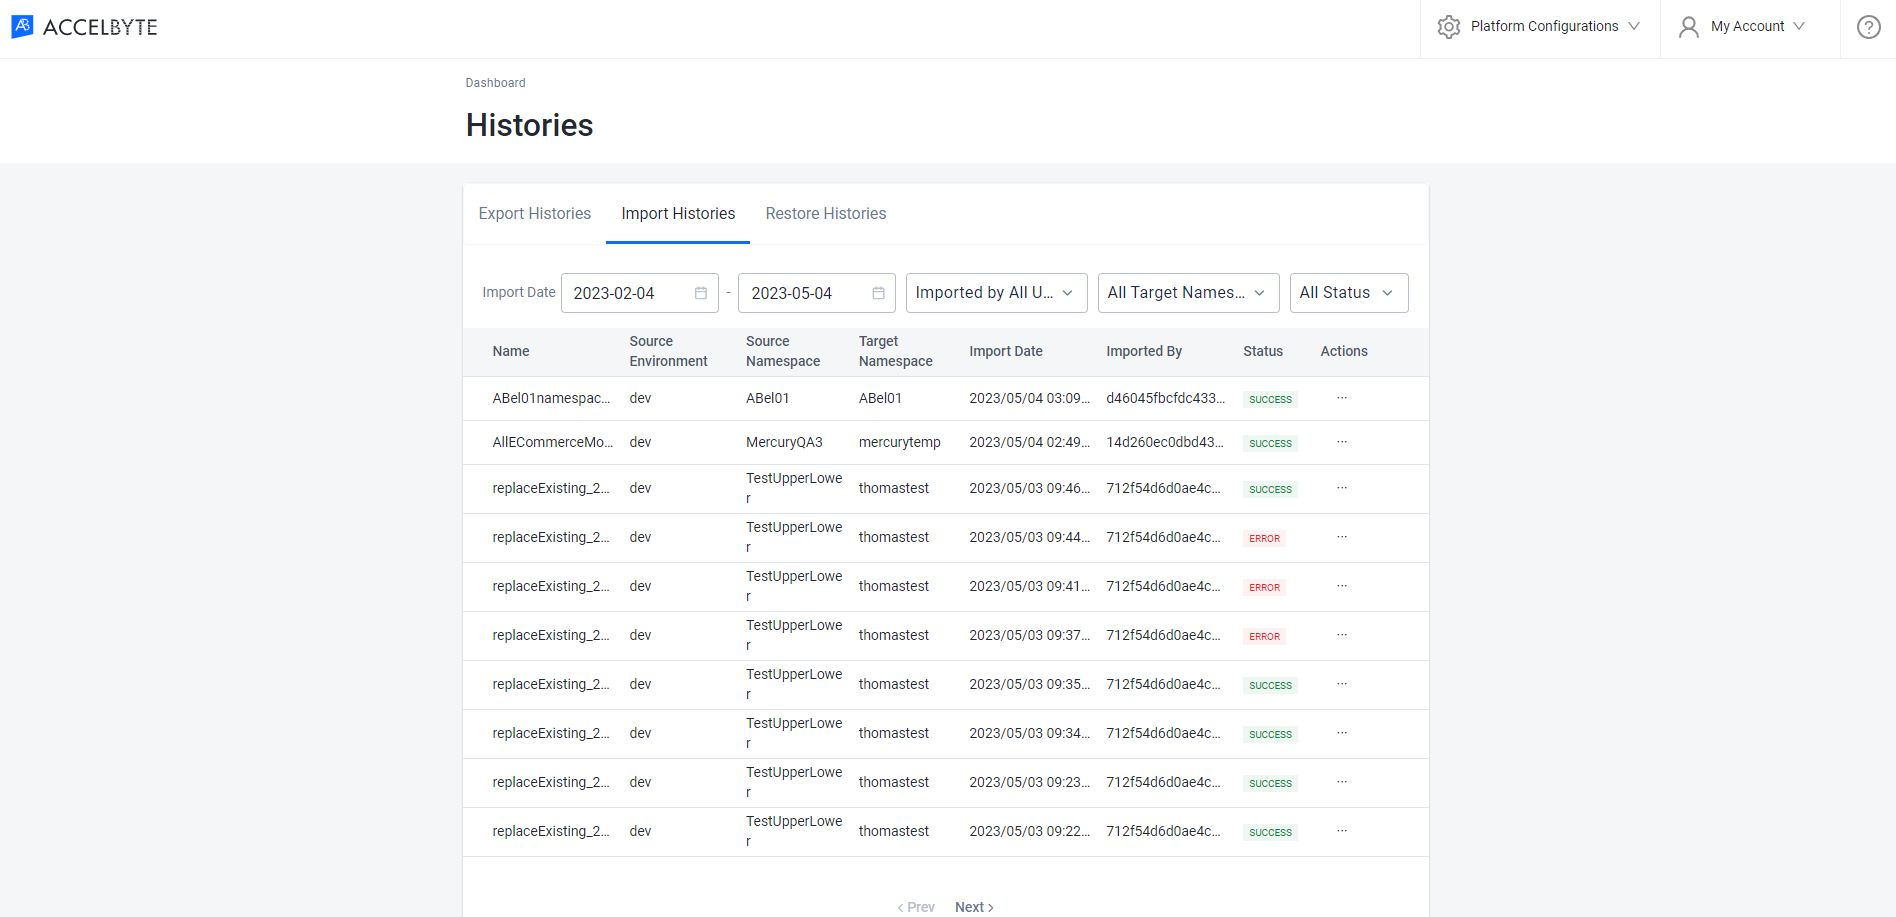
On this page, you can view the content of the imported file, which includes a list of modules that have been imported. To view the content of a specific export, click its ellipsis menu under the Actions column and select View content.
You can also view the logs of successful and failed imports.
- To view the import logs of a successful import, click its ellipsis menu under the Actions column and select Import Logs.
- To view the error logs of a failed import, click its ellipsis menu under the Actions column and select Error Logs.
Restore histories
In the Restore Histories tab, you will see a list of all the configurations that have been restored from a snapshot. In each restored configuration on the list, you will also see its namespace, the date and time each restore was performed, the user who performed the restore, and the status of the restore (i.e., SUCCESS or ERROR).
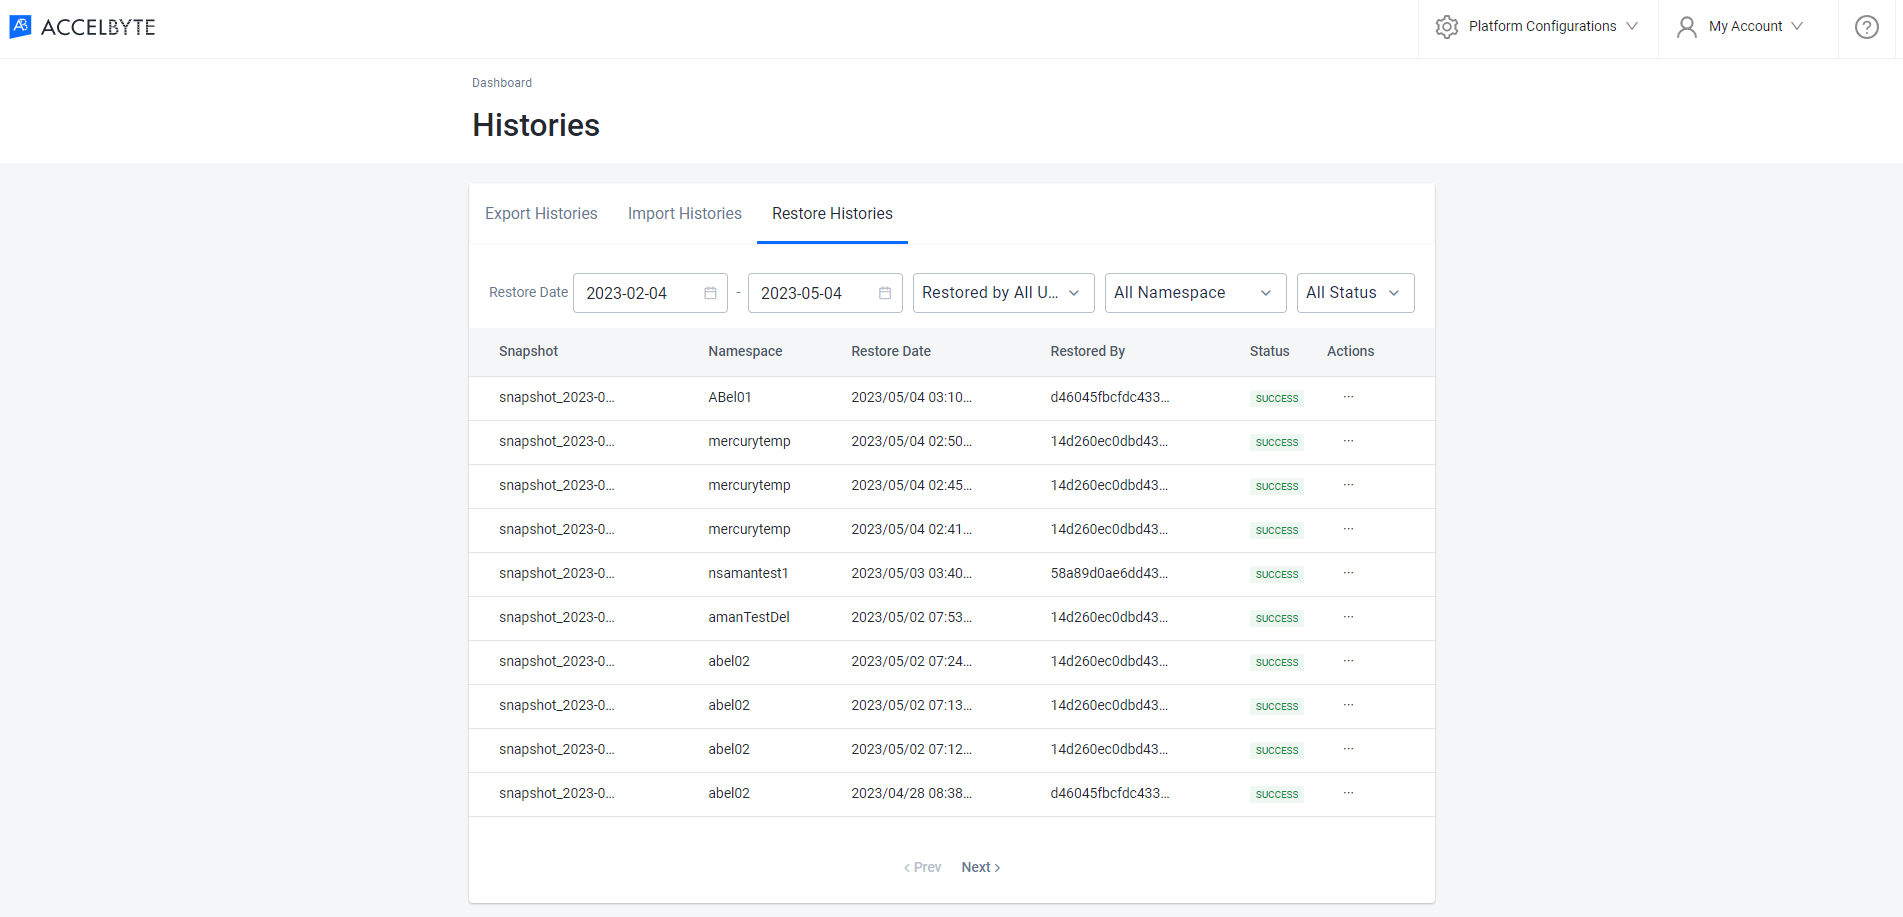
On this page, you can view the content of the snapshot file, which includes a list of modules that have been restored. To view the content of a restored configuration, click its ellipsis menu under the Actions column and select View content.
You can also view the logs of successful and failed restores.
- To view the restore logs of a sucessful restore, click its ellipsis menu under the Actions column and select Restore Logs.
- To view the error logs of a failed restore, click its ellipsis mnu under the Actions column and select Error Logs.