Set up Apple as an identity provider
Overview
You can connect your verified Apple Developer account to AccelByte Gaming Services (AGS) to enable Apple authentication in your game with the AGS SDK and in your publisher website with the AGS Player Portal.
You may need to set up additional features within Apple services that are not listed here. We recommend contacting your Apple representative and reviewing the Apple Developer documentation.
For more information, you can also request confidential guide materials from your AccelByte Technical Producer.
Prerequisites
The prerequisites for enabling Apple as an identity provider vary as follows:
Web login integration
To set up web login integration, you must have:
- An Apple Developer account.
- An AGS Admin Portal account to set up authentication and manage permissions.
- A publisher namespace for your Player Portal and Launcher.
- A Player Portal.
In-game login integration
To set up in-game login integration, you must have:
- An Apple Developer account.
- A Unity or Unreal game project with the latest version of the AccelByte Game SDK imported.
- For Unreal Engine, you need OnlineSubsystemApple (Apple OSS).
- For Unity, you need the Apple Unity plugin from the Unity Asset Store.
- An AGS Admin Portal account to set up authentication and manage permissions.
- A game namespace.
- Familiarity with AccelByte IAM Clients.
Set up Apple configuration
To enable Apple as an identity provider, follow these steps first in your Apple Developer account.
Create certificates
The certificates resource represents the digital certificates you use to sign in to your iOS or Mac, or web apps for development and distribution. You must create a Developer ID application certificate. To do this, follow the steps on the Create Certificate guide in the Apple Developer documentation.
Only the appropriate account holder, manager, or admin can create certificates.
Create App IDs
An App ID identifies your app in a provisioning profile. It is a two-part string used to identify one or more apps from a single development team. You must create App IDs with App Type. To do this, follow the steps on the Register an App ID guide in the Apple Developer Documentation.
Only the appropriate account holder, admin, or other accounts with relevant permissions can create an app.
Create Service ID
For each website that uses Sign in with Apple (SIWA), it's necessary to register a services identifier (Services ID). Configure your domain and return URL, then create an associated private key. To do this, follow the steps on the Configure Sign in with Apple for the web guide in the Apple Developer documentation.
Create key
Enable your apps to allow users to authenticate in your application with their Apple ID. To do this, follow the steps on the Create a private key to access a service guide in the Apple Developer Documentation. Ensure that you keep a copy of the key you generate in this step. You will need it when you set up the Apple login method for web and in-game.
The SIWA feature must be enabled to be able to create keys.
Set up Apple login method
Set up web login
To allow your players to sign in to your player portal using their Apple accounts, follow these steps:
Log in to the AGS Admin Portal.
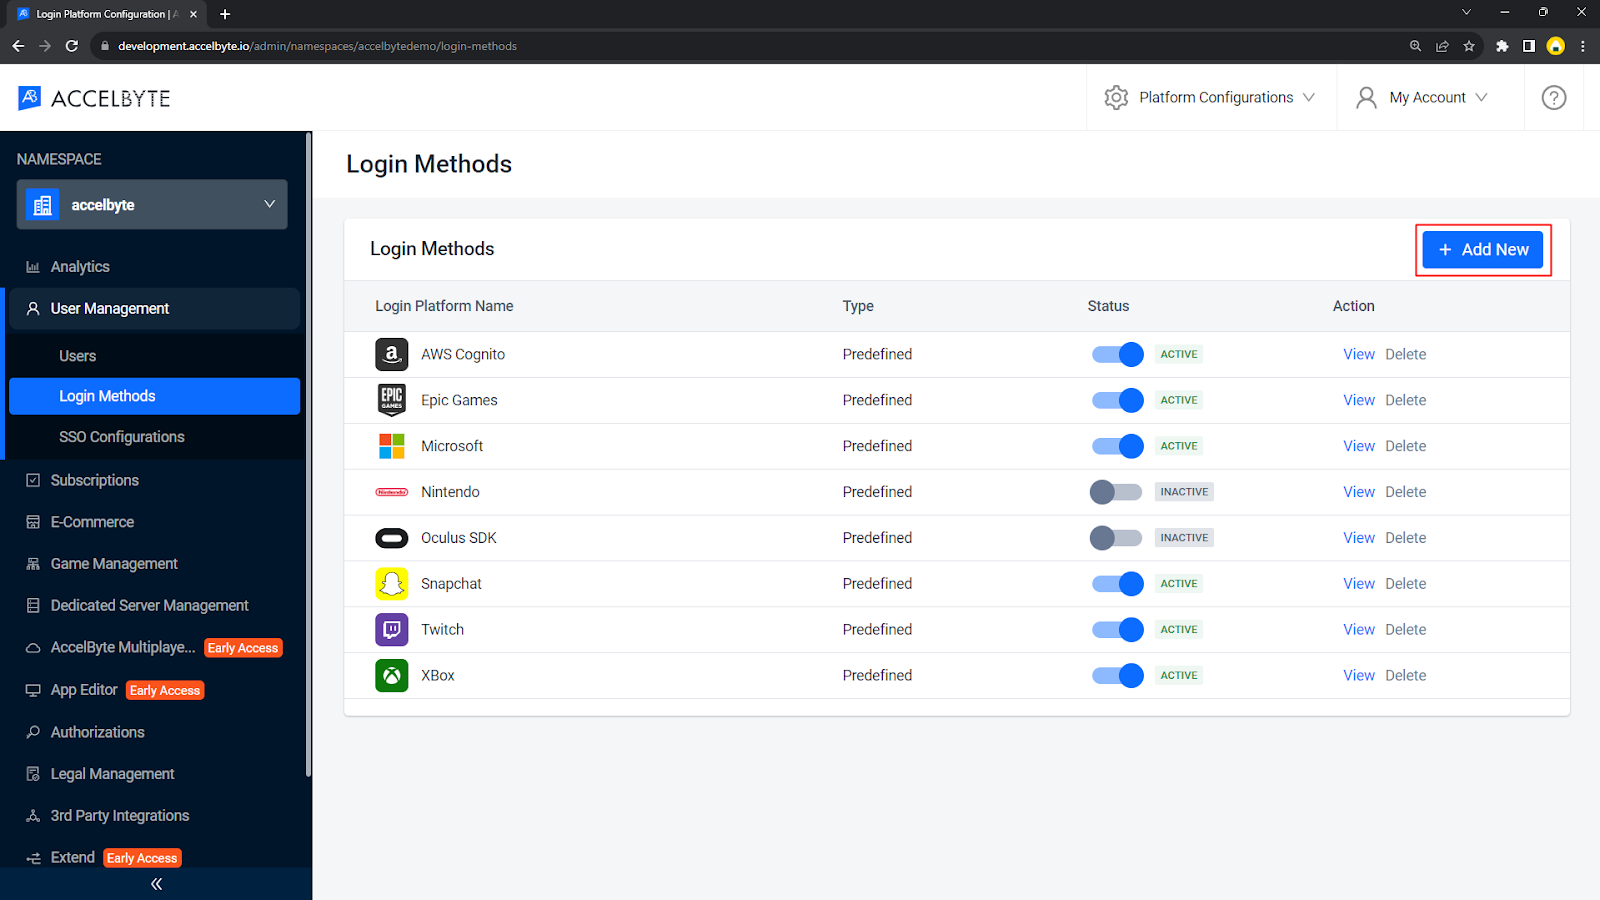
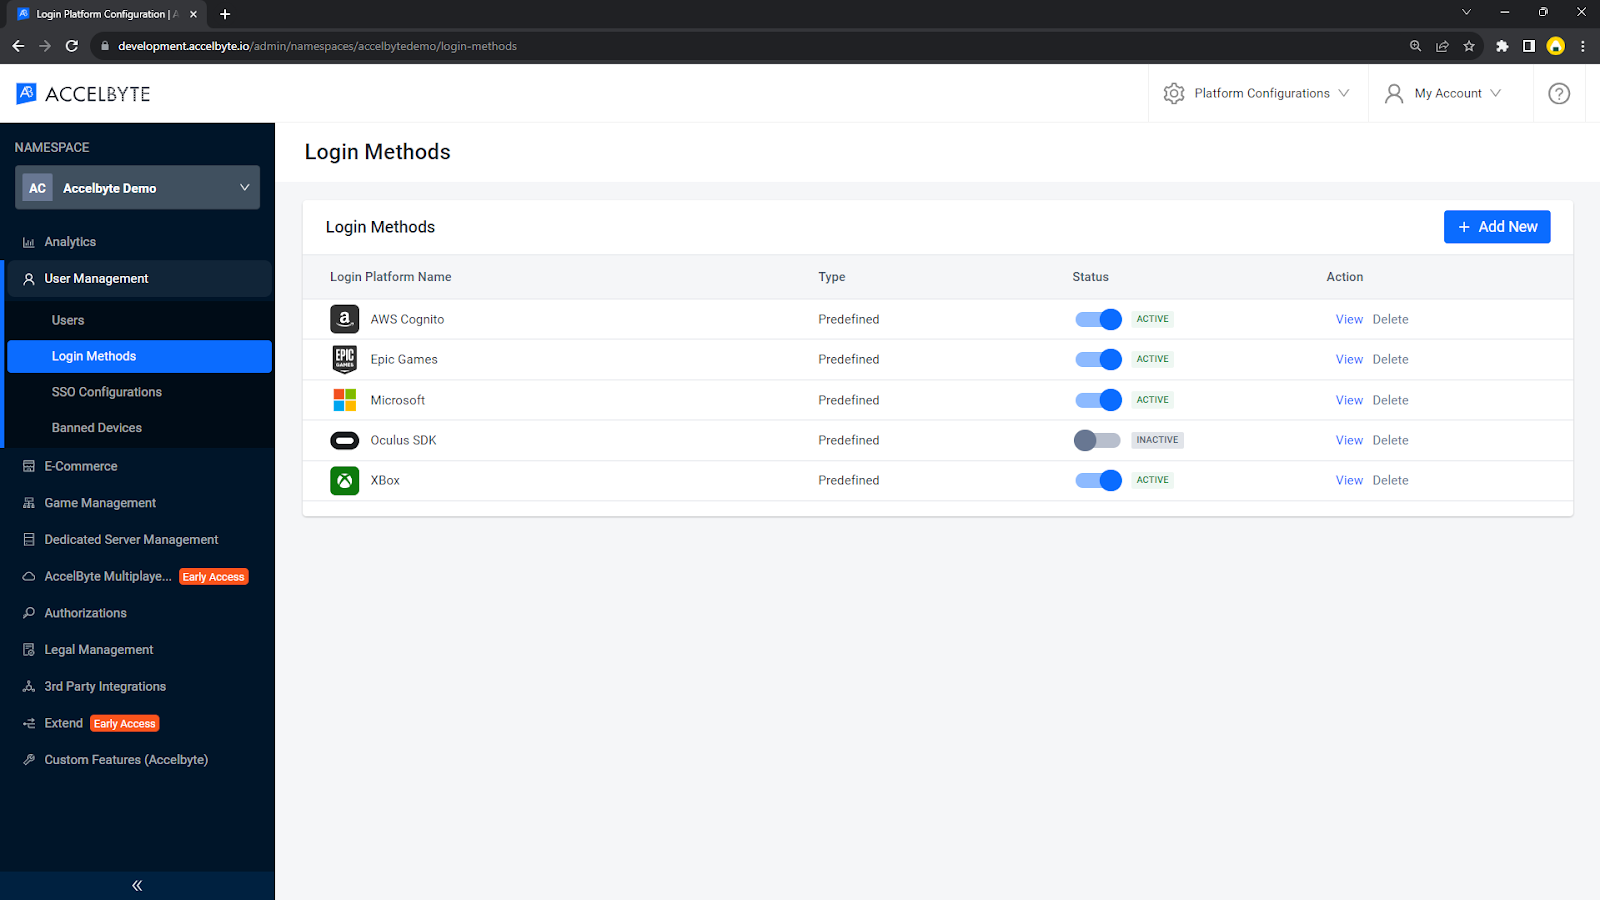
In the AGS Admin Portal under your publisher namespace, go to User Management > Login Methods sidebar.
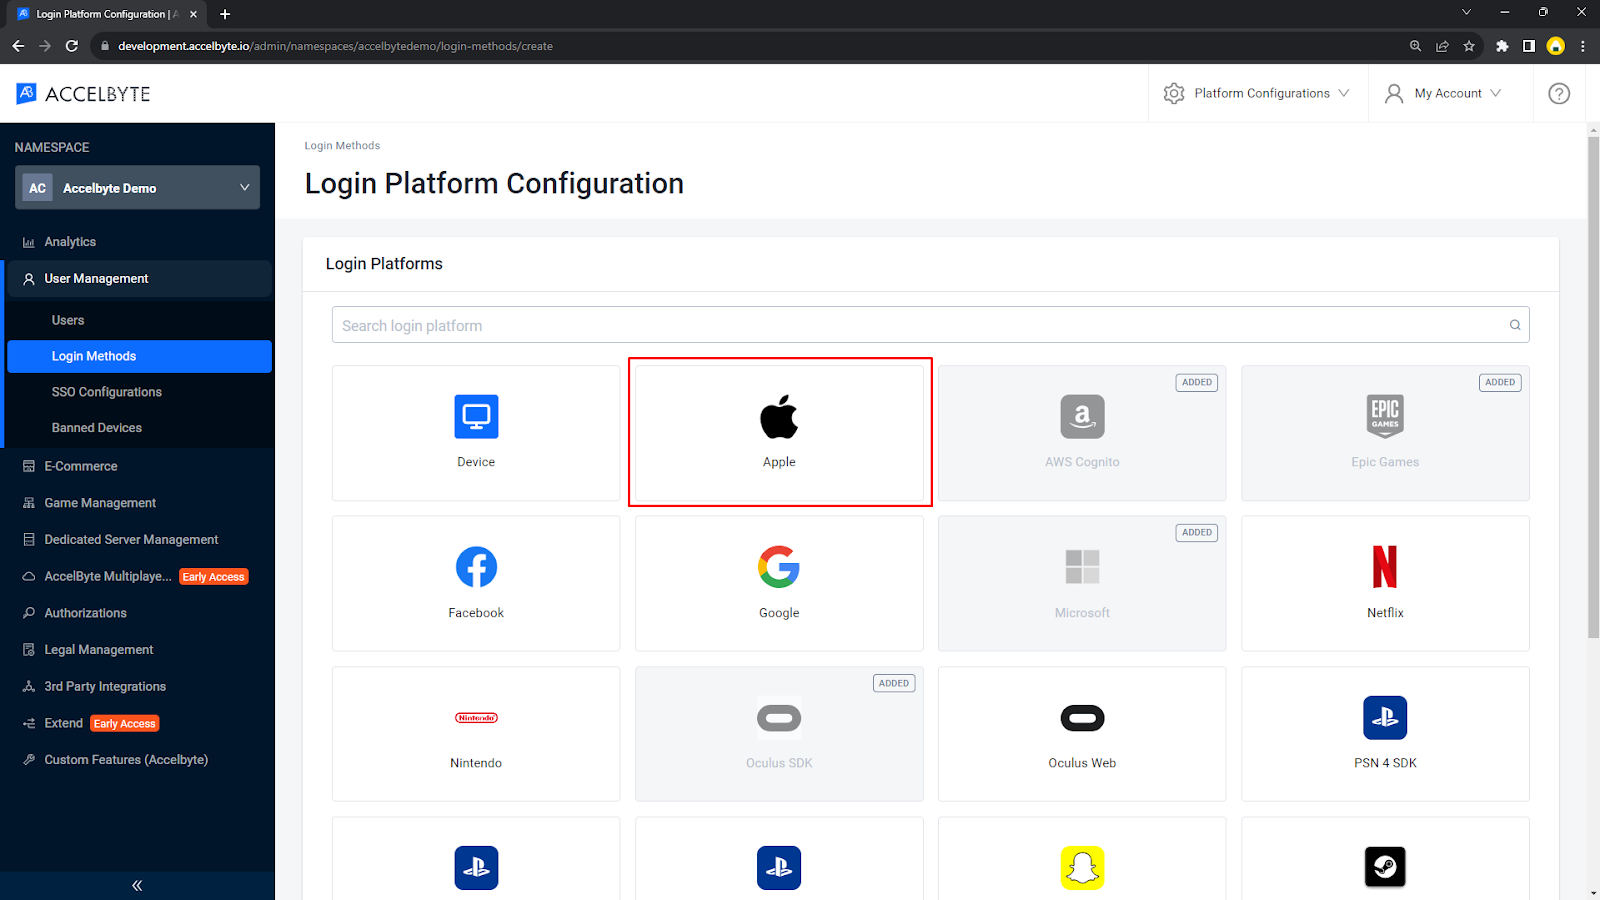
Click the + Add New button.
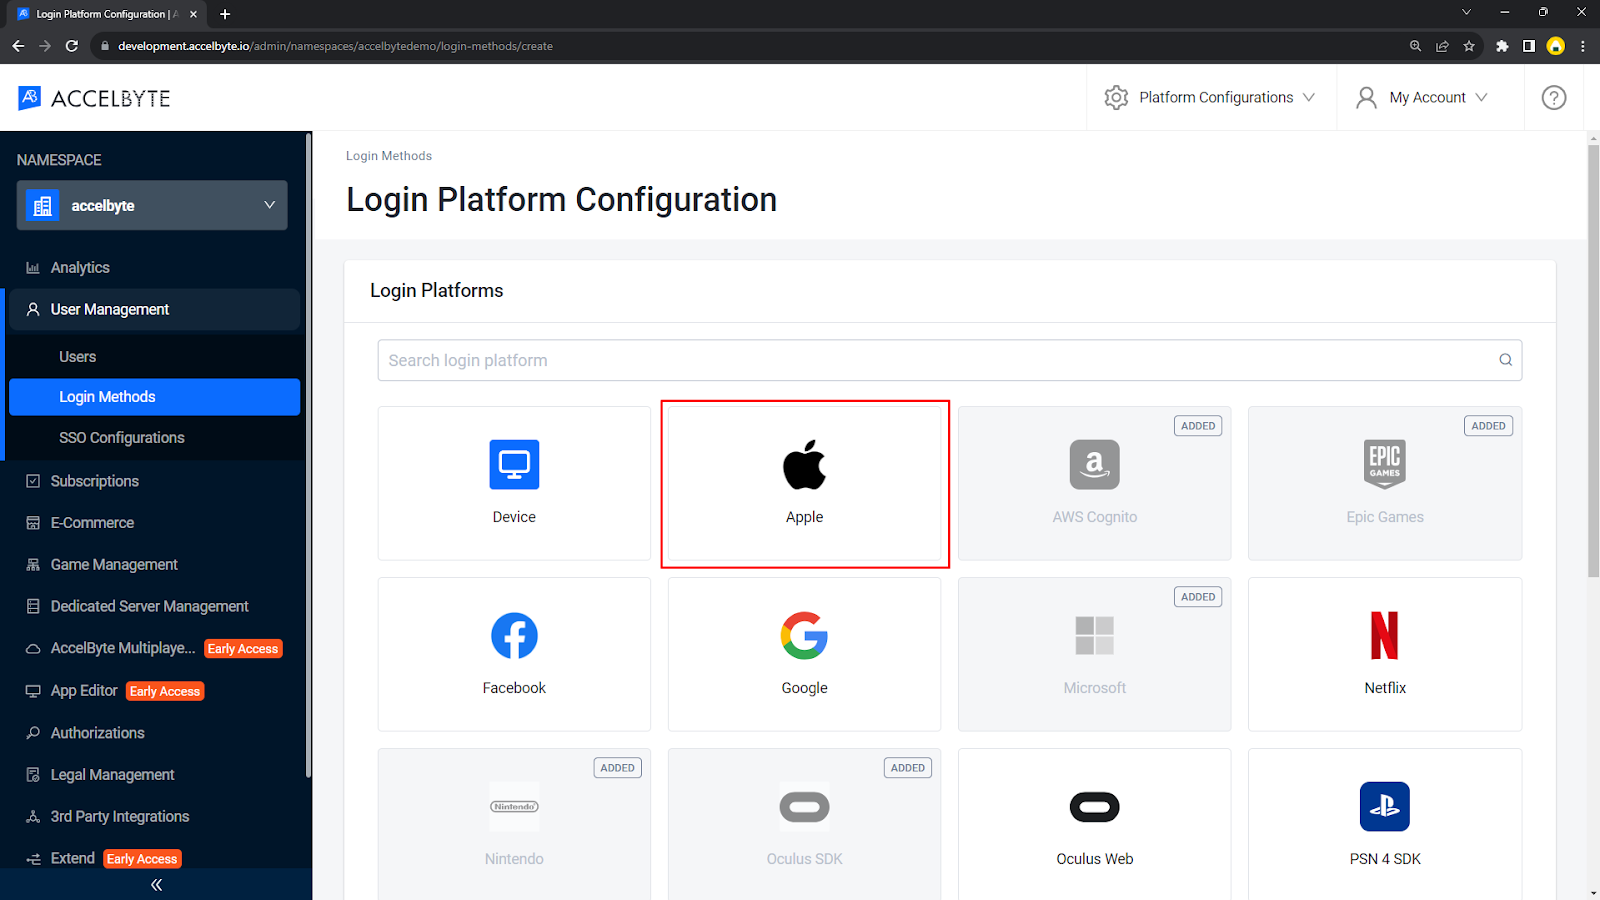
From the list of available Login Platforms, select Apple.
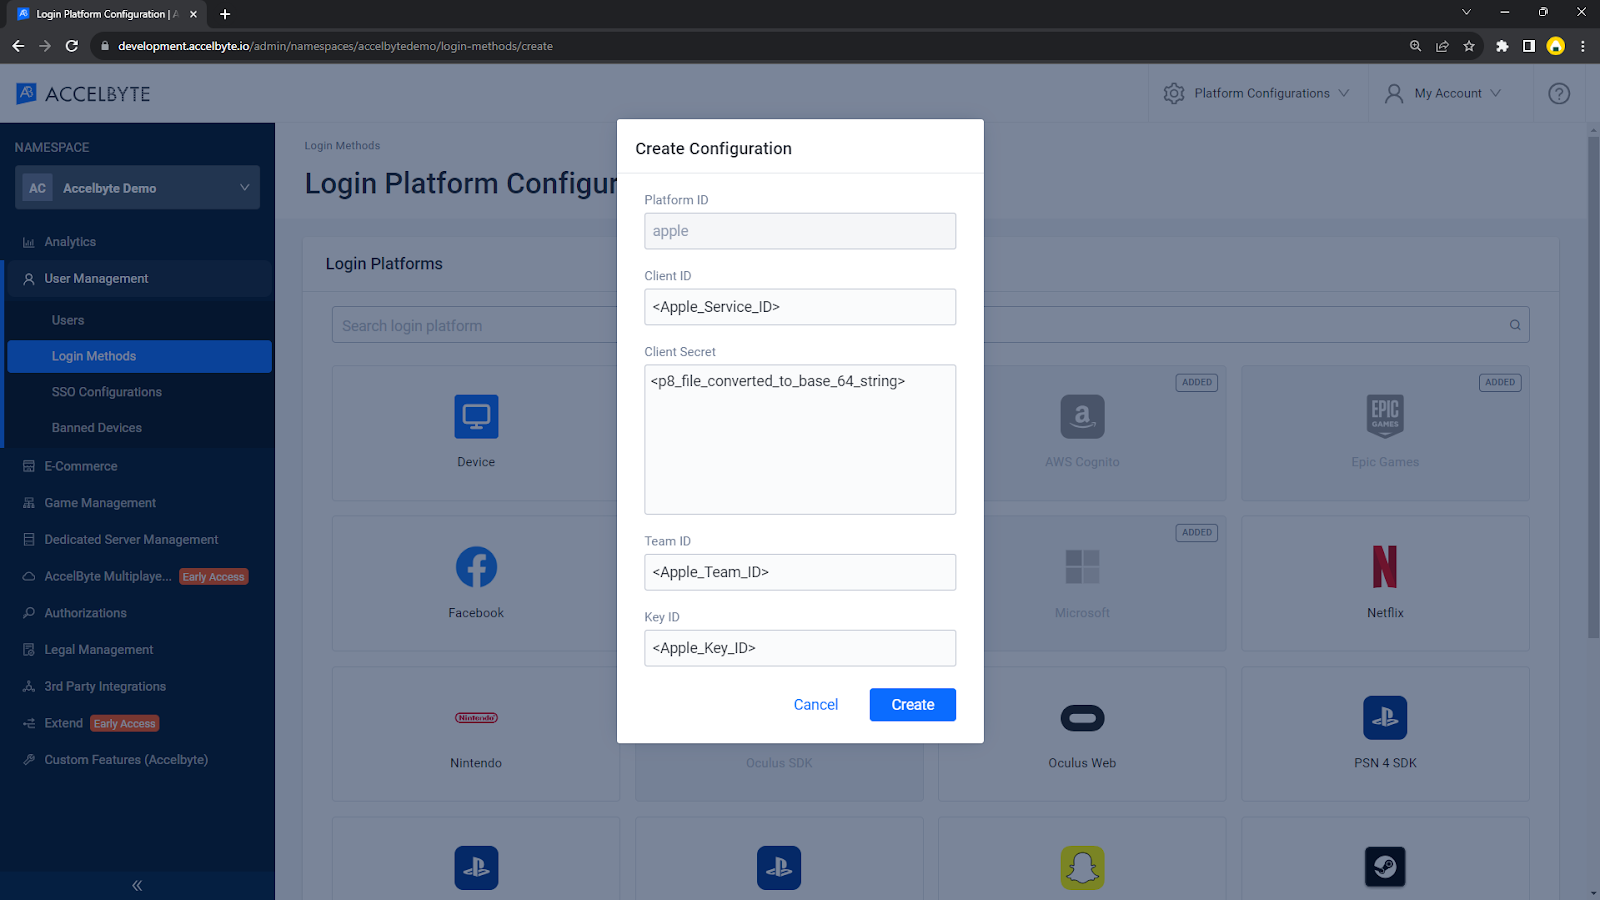
On the Create Configuration form, fill in the required information.
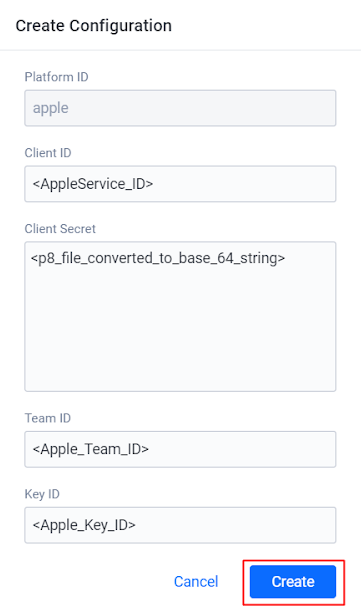
- Fill in the Client ID field with your Apple Service ID.
- Fill in the Client Secret field with the base64 string of your Private Key. You need to convert or encode a .p8 file, which is downloaded once you created a key, to base64 string. You can use your own favor as a converter.
- Fill in the Team ID field with your Apple Team ID. You can find it under your account name in the Apple Developer console.
- Fill in the Key ID field with the key you generated from the Create key step.
After filling in the required information, click Create. The details page of the configuration appears.
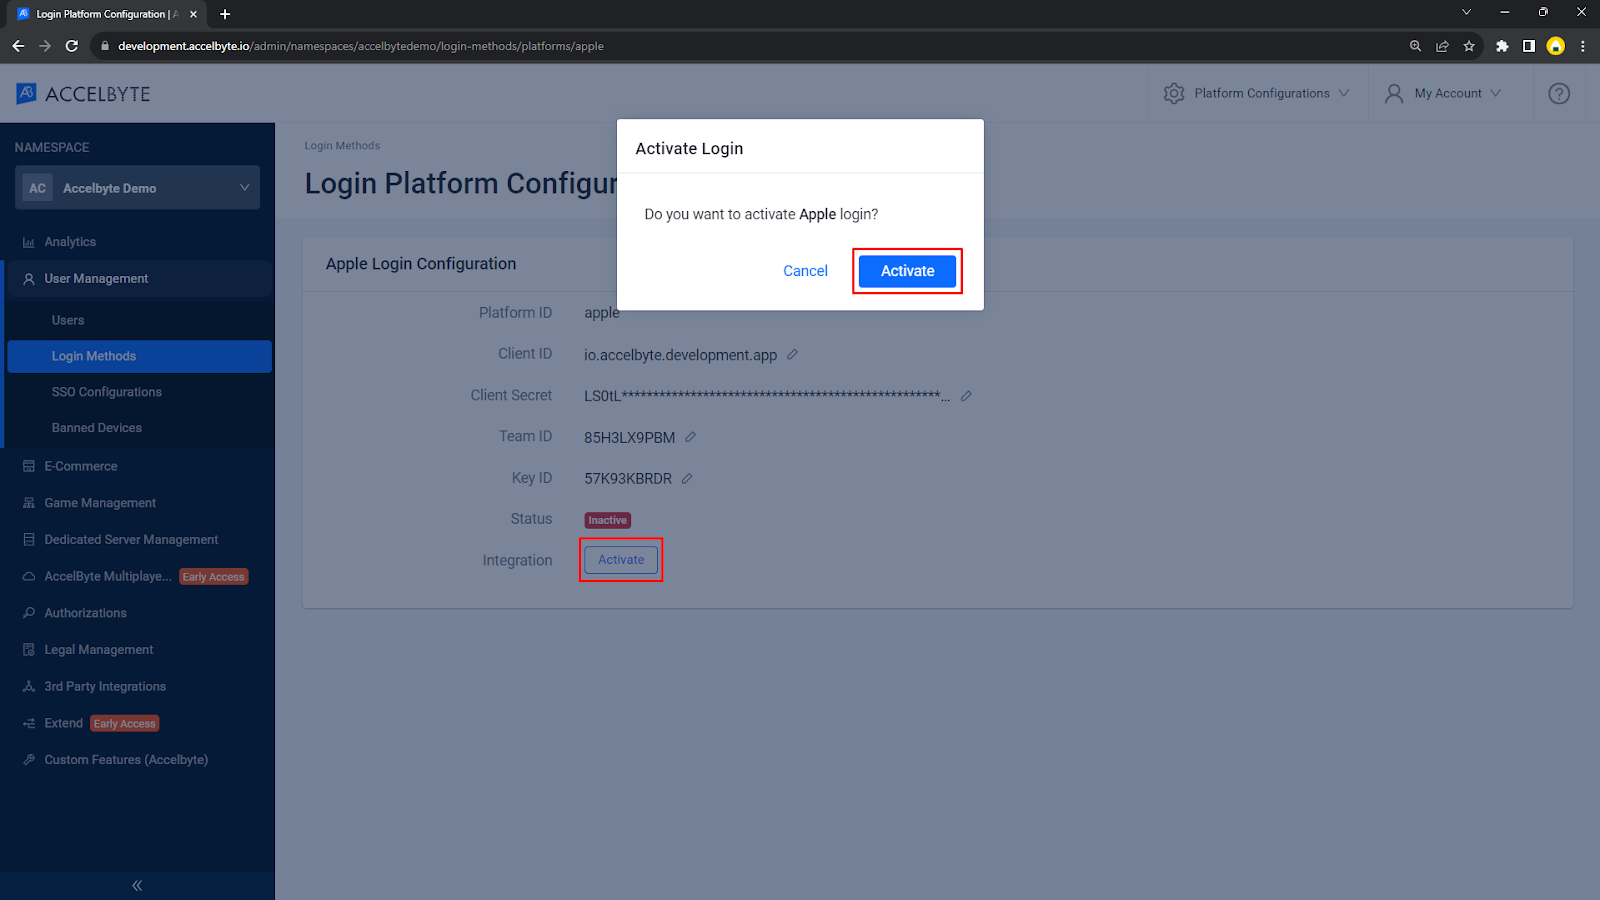
To enable the login method, click Activate and click Activate again on the pop-up message to confirm the action.

Test and verify
After activating the Apple web login method, you can test it out on your Player Portal. Follow these steps:
Go to the login page of your Player Portal.
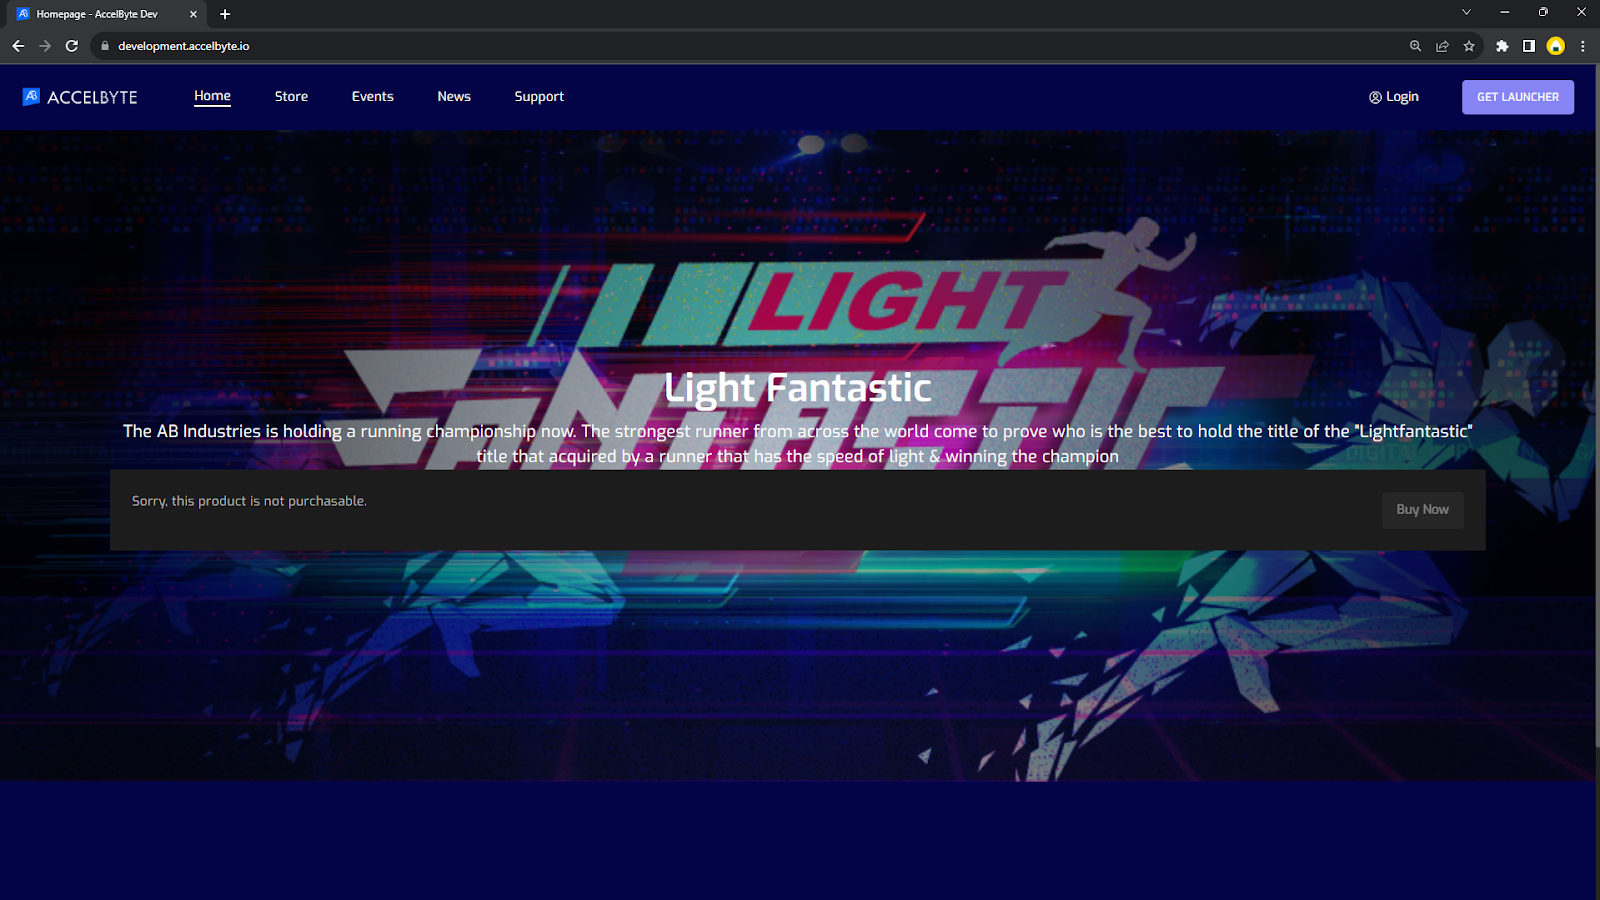
From the login options, select the Apple logo.
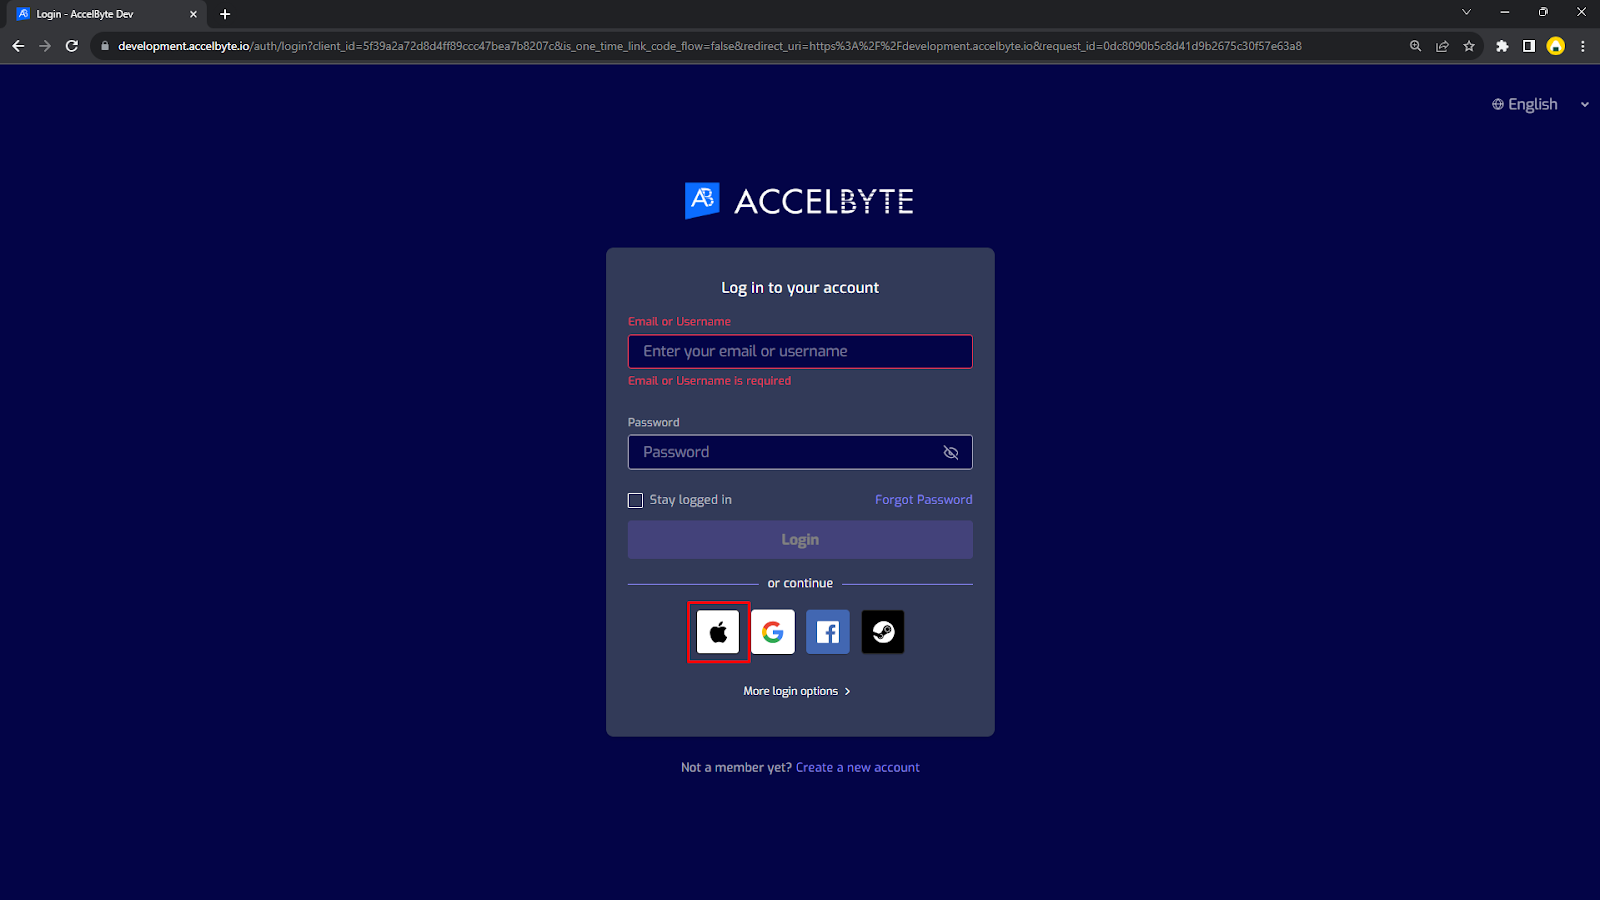
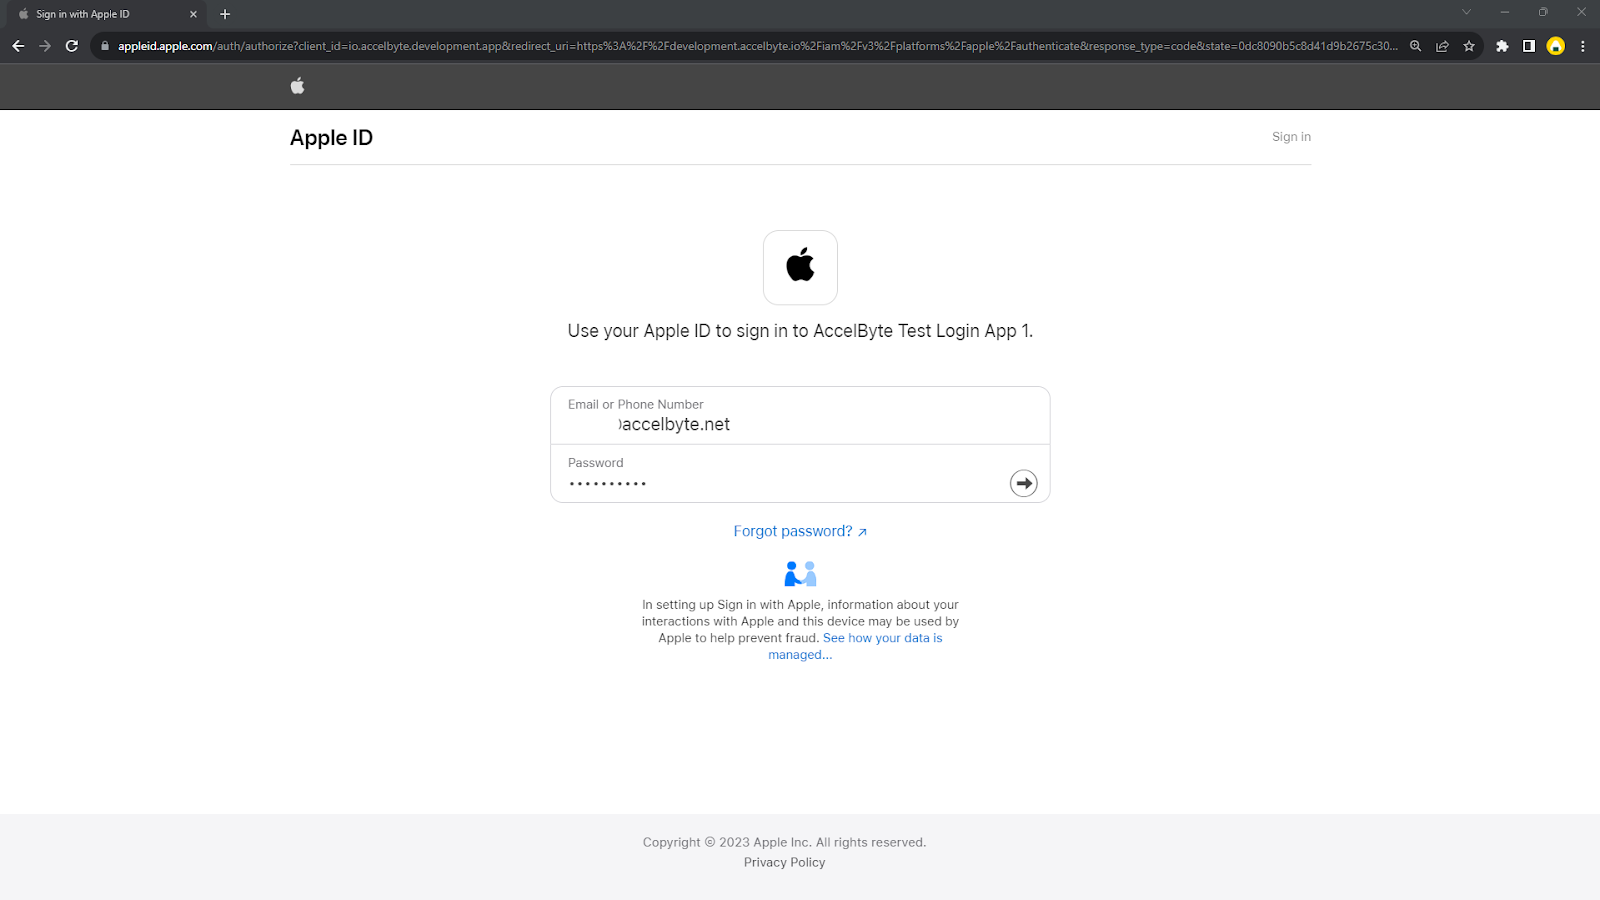
You will be redirected to the Apple Login page. Use your Apple credentials to log in.
 note
noteCurrently, the system asks players to link their Apple account with an existing or new AccelByte account. AccelByte is working on the ability to enable players to log in to the Player Portal with a headless account.
Set up in-game login
To allow your players to sign in to your game using their Apple accounts, follow these steps:
Log in to the AGS Admin Portal.
In your game namespace, go to User Management > Login Methods.
Click the + Add New button.
From the list of available Login Platforms, select Apple.
On the Create Configuration form, fill in the required information.
- Fill in the Client ID field with your Apple Service ID.
- Fill in the Client Secret field with the base64 string of your Private Key. You need to convert or encode a .p8 file, which is downloaded once you created a key, to base64 string. You can use your own favor as a converter.
- Fill in the Team ID field with your Apple Team ID. You can find it under your account name in the Apple Developer console.
- Fill in the Key ID field with the key you generated from the Create key step.
After filling in the required information, click Create. The details page of the configuration appears.
To enable the login method, click Activate and click Activate again on the pop-up message to confirm the action.
Create IAM clients
An IAM client represents the game client that you want to release on the Apple platform. With an IAM client, your game client can request access to protected AGS resources using the appropriate permissions. To learn more, see Manage access control for applications.
In the AGS Admin Portal, go to Authorizations > IAM Clients
On the IAM Clients page, click the + Create New button.
On the Create New IAM Client appears, fill in the required information.
Basic Information
Client ID: The system automatically generates the Client ID. Save a copy of the client ID in your SDK configuration, so that you can use it for your game build later on.
Client Type: Select Confidential. We recommend that you use the Confidential type, since you might need to add some permissions later for accessing AGS. Adequate security is not available with the Public type.
Secret: You can type the secret yourself, or you can click Generate Client Secret to generate a secret key.
WarningThe client secret isn't visible after the creation step. Ensure you save a secure copy of it as you'll need it when you set up your game configuration.
Client Name: We recommend you use a name that will reflect the platform, for example,
<game name> apple build.Namespace: Select your game namespace from the dropdown.
Scopes: Keep the default values in this field.
Redirect URI: Type
http://127.0.0.1in this field, since it's for the Game Client Build.Target Audience: Leave blank.
Base URI: Leave blank.
Description: Describe the IAM client. You can add a description of up to 256 characters.
Client SDK Configuration
Platform: Select the Target Platform your game is built on. In this case, set it to Apple.
Advanced Configurations: This section consists of additional features such as two-factor authentication (2FA) and override expiration time. As this is for a Game Client build, you can leave these as default or disabled.
After filling in the required information, click Create.
Go to the Permissions tab, then add the permissions that you need for the client. To learn more about IAM client permissions, refer to the Permissions section in Manage access control for applications.
In-game login
The setup for each game engine is different. Follow the steps that are applicable to your game engine.
- Unreal Engine instructions
- Unity Engine Instructions
Unreal Engine in-game login integration
Prepare Unreal project settings
Set the Client ID and Client Secret in DefaultEngine.ini file.
[/Script/AccelByteUe4Sdk.AccelByteSettings]
ClientId=abcdefg12345
ClientSecret=abcdefg12345
Namespace=test
PublisherNamespace=accelbyte
BaseUrl="https://demo.accelbyte.io"
QosPingTimeout=0.6

[/Script/AccelByteUe4Sdk.AccelByteServerSettings]
ClientId=defghi12345
ClientSecret=defghi12345
Namespace=test
PublisherNamespace=accelbyte
RedirectURI="http://127.0.0.1"
BaseUrl="https://demo.accelbyte.io"
QosPingTimeout=0.6
Add the
AccelByteUe4Sdkplugin name into theBuild.csfile.PublicDependencyModuleNames.AddRange(new string[] { "AccelByteUe4Sdk" });
PrivateDependencyModuleNames.Add("OnlineSubsystem");
PrivateDependencyModuleNames.Add("OnlineSubsystemApple");
Unreal build configuration
Set the Unreal certificates and provisioning
Set the Bundle Identifier to your app's Bundle ID from the Apple Developer portal. Make sure the App ID already has SIWA capability.
Set the correct certificate and provisioning file. This requires
.mobileprovisionandcert.SingningRequestfiles.
Enable SIWA in Unreal Engine
UE4 only passes the identity token, which cannot be used to authorize Apple users in AGS Access Service. We need to change it so that it passes authorization code instead. Follow these steps:
Locate and open the following file.
<EngineDir>\Plugins\Online\OnlineSubsystemApple\Source\Private\OnlineExternalUIInterfaceApple.cppInside the file, locate this line.
signInWithAppleBridge->SignInResultCallback([AuthAppleID user], [AuthAppleID identityToken], [AuthAppleID email], [AuthAppleID fullName], nullptr);Change the line to the following, replacing the information in the square brackets appropriately.
signInWithAppleBridge->SignInResultCallback([AuthAppleID user], [AuthAppleID authorizationCode], [AuthAppleID email], [AuthAppleID fullName], nullptr);
Unreal sample code implementation
Header declaration:
#include <OnlineSubsystem.h>
#include "Interfaces/OnlineIdentityInterface.h"
#include "Interfaces/OnlineLeaderboardInterface.h"
#include "Core/AccelByteMultiRegistry.h"
#include "Core/AccelByteError.h"
Log in to Apple Service, then get the Platform Token.
const IOnlineSubsystem* OnlineSubsystem = IOnlineSubsystem::Get(TEXT("Apple"));
    if (OnlineSubsystem == nullptr)
    {
    FString Message = TEXT("Cannot login with no online subsystem set!");
    UE_LOG(LogTemp, Warning, TEXT("%s"), *Message);
    return;
    }

    const IOnlineIdentityPtr OnlineIdentity = OnlineSubsystem->GetIdentityInterface();
    if (!OnlineIdentity.IsValid())
    {
    FString Message = TEXT("Could not retrieve identity interface from native subsystem.");
    UE_LOG(LogTemp, Warning, TEXT("%s"), *Message);
    return;
    }

    int32 TempLocalUserNum = 0;
    OnlineIdentity->AddOnLoginCompleteDelegate_Handle(TempLocalUserNum,
        FOnLoginCompleteDelegate::CreateLambda([=]
        (int32 LocalUserNum, bool bWasSuccessful, const FUniqueNetId& UserId, const FString& Error)
            {
                if (bWasSuccessful)
                {
                    UE_LOG(LogTemp, Warning, TEXT("Success Apple Login"));
                    PlatformToken = OnlineIdentity->GetAuthToken(TempLocalUserNum);
                    UE_LOG(LogTemp, Warning, TEXT("Apple PlatformToken : %s"), *PlatformToken);
                }
                else
                {
                    UE_LOG(LogTemp, Warning, TEXT("Error Login: %s"), *Error);
                }
            })
    );
    // login native
    FOnlineAccountCredentials Creds{};
    OnlineIdentity->Login(TempLocalUserNum, Creds); // Apple Login
Log in to AGS.
// Log in to AGS
FRegistry::User.LoginWithOtherPlatform(EAccelBytePlatformType::Apple
    , PlatformToken
    , FVoidHandler::CreateLambda([=]()
        {
            UE_LOG(LogTemp, Log, TEXT("    Success AB Login "));
        })
    , FOAuthErrorHandler::CreateLambda([=](int32, const FString&, const FErrorOAuthInfo& Result)
        {
            UE_LOG(LogTemp, Warning, TEXT("    Error. Code: %s, Reason: %s"), *Result.Error, *Result.Error_description);
}));
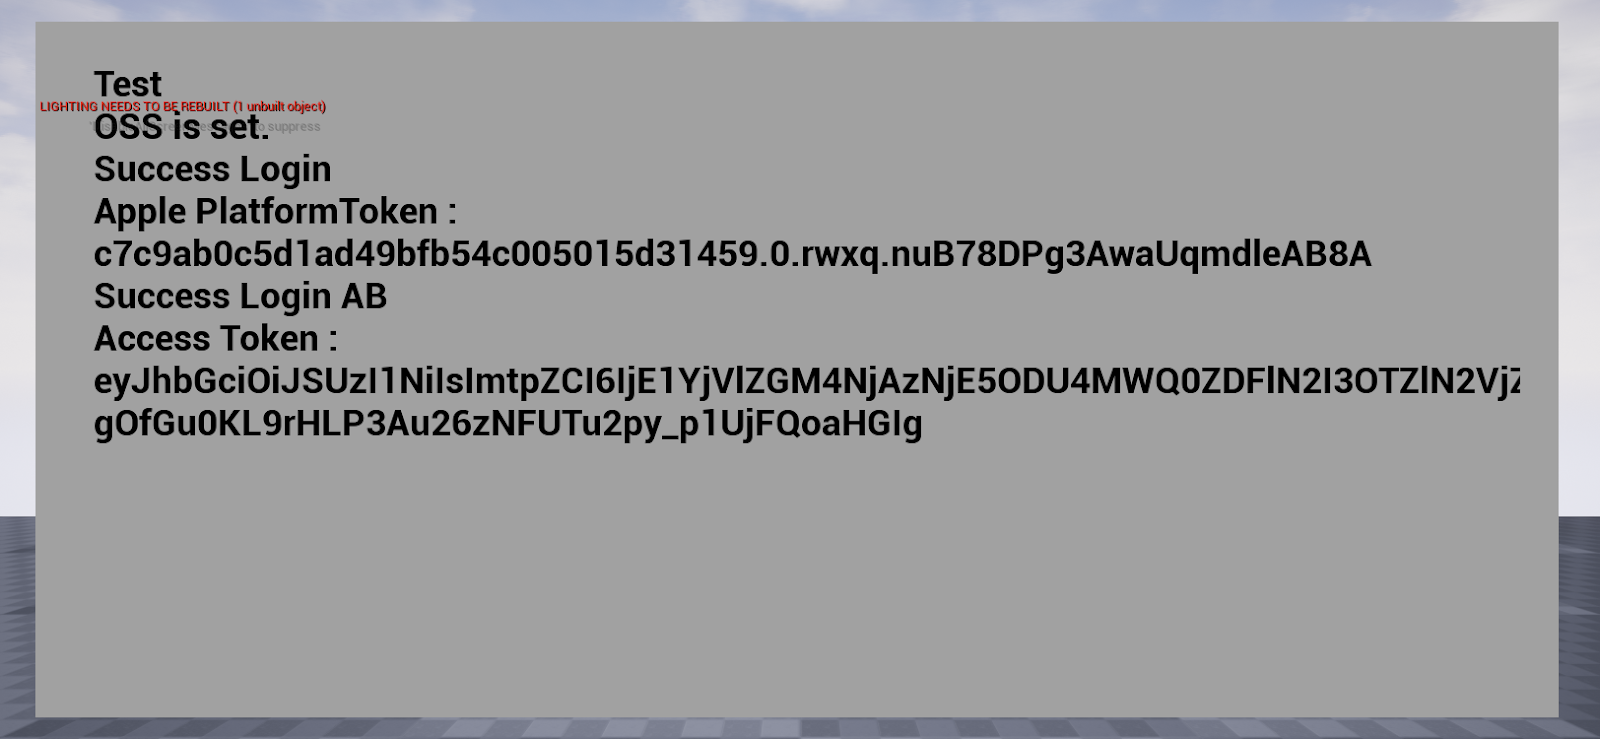
Sample code testing
In this example, we tested the code on an iPhone 11. The following image shows that the code works and a user is able to log in using Apple with the sample code.
Unity in-game login integration
Prepare Unity project settings
This step uses the following files:
Asset/Resources AccelByteSDKConfig.jsonAsset/Resources AccelByteSDKOAuthConfig.json
{
  "Default": {
    "Namespace": "example-namespace",
    "UsePlayerPrefs": true,
    "EnableDebugLog": true,
    "DebugLogFilter": "Verbose",
    "BaseUrl": "https://demo.accelbyte.io",
    "IamServerUrl": "https://demo.accelbyte.io/iam",
    "PlatformServerUrl": "https://demo.accelbyte.io/platform",
    "BasicServerUrl": "https://demo.accelbyte.io/basic",
    "LobbyServerUrl": "wss://demo.accelbyte.io/lobby/",
    "CloudStorageServerUrl": "https://demo.accelbyte.io/social",
    "GameProfileServerUrl": "https://demo.accelbyte.io/social",
    "StatisticServerUrl": "https://demo.accelbyte.io/social",
    "QosManagerServerUrl": "https://demo.accelbyte.io/qosm",
    "AgreementServerUrl": "https://demo.accelbyte.io/agreement",
    "LeaderboardServerUrl": "https://demo.accelbyte.io/leaderboard",
    "CloudSaveServerUrl": "https://demo.accelbyte.io/cloudsave",
    "GameTelemetryServerUrl": "https://demo.accelbyte.io/game-telemetry",
    "AchievementServerUrl": "https://demo.accelbyte.io/achievement",
    "UGCServerUrl": "https://demo.accelbyte.io/ugc",
    "ReportingServerUrl": "https://demo.accelbyte.io/reporting",
    "SeasonPassServerUrl": "https://demo.accelbyte.io/seasonpass",
    "SessionBrowserServerUrl": "https://demo.accelbyte.io/sessionbrowser",
    "SessionServerUrl": "https://demo.accelbyte.io/session",
    "MatchmakingV2ServerUrl": "https://demo.accelbyte.io/match2",
    "UseTurnManager": false,
    "TurnManagerServerUrl": "https://demo.accelbyte.io/turnmanager",
    "TurnServerHost": "",
    "TurnServerPort": "",
    "TurnServerPassword": "",
    "TurnServerSecret": "",
    "TurnServerUsername": "",
    "GroupServerUrl": "https://demo.accelbyte.io/group",
    "ChatServerUrl": "wss://demo.accelbyte.io/chat/",
    "RedirectUri": "http://127.0.0.1",
    "AppId": "133xxx",
    "PublisherNamespace": "accelbyte",
    "CustomerName": "game-sdk",
    "MaximumCacheSize": 100,
    "MaximumCacheLifeTime": 100
  }
}
Unity build configuration
Set the Certificate and Provisioning
Set the Bundle Identifier to your app's Bundle ID from the Apple Developer portal. Make sure the App ID already has SIWA capability.
Set automatic management of signing, Team, and Bundle Identifier.
Unity sample code implementation
Header declaration:
using AppleAuth;
using AppleAuth.Enums;
using AppleAuth.Extensions;
using AppleAuth.Interfaces;
using AppleAuth.Native;
using UnityEngine;
using TMPro;
using System;
using System.Text;
using System.Collections;
using AccelByte.Api;
using AccelByte.Core;
using AccelByte.Models;
Log in to Apple Service, then get the Platform Token.
string authCode = "";

void RunLogin()
{
    IAppleAuthManager _appleAuthManager;

    // If the current platform is supported
    if (AppleAuthManager.IsCurrentPlatformSupported)
    {
        // Creates a default JSON deserializer, to transform JSON Native responses to C## instances
        var deserializer = new PayloadDeserializer();
        // Creates an Apple Authentication manager with the deserializer
        this._appleAuthManager = new AppleAuthManager(deserializer);
    }

    var loginArgs = new AppleAuthLoginArgs(LoginOptions.IncludeEmail | LoginOptions.IncludeFullName);
    bool done = false;
    string authCode = "";
    this._appleAuthManager.LoginWithAppleId(
        loginArgs,
        credential =>
        {

            LogText.text += "\nSuccess login Apple ";

            var appleIDCred = credential as IAppleIDCredential;
            authCode = Encoding.UTF8.GetString(appleIDCred.AuthorizationCode, 0, appleIDCred.AuthorizationCode.Length);

            LogText.text += "\nAuth Code : " + authCode;

            done = true;
        },
        error =>
        {
            var authorizationErrorCode = error.GetAuthorizationErrorCode();
            Debug.LogWarning("Sign in with Apple failed " + authorizationErrorCode.ToString() + " " + error.ToString());

            LogText.text += "\nSign in with Apple failed " + authorizationErrorCode.ToString() + " " + error.ToString();
            done = true;
        });

}

// Update is called once per frame
void Update()
{
    // Updates the AppleAuthManager instance to execute
    // pending callbacks inside Unity's execution loop
    if (this._appleAuthManager != null)
    {
        this._appleAuthManager.Update();
    }

}
Log in to AGS.
var user = AccelBytePlugin.GetUser();
Result<TokenData, OAuthError> callback = null;

user.LoginWithOtherPlatform(PlatformType.Apple, authCode, (Result<TokenData, OAuthError> result) =>
{
    if (result.IsError)
    {
        LogText.text += "\nLogin Error : " + result.Error.error + " " +result.Error.error_description;
    }
    else
    {
        LogText.text += "\nLogin to AccelByte Success ";
    }
    callback = result;
});
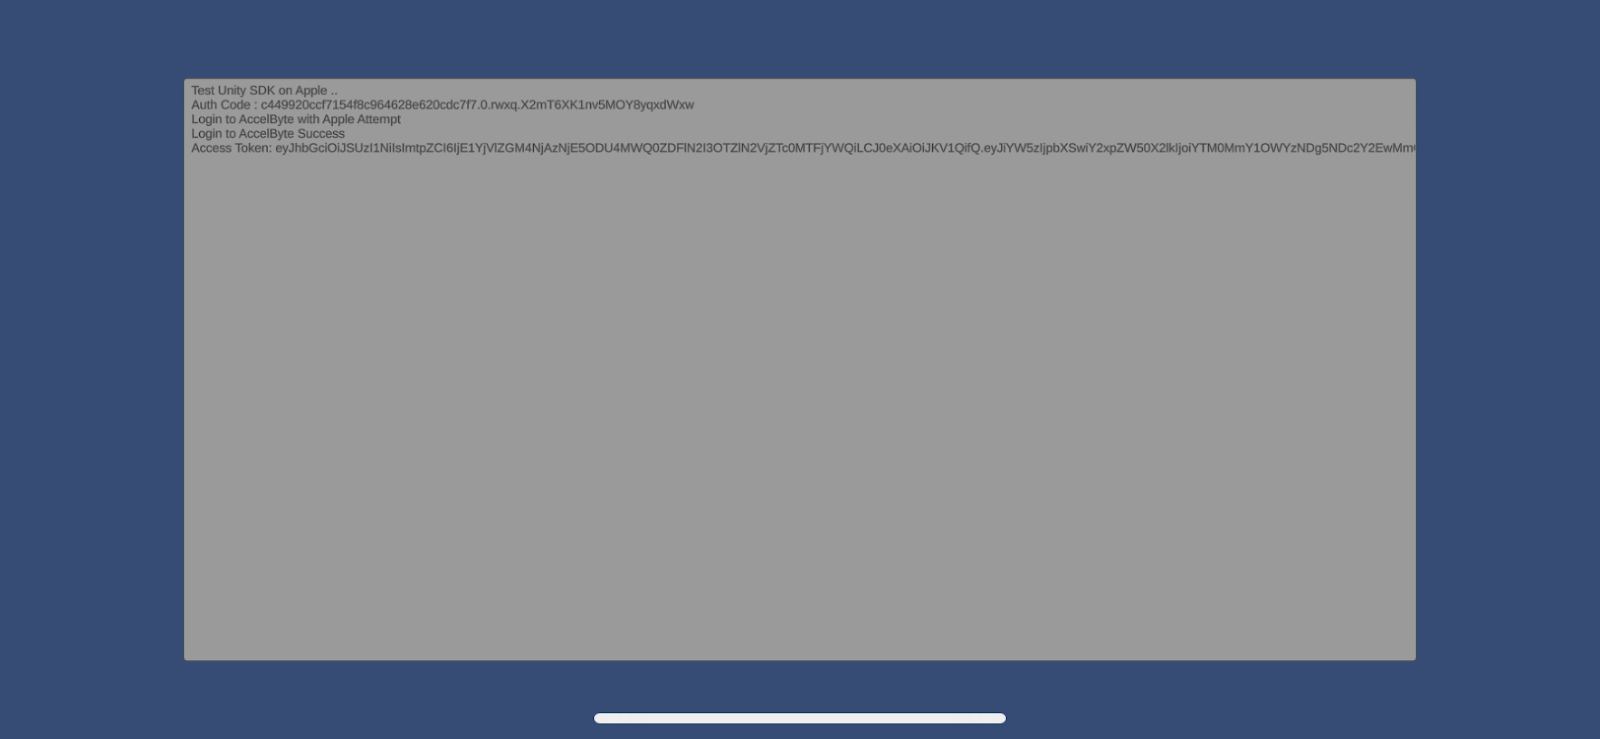
Unity sample code testing
In this example, we tested the code on an iPhone 11. The following image shows that the code works and a user is able to log in using Apple with the sample code.