Getting started with Cloud Save validator customization
Extend is in Open Beta for AGS Premium Clients! This means Extend available for you to try on your development environment. You can submit your feedback through this link.
Extend is currently available for AGS Starter Closed Beta partners only.
Overview
AccelByte Gaming Services (AGS) has the capability to provide custom logic for Cloud Save. Cloud Save can be customized to validate the eligibility of JSON records to be stored or accessed using AGS Extend integration.
In this guide, we will go through the workflow of creating and using a simple custom Cloud Save validator for AGS.
Prerequisites
- Go
- Python
- C#
- Java
- Windows 10 WSL2 or Linux Ubuntu 20.04 with the following tools installed:
- Bash
- Make
- Docker v23.x
- docker-compose v2
- Go v1.19
- ngrok
- Windows 10 WSL2 or Linux Ubuntu 20.04 with the following tools installed:
- bash
- make
- docker
- docker-compose v2
- python 3.9
- ngrok
- Windows 10 WSL2 or Linux Ubuntu 20.04 with the following tools installed:
- bash
- make
- docker
- docker-compose v2
- .NET 6.0 SDK
- ngrok
- Windows 10 WSL2 or Linux Ubuntu 20.04 with the following tools installed:
- bash
- make
- docker
- docker-compose v2
- Java LTS
- ngrok
Access to the AccelByte Gaming Services environment.
- Base URL. For demo environment, it is https://demo.accelbyte.io.
- Create a namespace if you don't have one yet. Keep the
Namespace ID. - Create an OAuth Client with
confidentialclient type. Keep theClient IDandClient Secret.
The
extend-helper-clidownloaded, installed, and set up. Download here.Add the following permission to the client credentials.
PermissionADMIN:NAMESPACE:{namespace}:EXTEND:REPOCREDENTIALS [READ]
Download a sample app
- Go
- Python
- C#
- Java
Clone the sample app.
git clone https://github.com/AccelByte/cloudsave-validator-grpc-plugin-server-go.gitOpen the
README.mdfile, then follow the instructions on the Setup, Building, and Running sections. Alternatively, you can use the followinggocommand to run the server. Ensure that the server is running locally before moving onto the next section.From sample app root directory (
gocommand):make proto
go run main.goStart
ngrokand expose theportspecified within the sample app. The following command assumes you have not changed the port in the sample app:ngrok tcp localhost:6565
Clone the sample app.
git clone https://github.com/AccelByte/cloudsave-validator-grpc-plugin-server-python.gitOpen the
README.mdfile, then follow the instructions on the Setup, Building, and Running sections. Alternatively, you can use the followingpythoncommand to run the server. Ensure that the server is running locally before moving onto the next section.From sample app root directory (
python,python3,python39command):make proto
python -m pip install . && python -m appStart
ngrokand expose theportspecified within the sample app. The following command assumes you have not changed the port in the sample app:ngrok tcp localhost:6565
Clone the sample app.
git clone https://github.com/AccelByte/cloudsave-validator-grpc-plugin-server-csharp.gitOpen the
README.mdfile, then follow the instructions on the Setup, Building, and Running sections. Alternatively, you can use thedotnetcommand shown below to run the server. Ensure that the server is running locally before moving onto the next section.
From sample app root directory:
cd src/AccelByte.PluginArch.CloudsaveValidator.Demo.Server
dotnet run
Start
ngrokand expose theportspecified within the sample app. The following command assumes you have not changed the port in the sample app:ngrok tcp localhost:6565
Clone the sample app.
git clone https://github.com/AccelByte/cloudsave-validator-grpc-plugin-server-java.gitOpen the
README.mdfile, then follow the instructions on the Setup, Building, and Running sections. Alternatively, you can use thegradlewrapper command shown below to run the server. Ensure that the server is running locally before moving onto the next section.
From sample app root directory:
./gradlew run
Start
ngrokand expose theportspecified within the sample app. The following command assumes you have not changed the port in the sample app:ngrok tcp localhost:6565
Test your local Cloud Save validator sample app
We will test the sample app locally by utilizing ngrok to expose localhost to the internet and using the address for Cloud Save validator gRPC URL configuration. Lastly, we'll try one of the validation inside the sample app to test against the real environment.
Register a local custom function
Copy the
forwardingaddress fromngrok. An example of this will look like:<number>.tcp.ngrok.io:<port>Go to the AGS Admin Portal and use the
namespaceyou wish to use when creating your custom configuration. On the left pane, click on Game Management, then Cloud Save, and then Custom Configuration. Click Add Configuration if you haven't added any.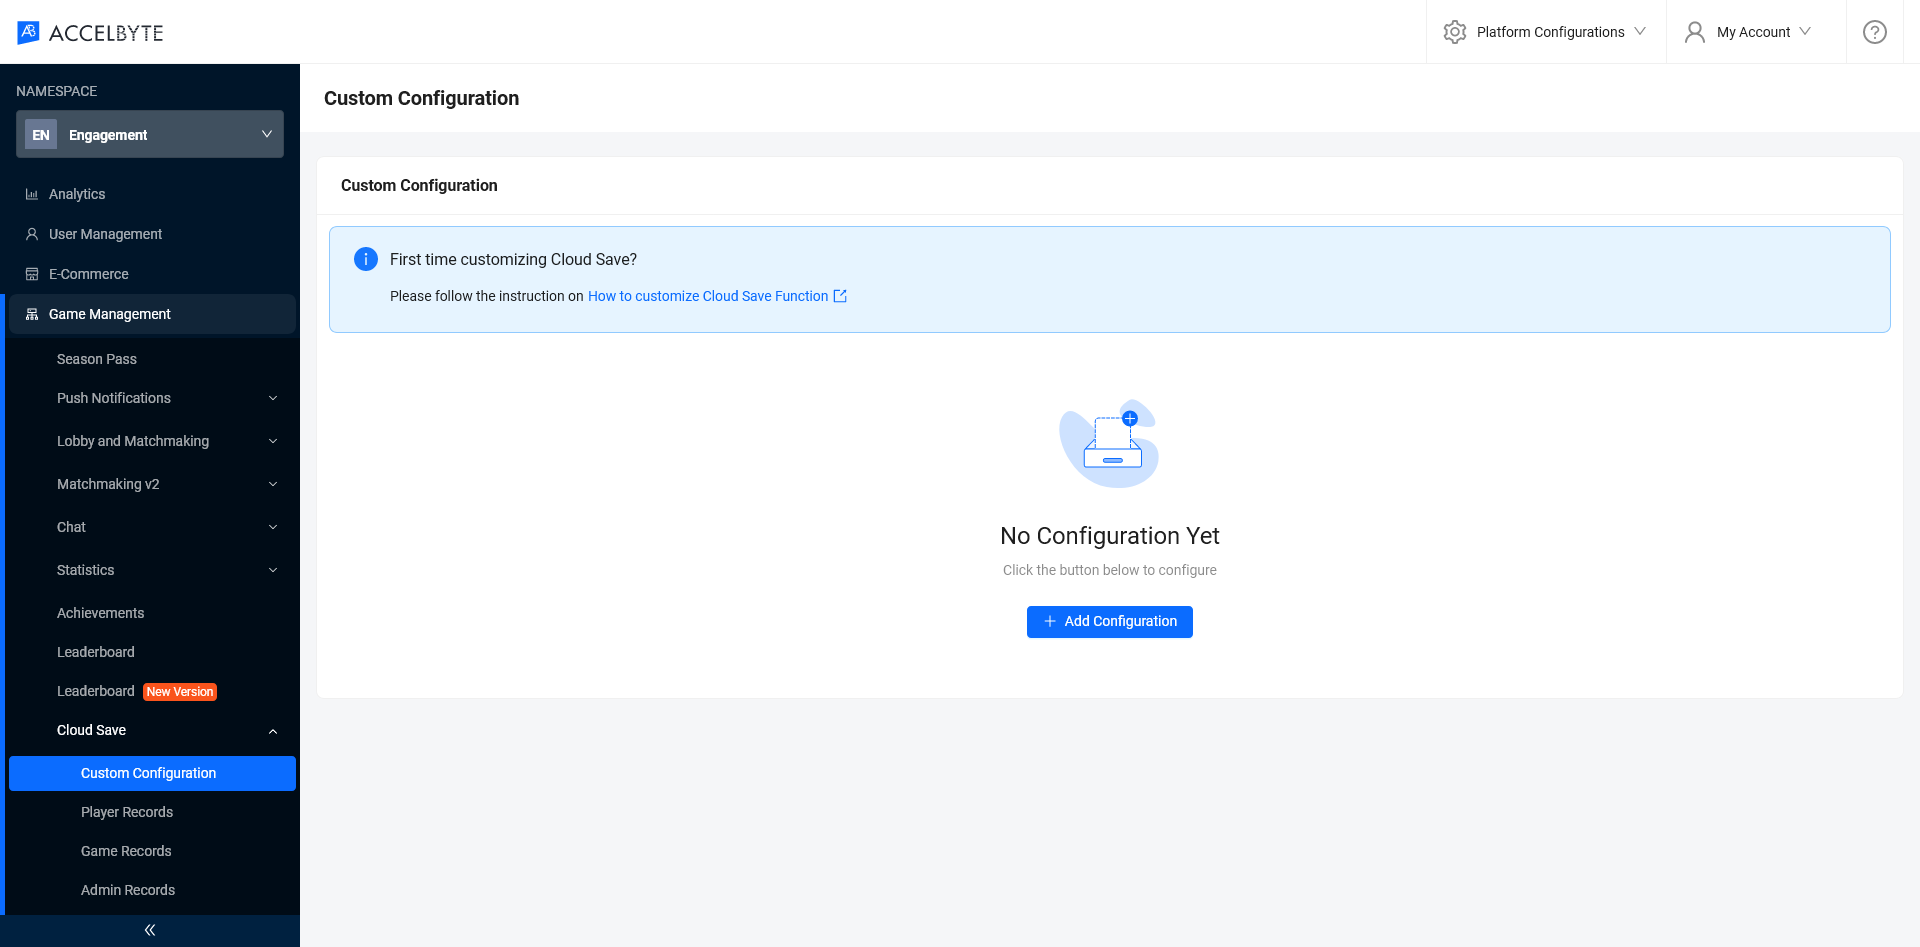
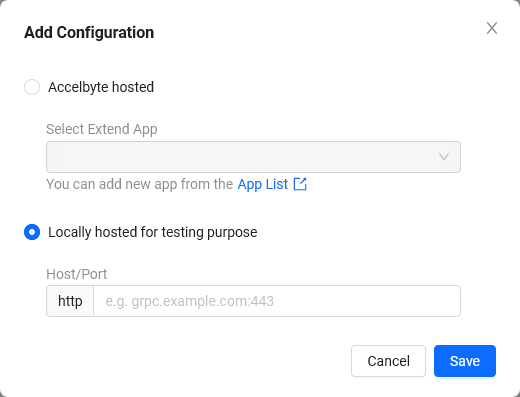
Select the Locally hosted for testing purpose optionand put the ngrok address above and finally click Save.
Test the Cloud Save validation
There are several custom validation implemented on the sample app. In this test, we will try to test one of the validations, which expects the game record with a key that has the suffix map. It should follow this schema:
{
  "locationId": "string,required",
  "name": "string, required",
  "totalResources": "int, required",
  "totalEnemy": "int, required"
}
Create and test a valid game record
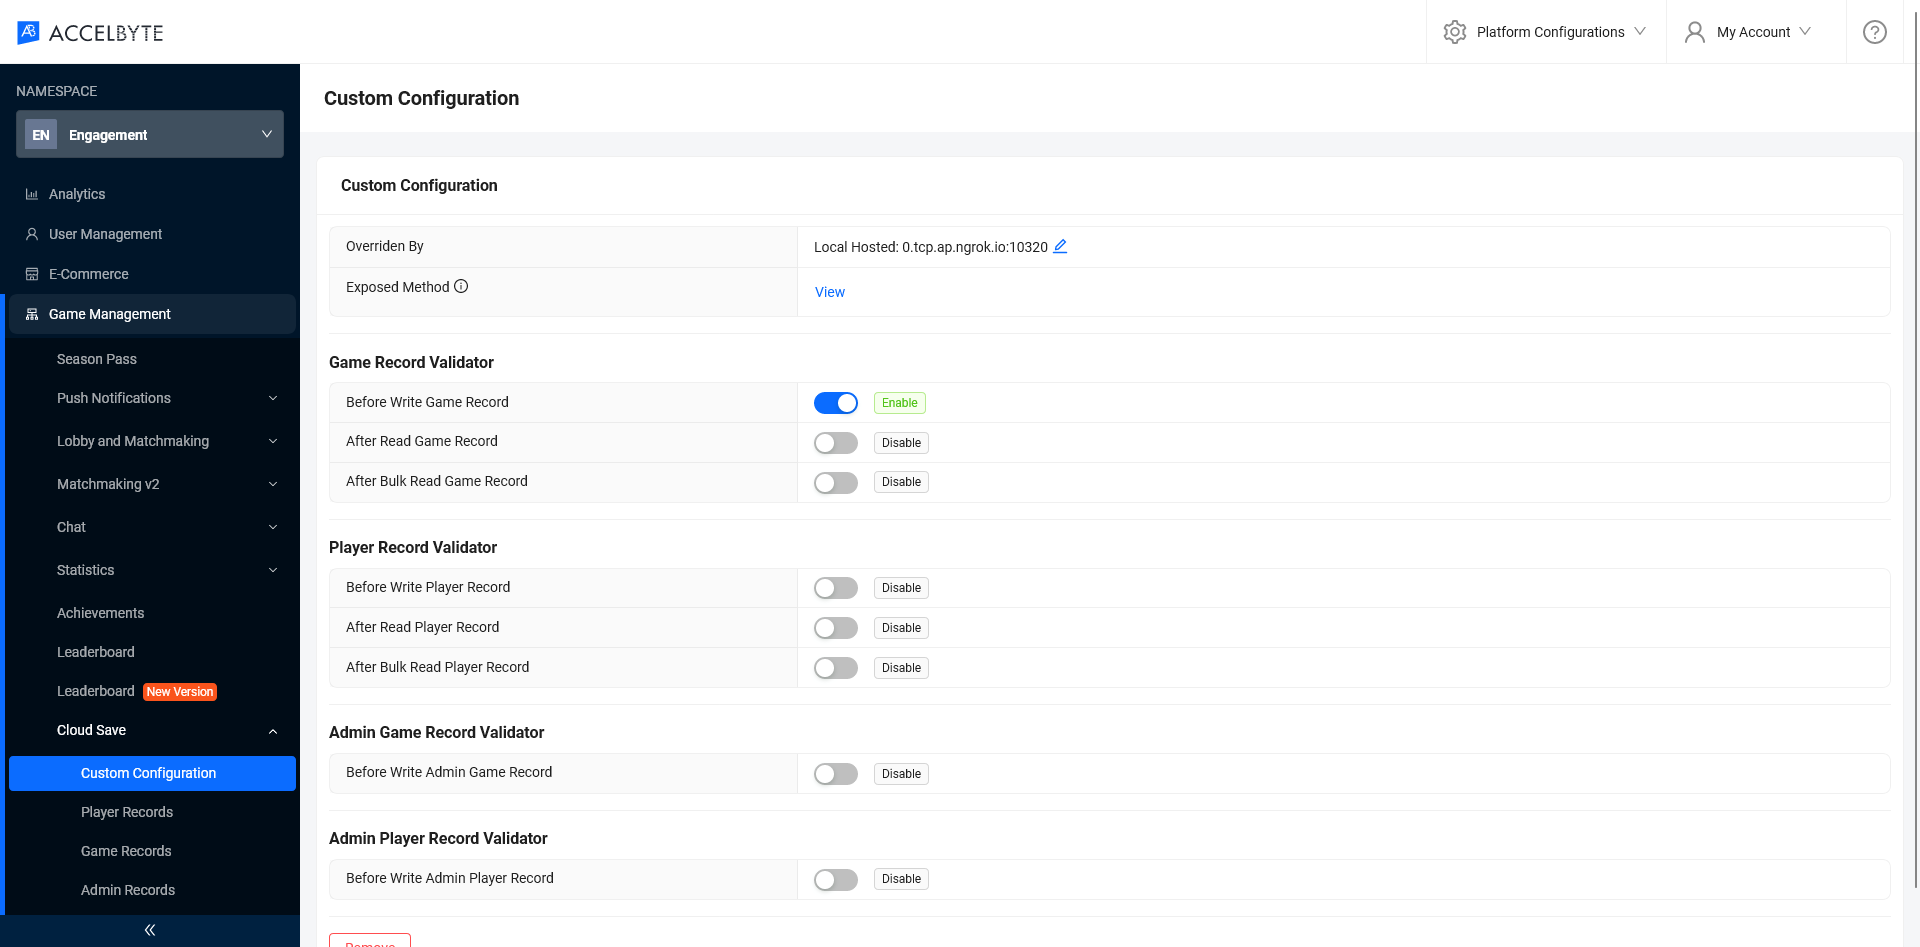
Enable the Before Write Game Record on the Cloud Save custom configuration.
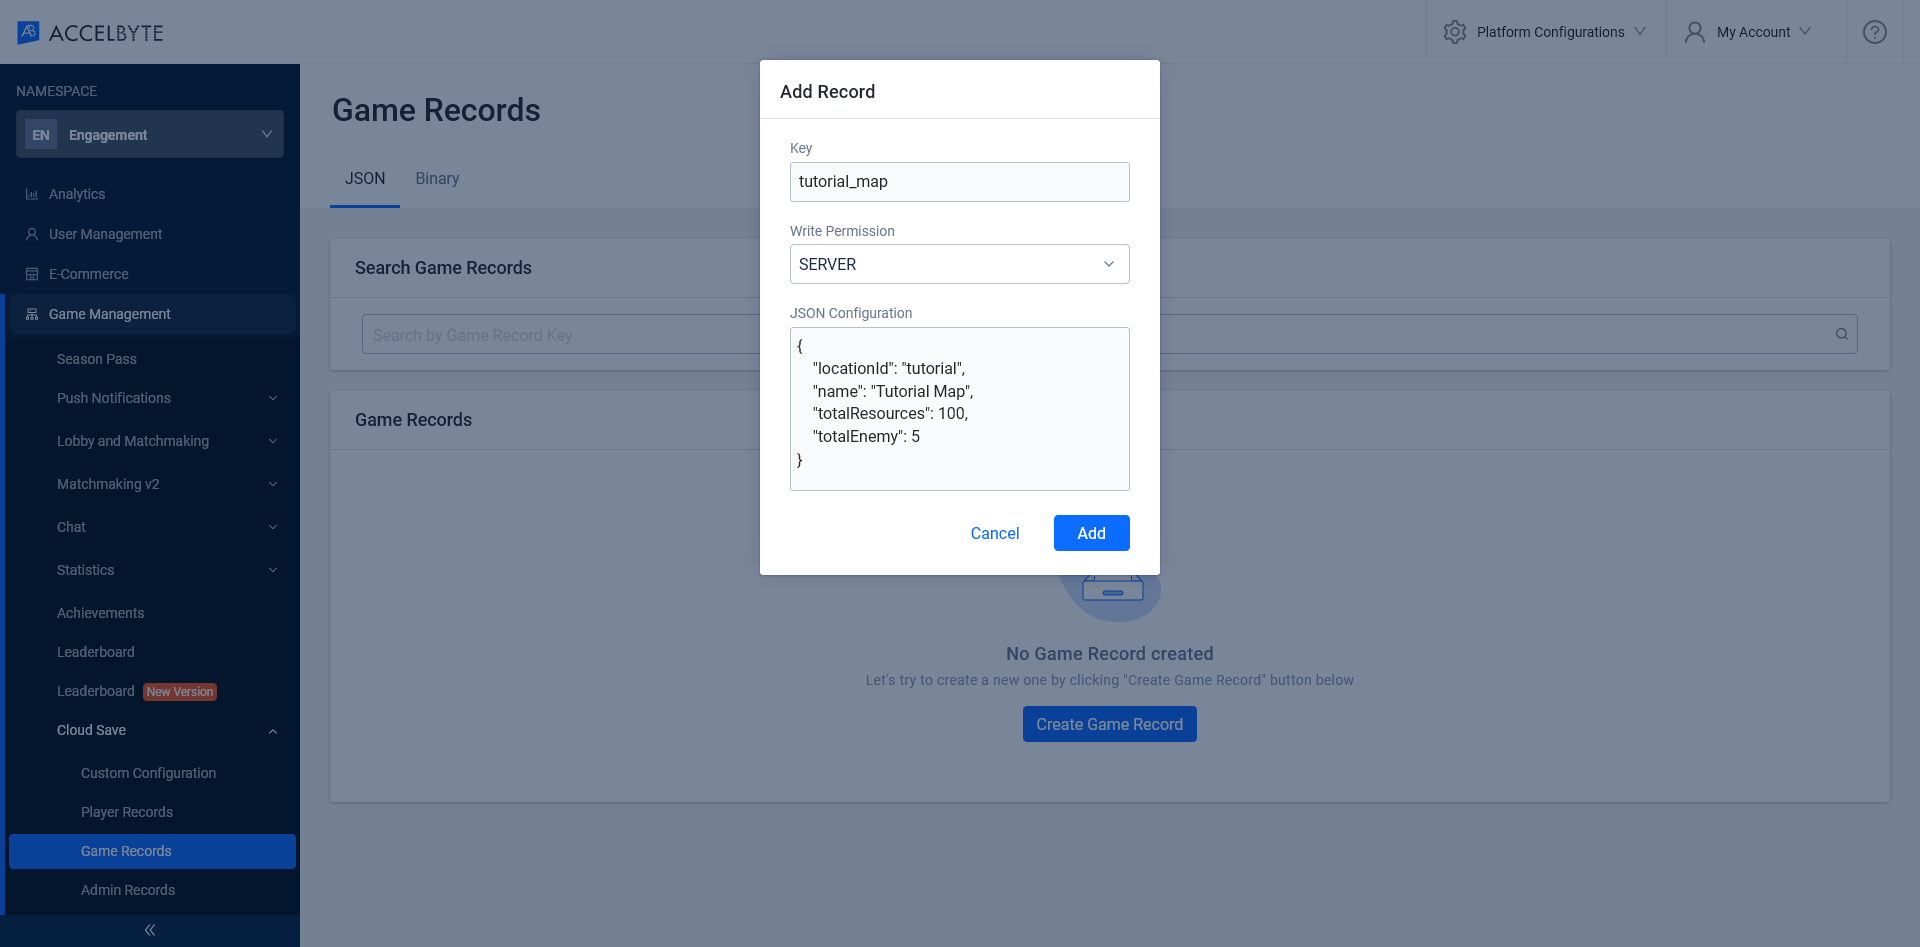
On the left pane, click on Game Records, then click the Add Record button. If this is your first time adding a game record, the Create Game Record button will appear instead.
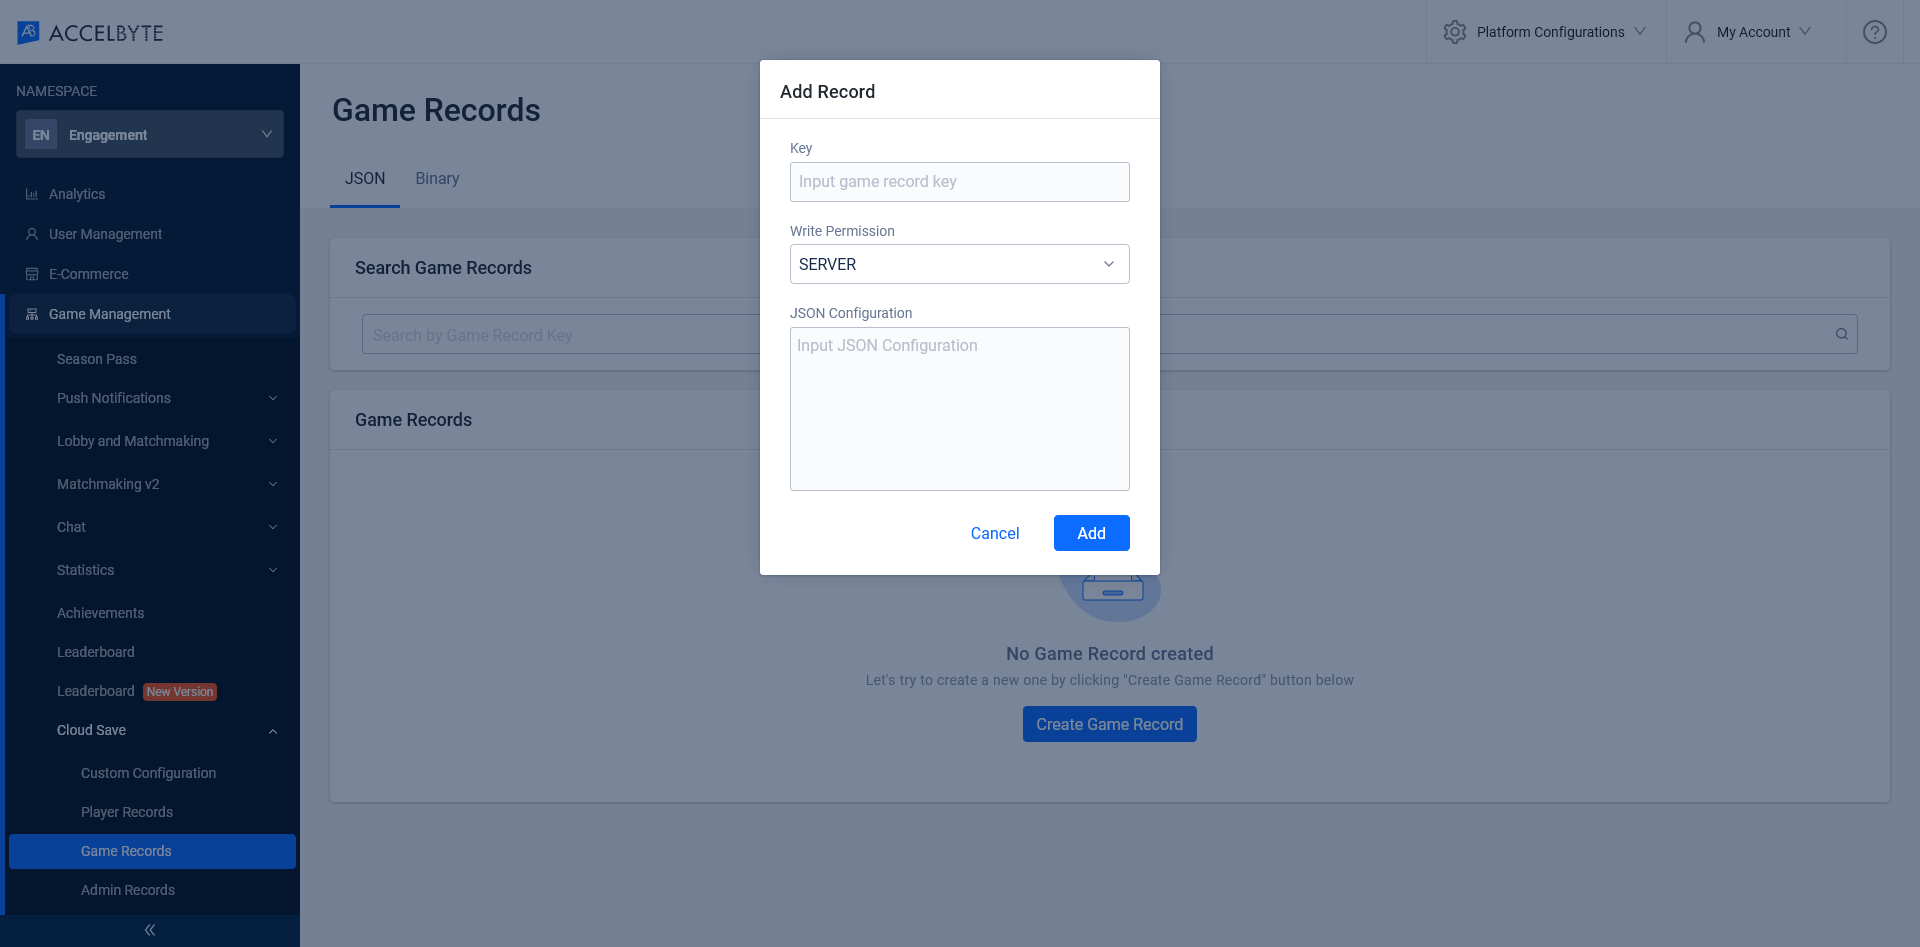
Create a valid map game using the key,
tutorial_map, and the following JSON configuration:{
"locationId": "tutorial",
"name": "Tutorial Map",
"totalResources": 100,
"totalEnemy": 5
}
Click Add to save the game record.
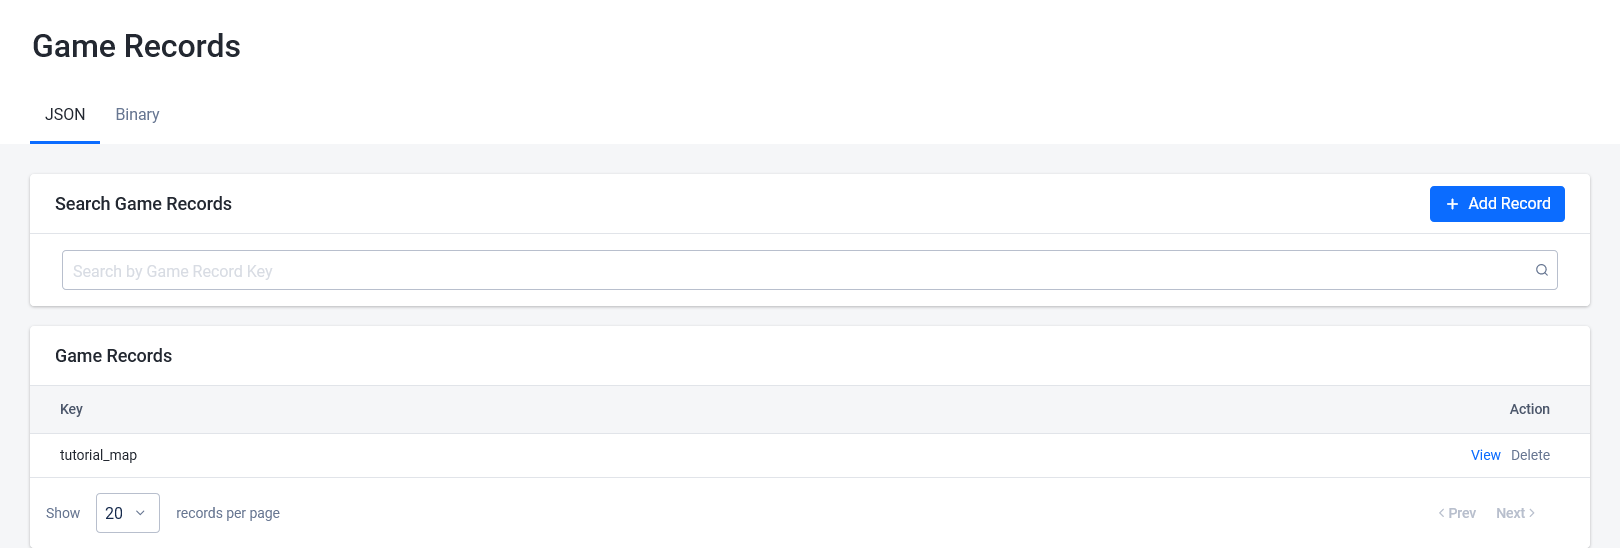
Create and test an invalid game record
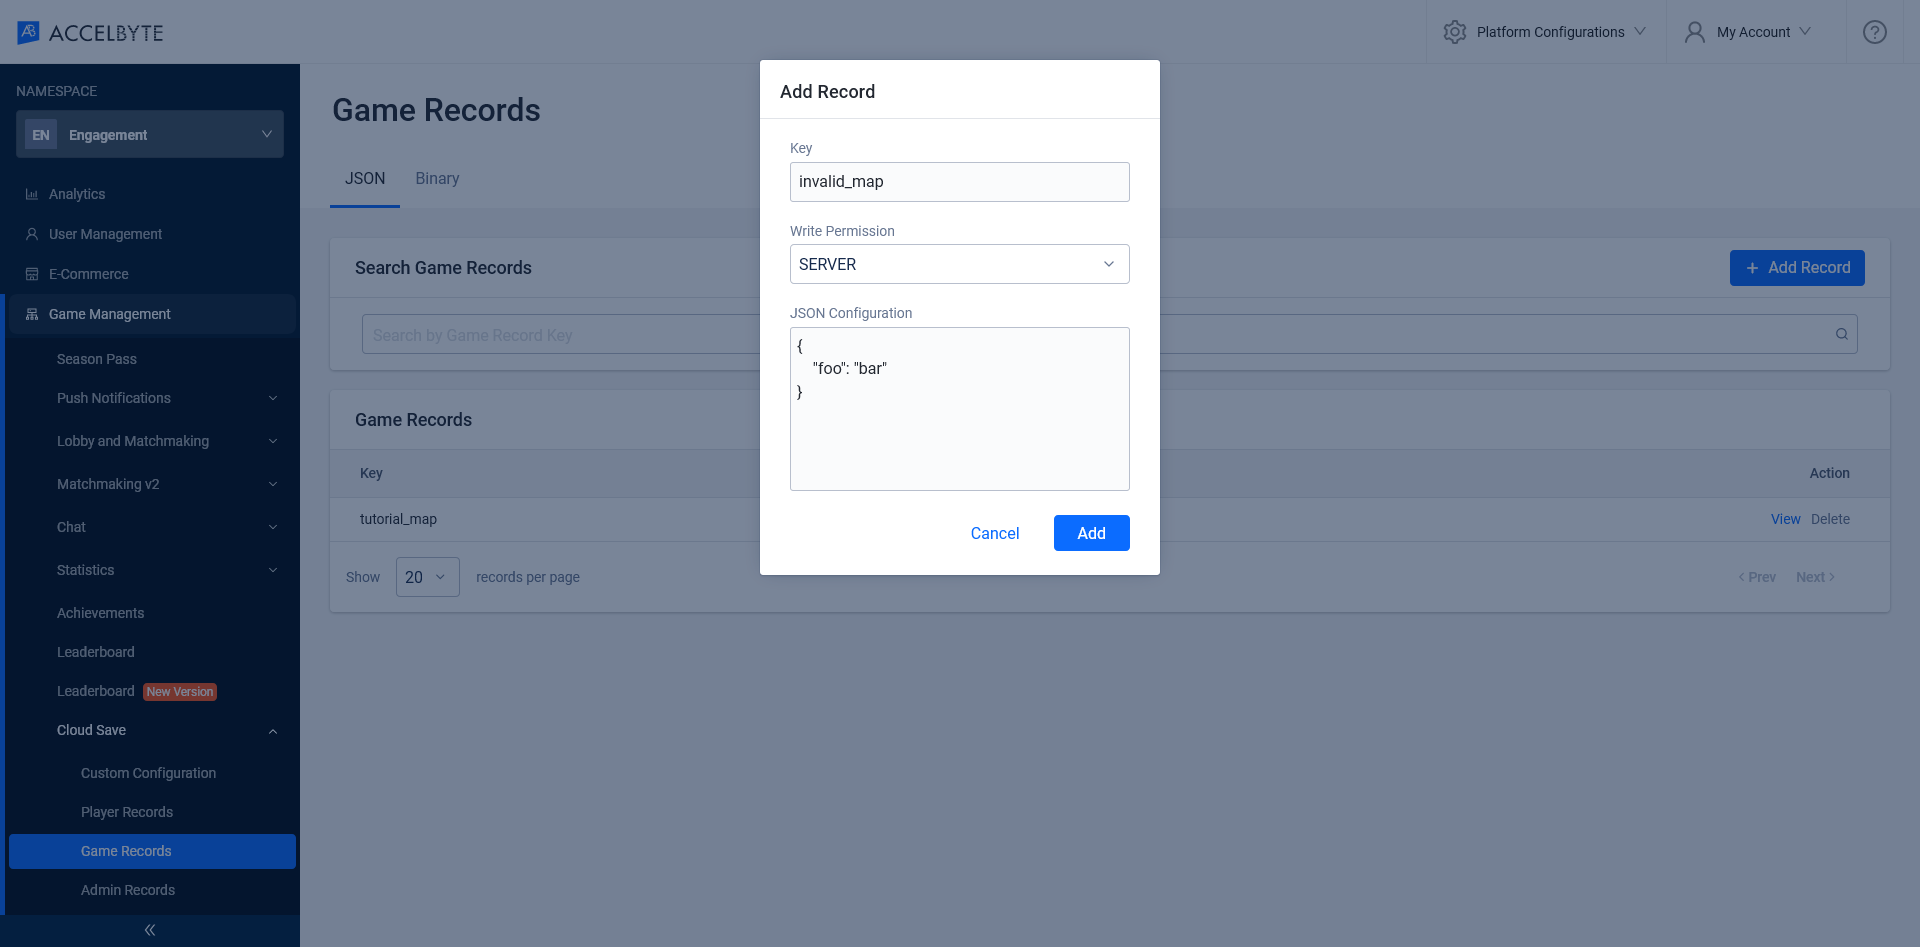
Create an invalid map game record using the key,
invalid_map, and the following JSON configuration:{
"foo": "bar"
}
Click Add to save the game record. An error message should appear. This means that the custom validation is working.
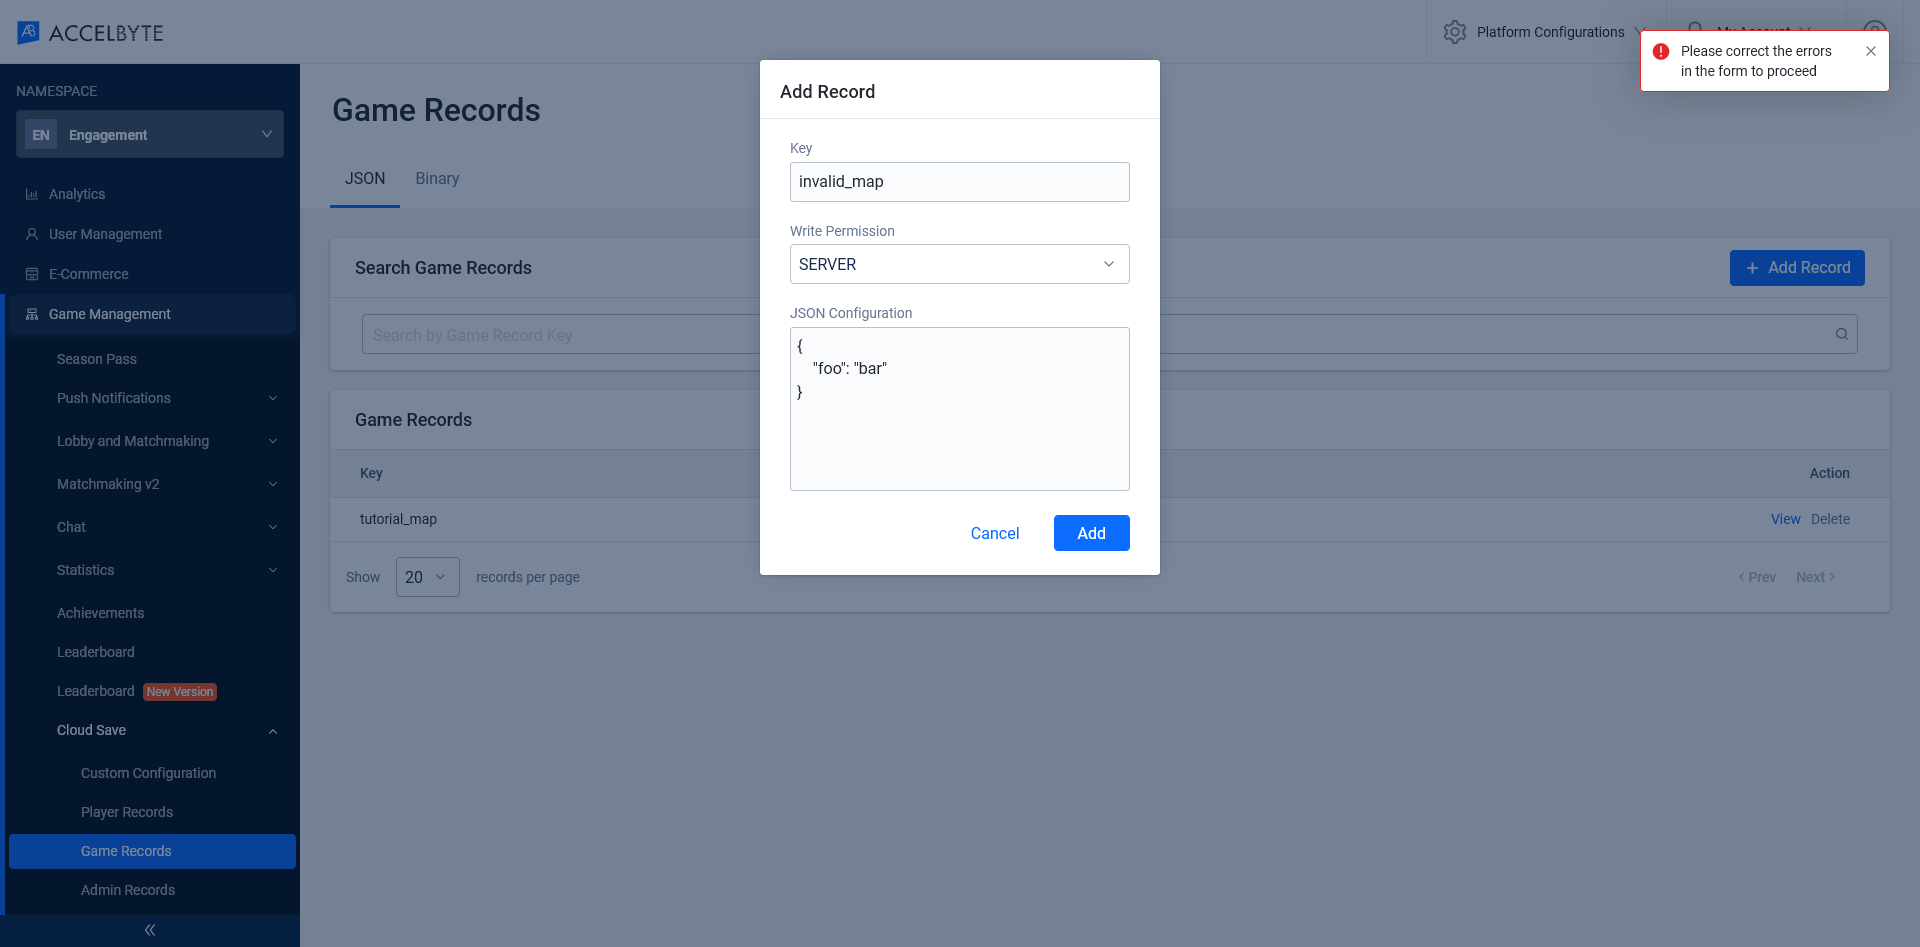
Inspect the network
If you want, you could also inspect the network call to check the error response. Here is the example error response:
{
 "errorCode": 20002,
 "errorMessage": "unable to create_game_record: unable to save record, user ID: 04268814c7af4ba5b3acd26603a12009, locationId cannot be empty;name cannot be empty;totalEnemy cannot be empty;totalResources cannot be empty"
}
Create the Extend app
We're going to test the sample app and deploy it on the AccelByte-hosted environment called Extend App.
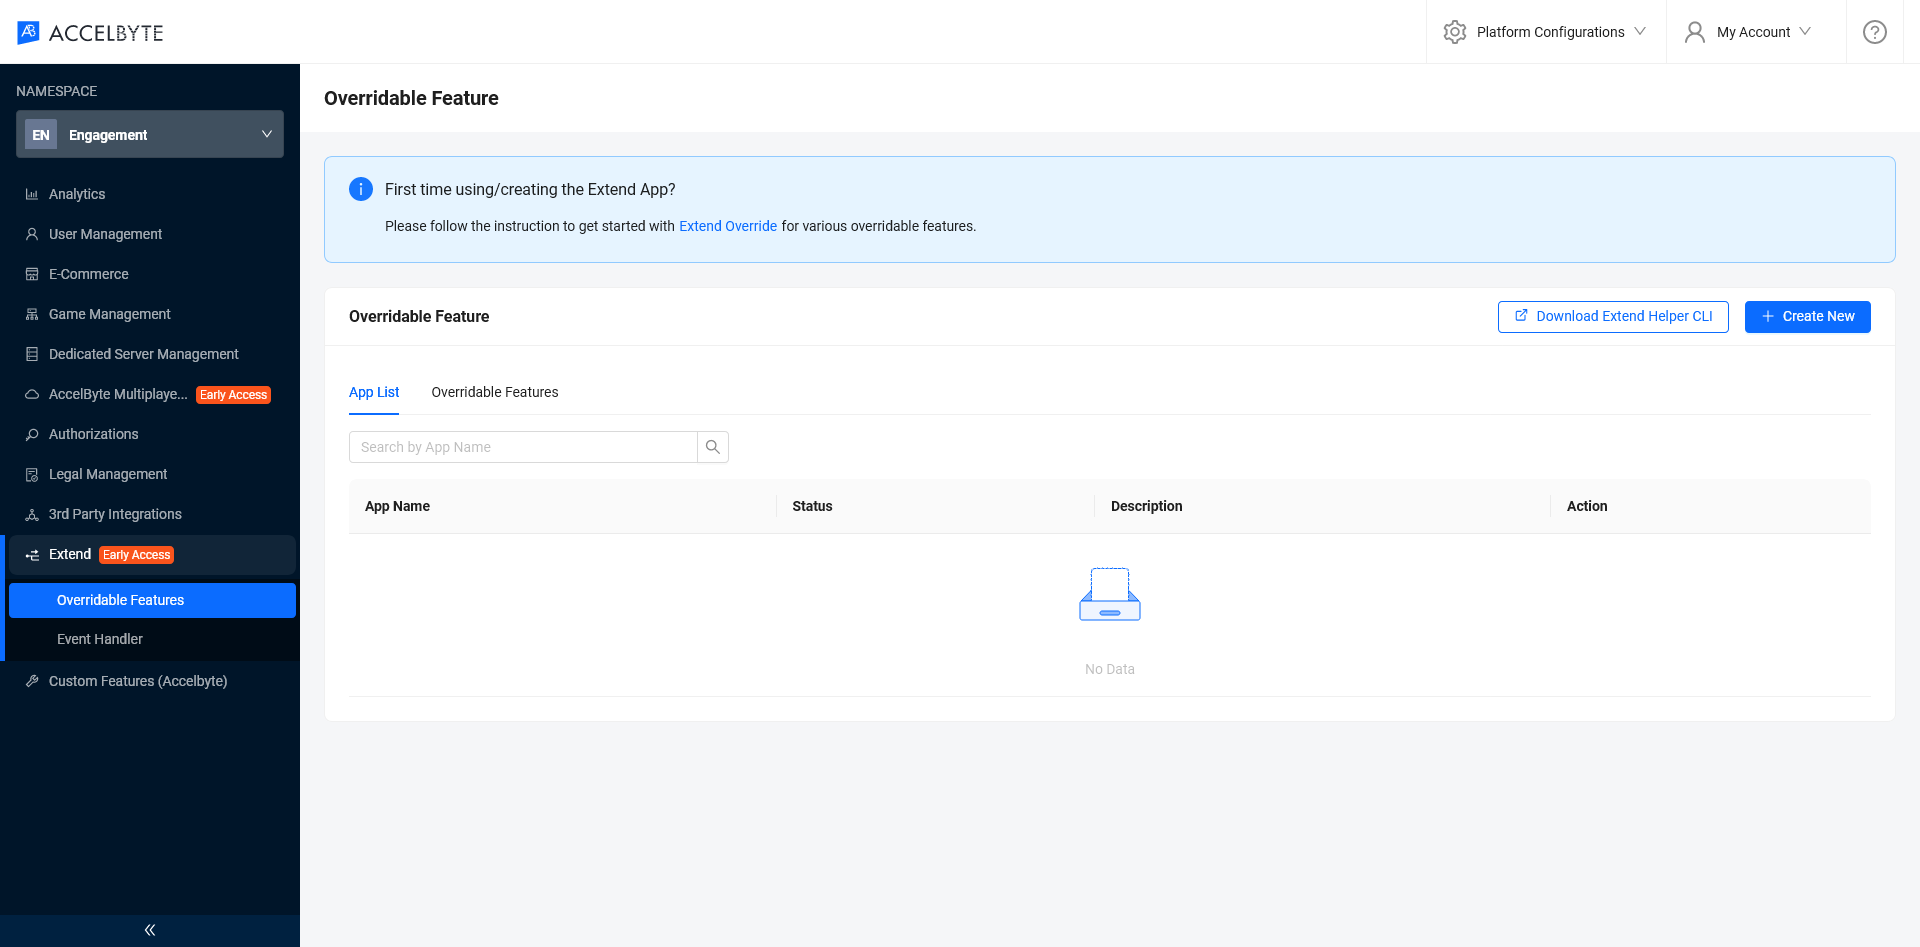
To create the Extend app, go to the AGS Admin Portal and use the namespace you wish to create in your gRPC plugin. On the left pane hover over Extend and click Overridable Features. Click Create New to create a new extend app.
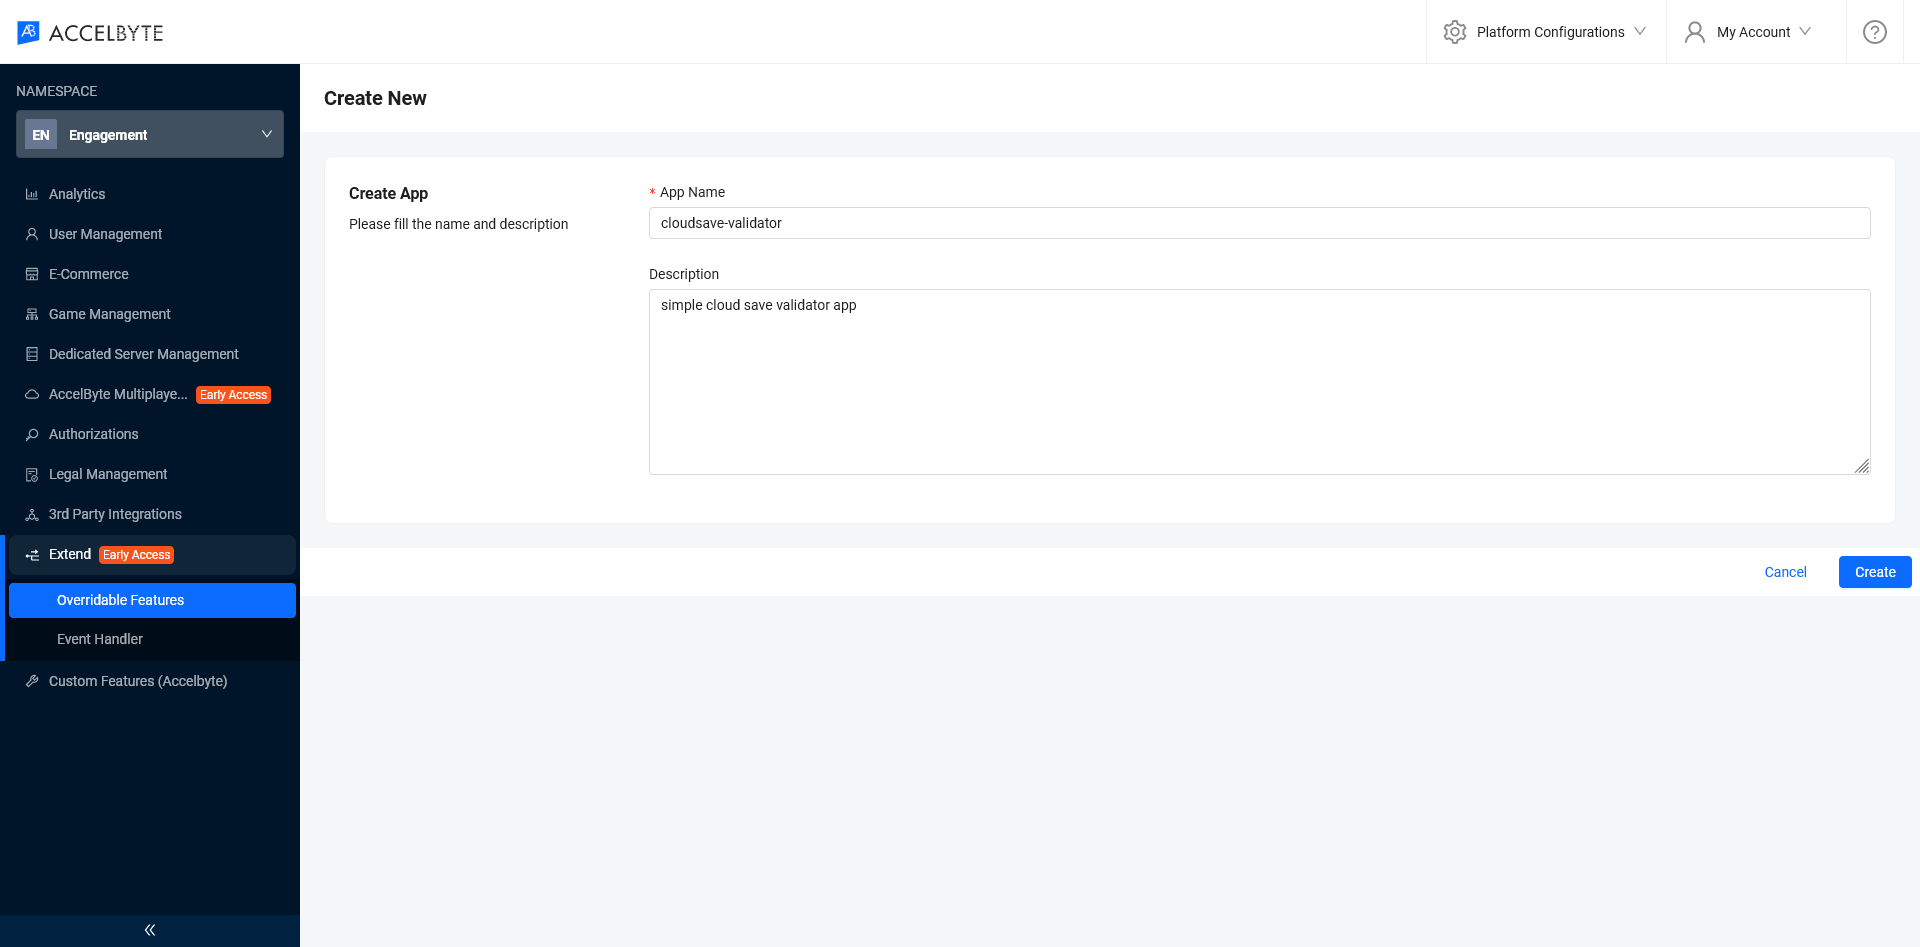
Fill in the App Name and the Description (optional), then click Create.
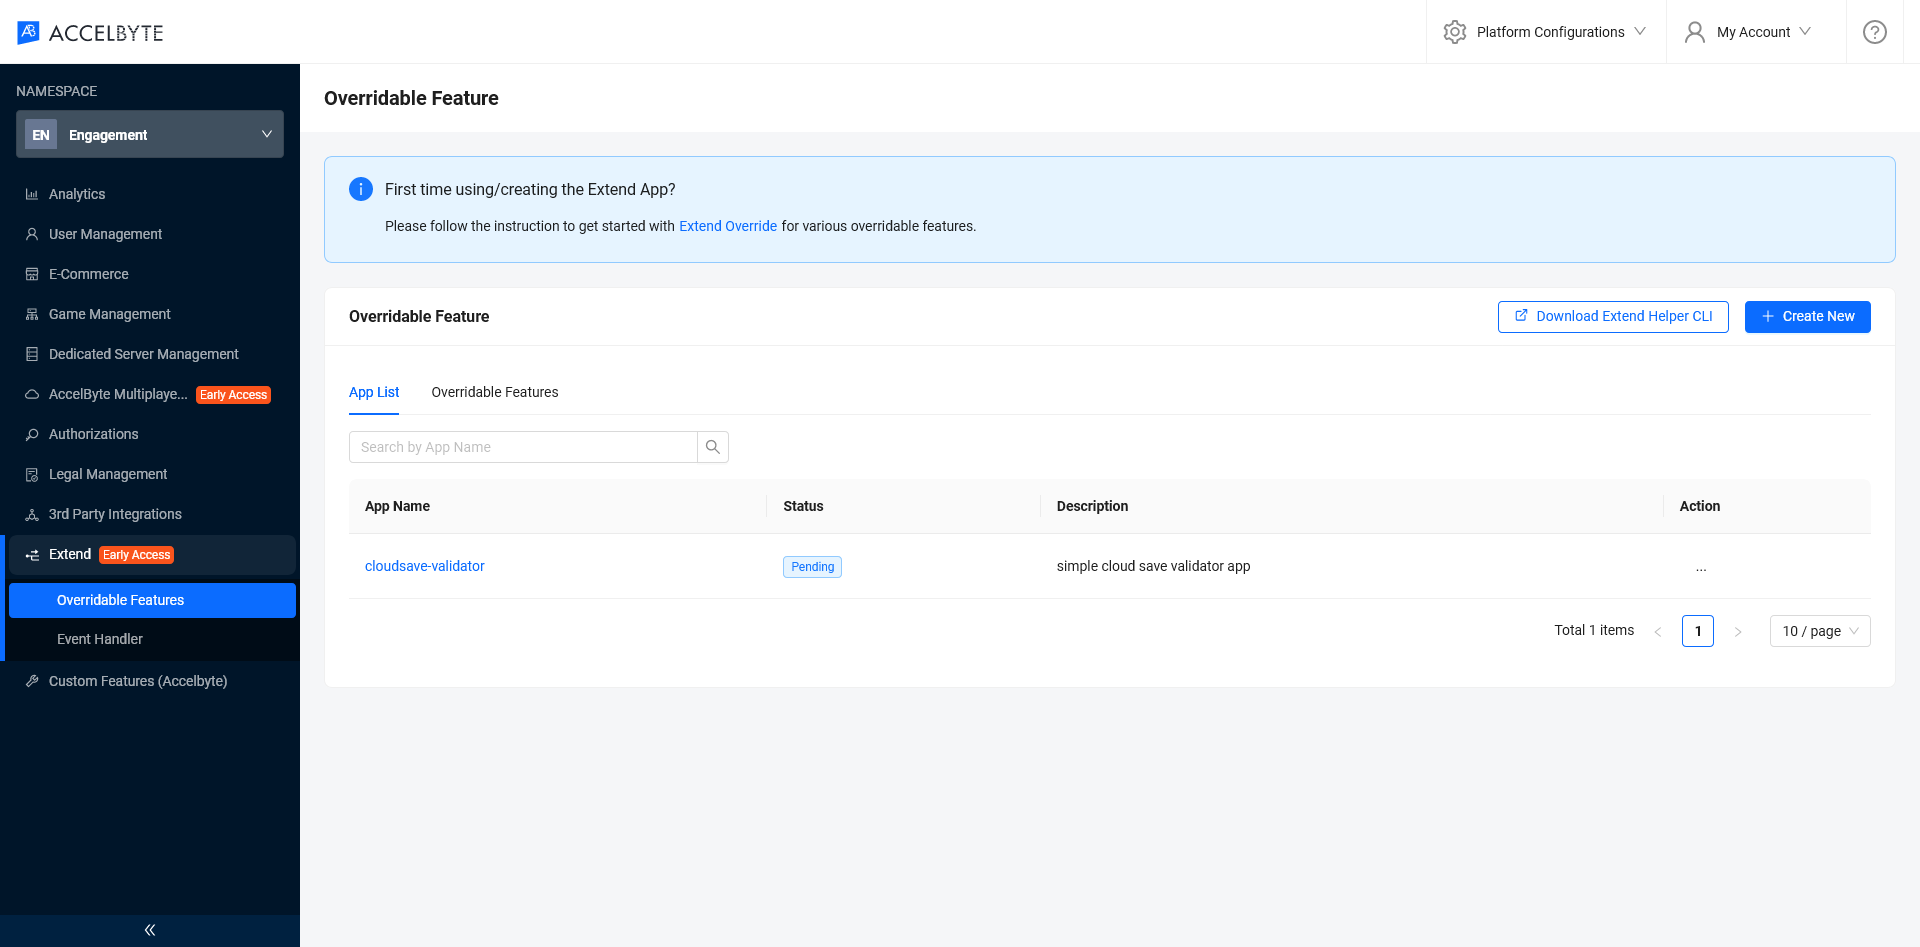
You will be redirected back to Overridable Features app list page with the newly created app with the Pending status.
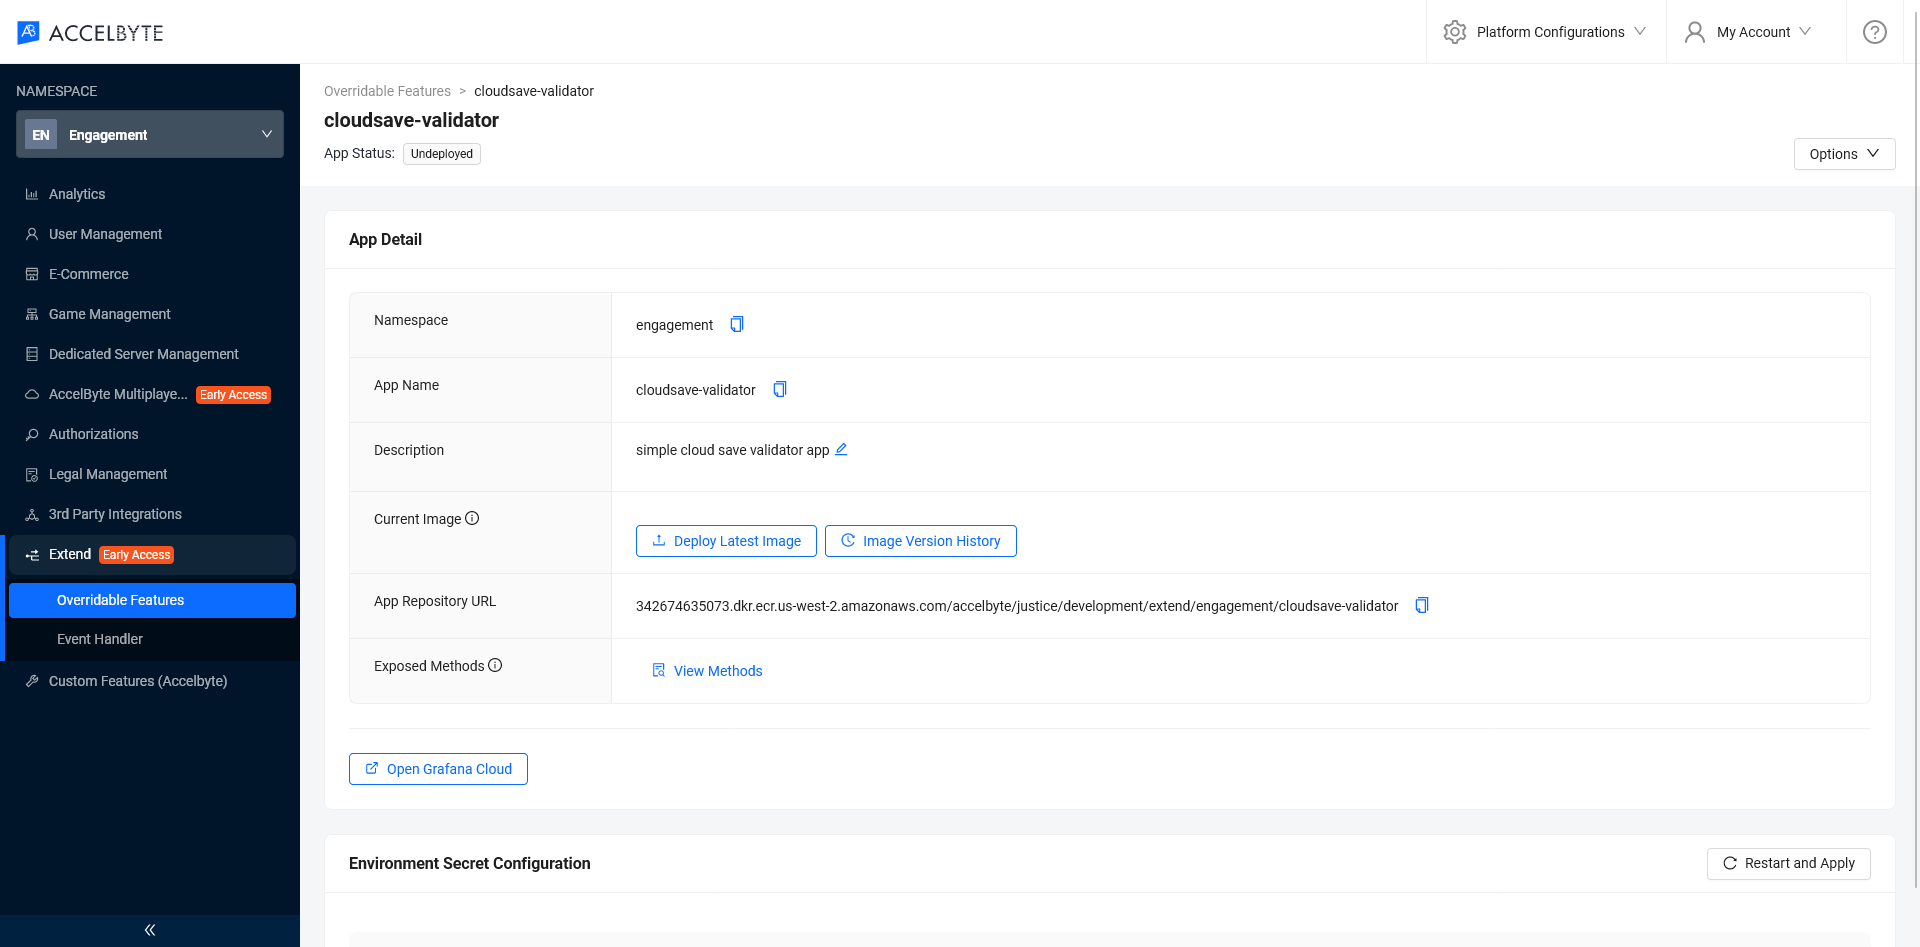
Wait until the status says Undeployed and click the app name in the list to see its details page.

Please take note of the Namespace, App Name, and the App Repository URL since we're going to use it in the next section.
Build and push the Extend app image
The extend-helper-cli is required to get the temporary docker credentials for uploading your docker image.
Run the following extend-helper-cli command. Replace the namespace and app name with what you used to create your Extend app.
extend-helper-cli dockerlogin --namespace <game namespace> --app <app name> -p | docker login -u AWS --password-stdin https://342674635073.dkr.ecr.us-west-2.amazonaws.com
Create an OAuth Client with confidential client type with the following permission. Keep the Client ID and Client Secret.
ADMIN:NAMESPACE:{namespace}:EXTEND:REPOCREDENTIALS[READ]
If you use extend-helper-cli v0.0.3 or lower, create a user if you don't have any with the following permission. Keep the Username and Password.
ADMIN:NAMESPACE:{namespace}:EXTEND:REPOCREDENTIALS[READ]
Go to the extend-helper-cli README for more details.
To directly build and push the sample app docker image, you can use the provided make script. Inside the sample app directory, run this:
make imagex_push IMAGE_TAG=v0.0.1 REPO_URL=<app-repository-url>
The REPO_URL can be copied from the app details page App Repository URL.
Deploy the Extend app
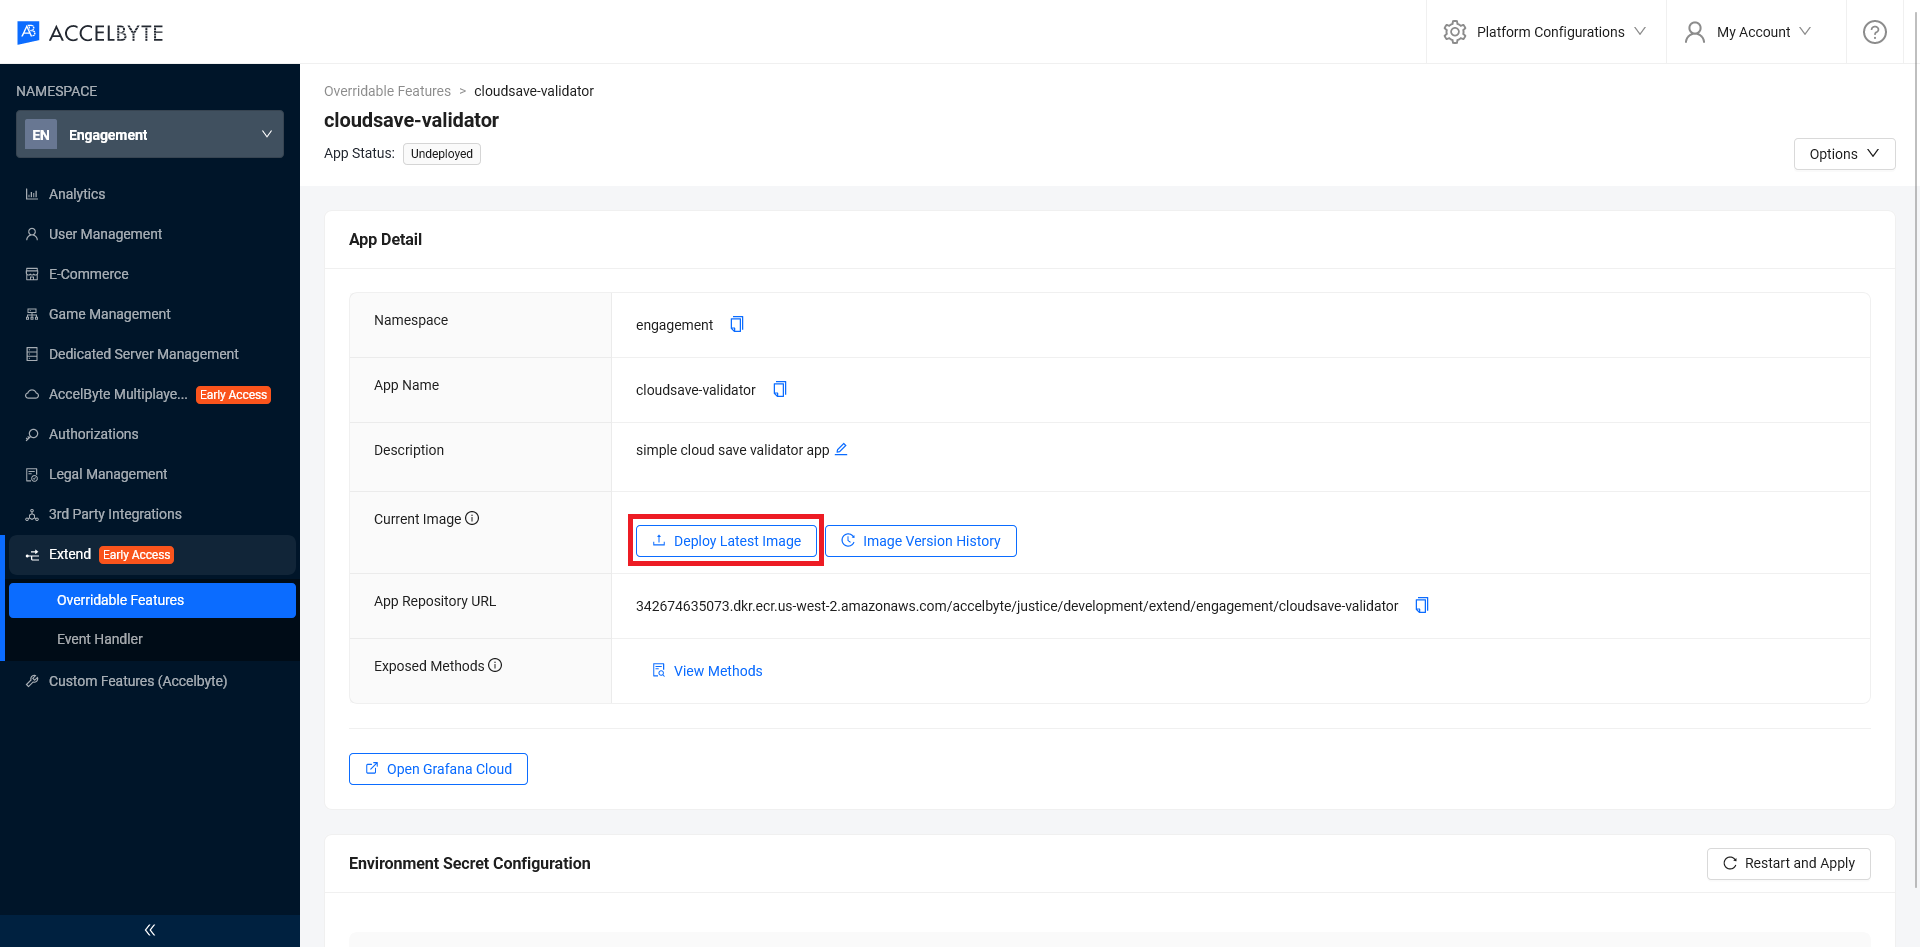
Log in to the AGS Admin Portal. On the Extend App Details page, click Deploy Latest Image and wait until the deployment is successful.
Test the Extend app
Update the custom configuration with the Extend App
In the Admin Portal, update the Cloud Save custom configuration. Go to the Overridden by section to edit existing configuration.
Select the AccelByte hosted option and choose one of the extend app. Click
Saveto finish.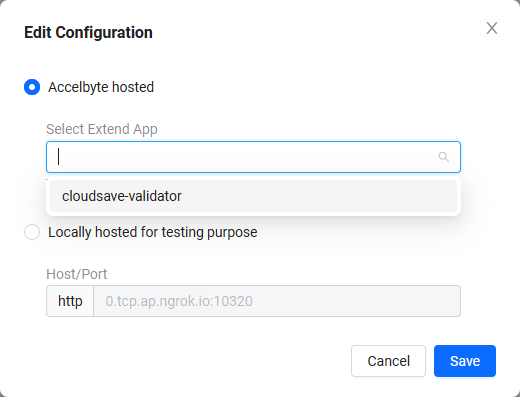
Test the Cloud Save validation (Extend)
Testing the Extend app is similar to a locally hosted app. You can follow the steps in the Test the Extend app section.
A note on Extend App behavior
In the deployment setup, there's a timeout mechanism for the gRPC Extend app managed by Envoy. This timeout occurs when there's no incoming/outgoing data or request, allowing the system to free up resources. By default, the timeout duration is 300s for streamIdleTimeout and 30s for routeTimeout.