Configure the clan and multiple group system
Overview
The AccelByte Gaming Services (AGS) Group service provides two types of group configurations to support single clan and multiple group systems.
The clan system is designed to support your game logic so that users are only able to join one group at a time; if players want to join another group with this type, they will need to leave the group they're already in. The multiple group system enables players to join many groups at the same time.
For comparison:
| Scenario | Clan system | Multiple group system |
|---|---|---|
| Join a single group | ✔️ | ✔️ |
| Join multiple groups at the same time | ❌ | ✔️ |
Goals
- Provide an understanding of the different types of group configurations.
- Provide an understanding and overview of how to configure the group configuration types.
Prerequisites
You will need access to:
- The AGS Admin Portal.
- The AccelByte Group API documentation.
Configure a group in the Admin Portal
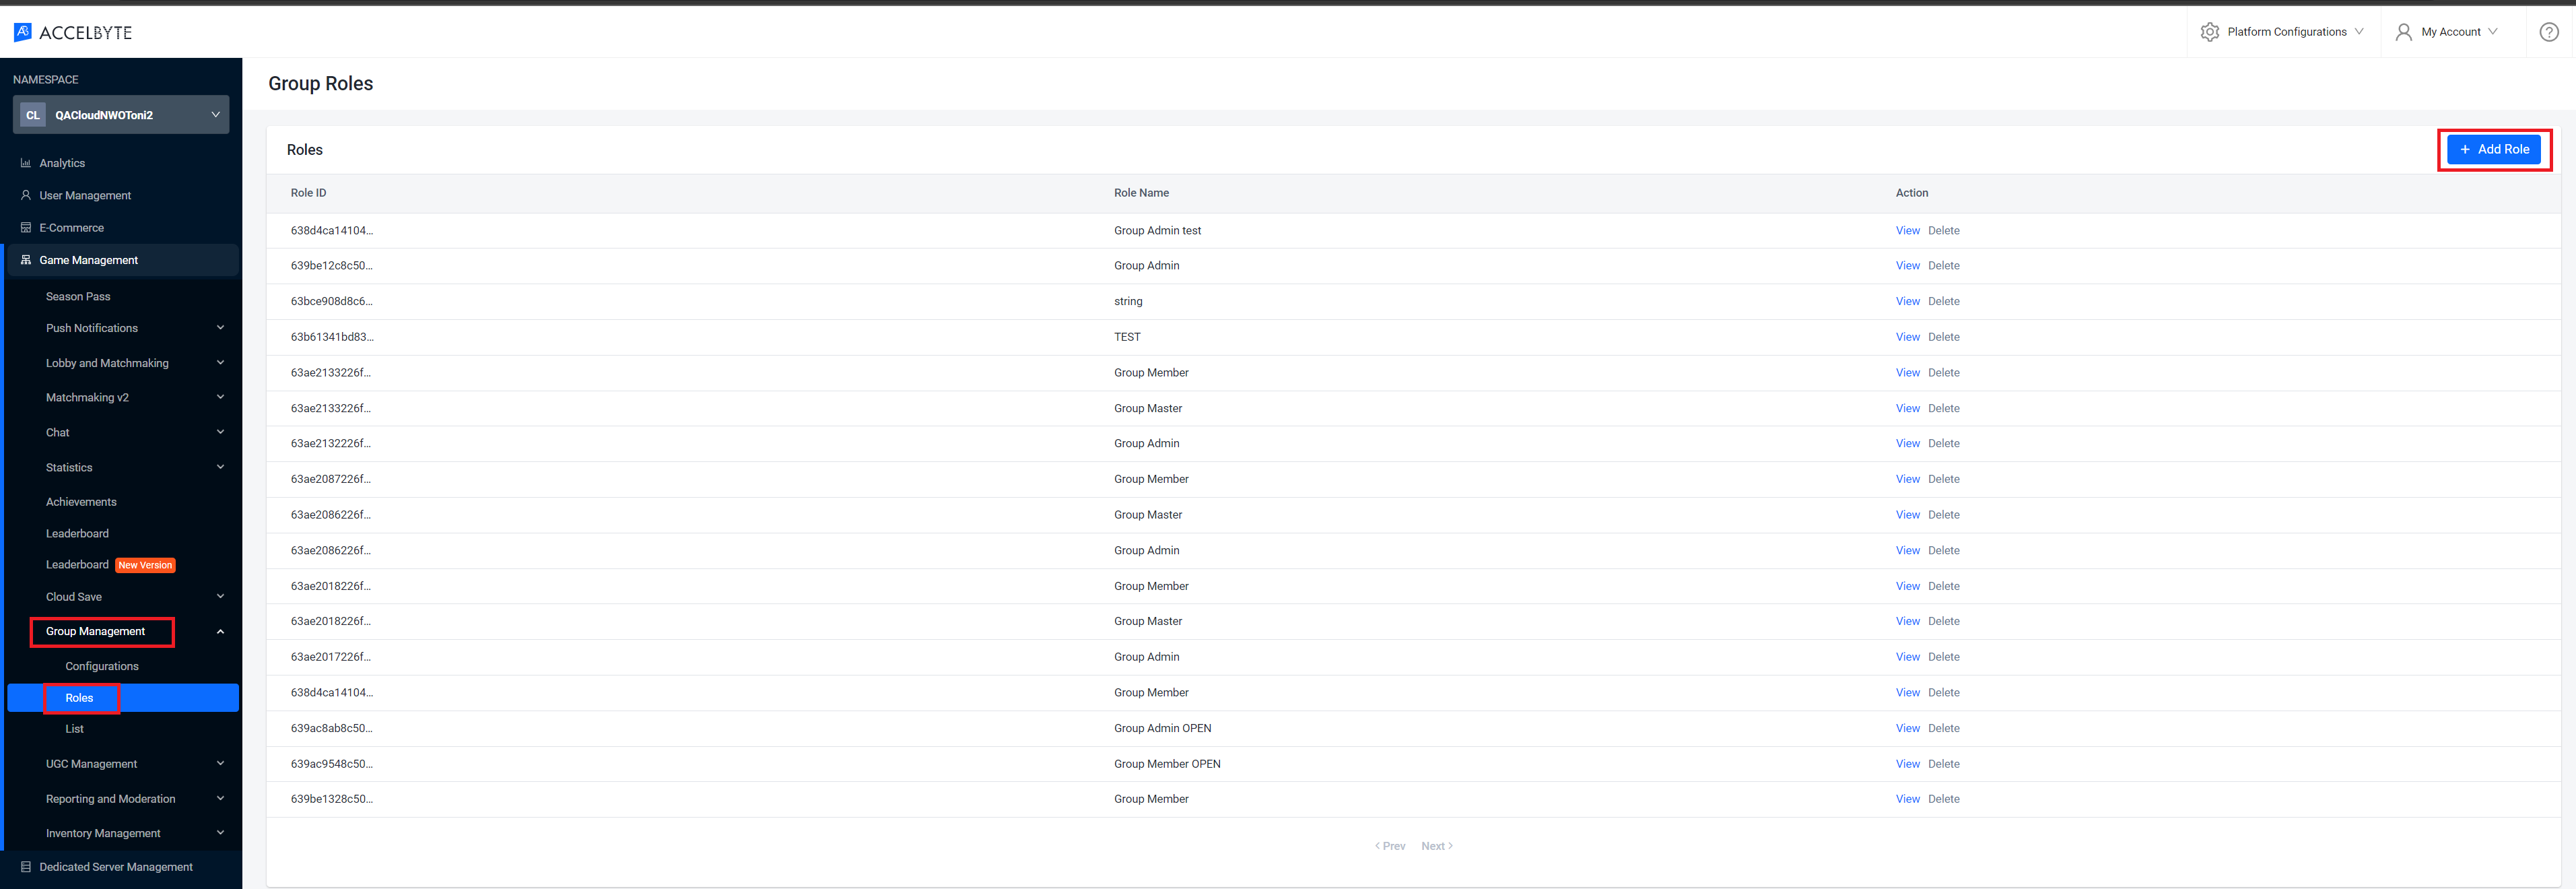
Create a group role
- On the Group Roles page in the Admin Portal, click the Add Role button.
- A pop-up will appear. Enter the Role Name for your new role.
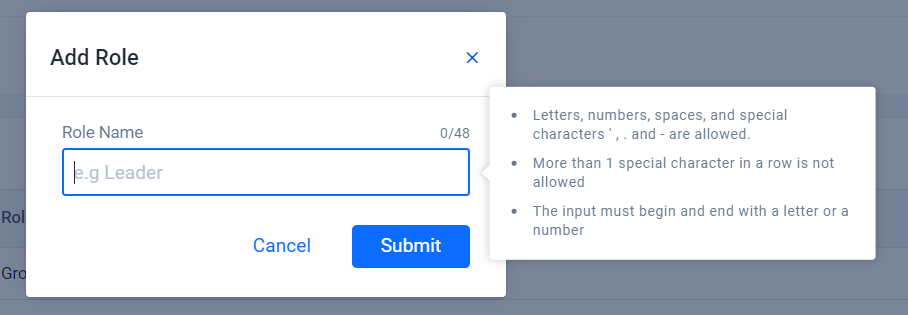
- Click Submit to save the group role.
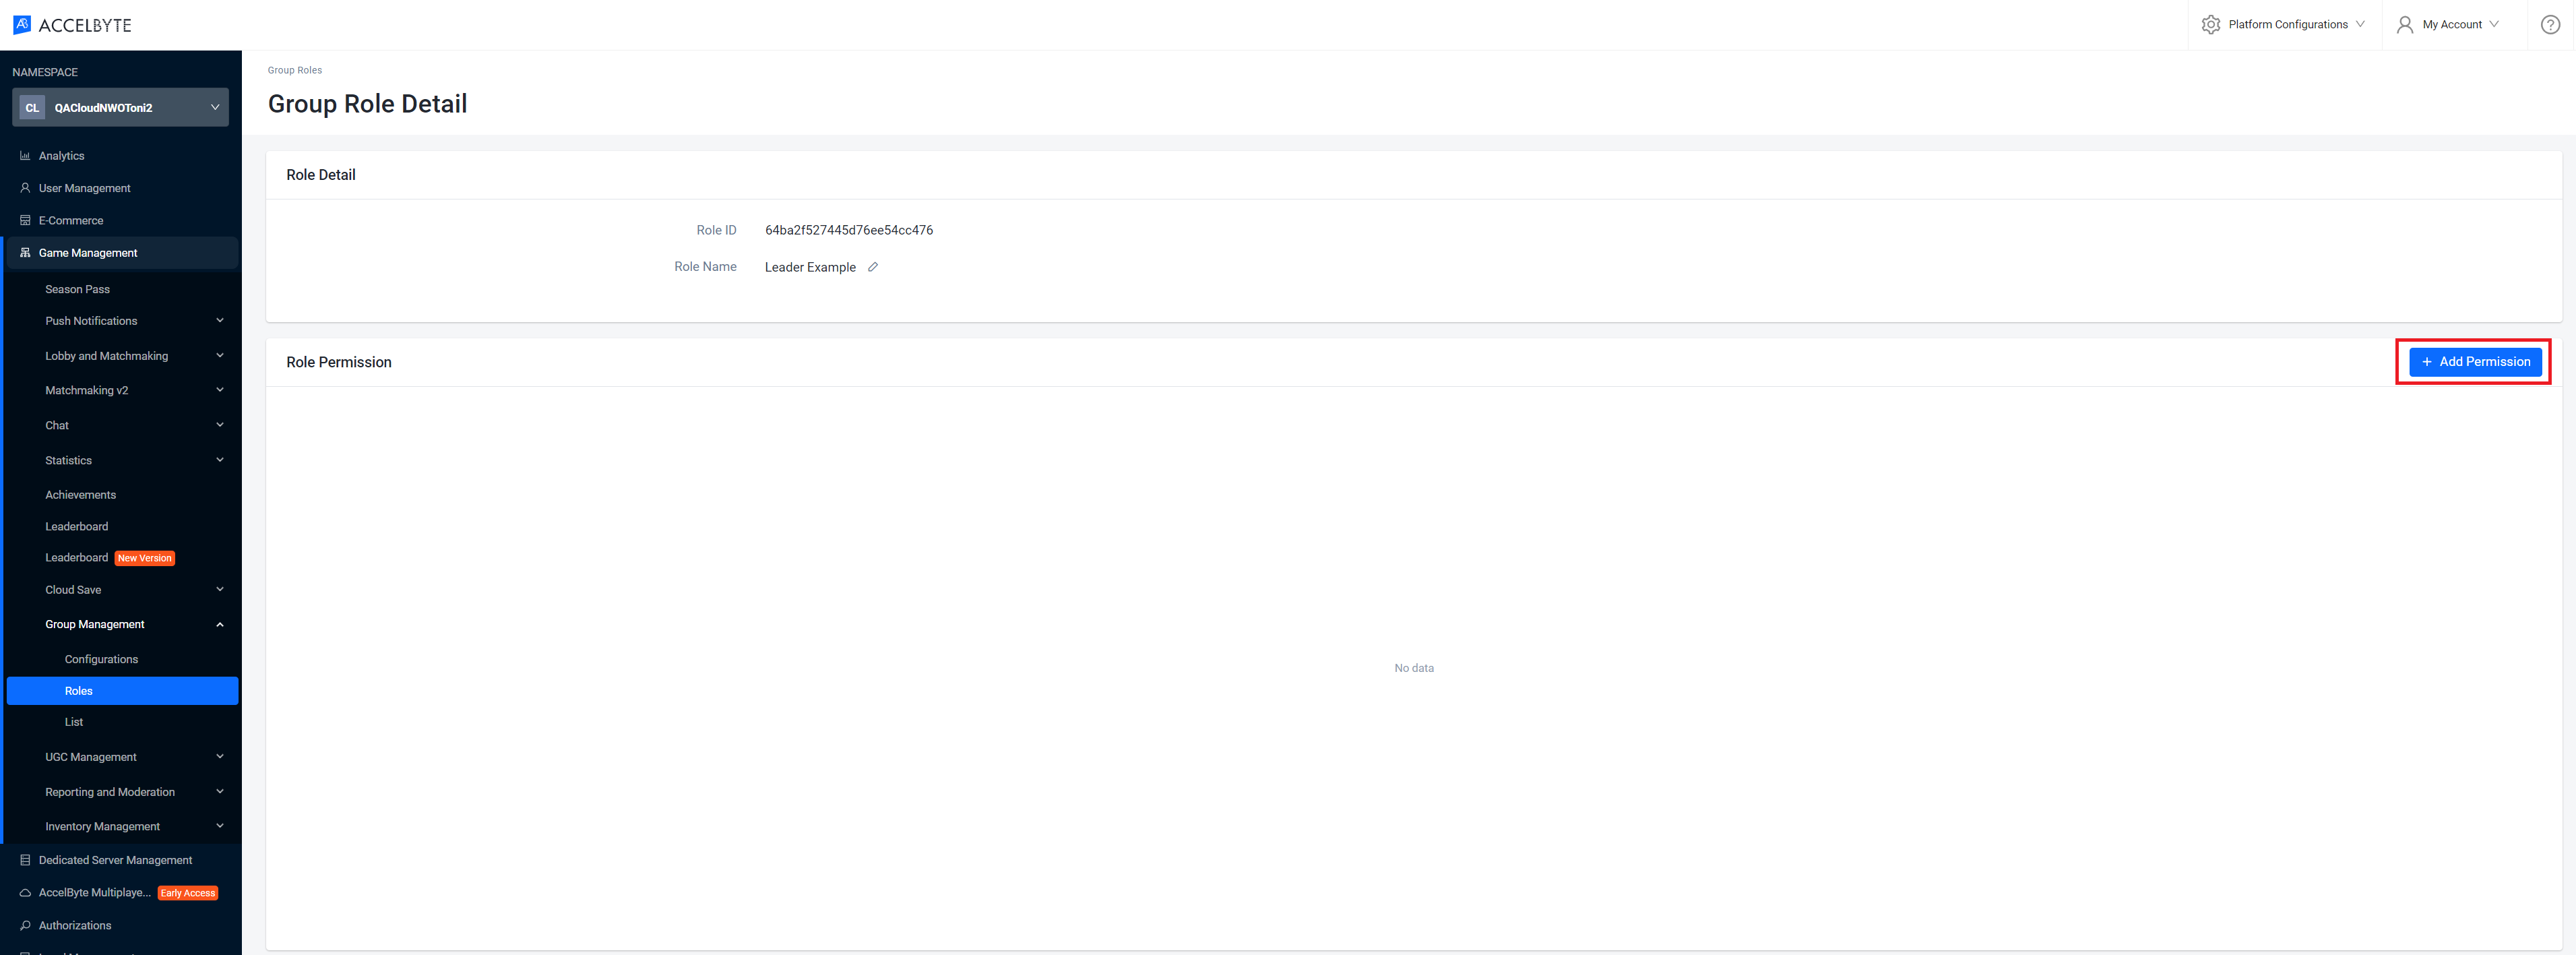
Add permissions to a group role
In the Admin Portal, go to the group role you wish to add permissions to. On its Group Role Detail page, click the Add Permission button.
A pop-up will appear. Enter the Permission name for your new permission.
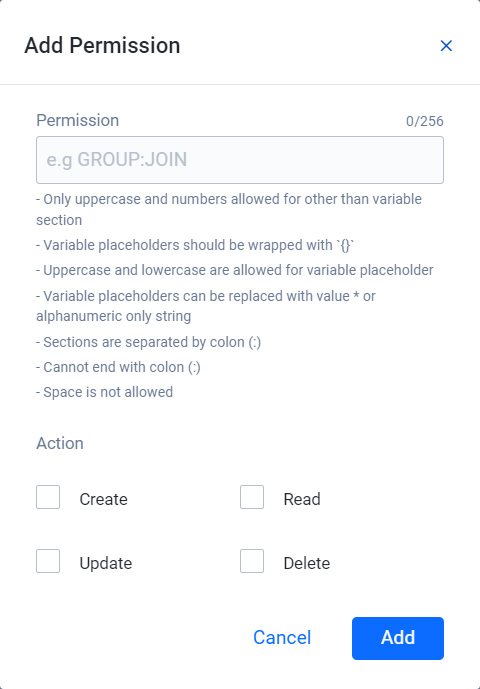 note
noteThe role will appear when you add the group configuration later.
Click Add to save the permission.
Create a group configuration
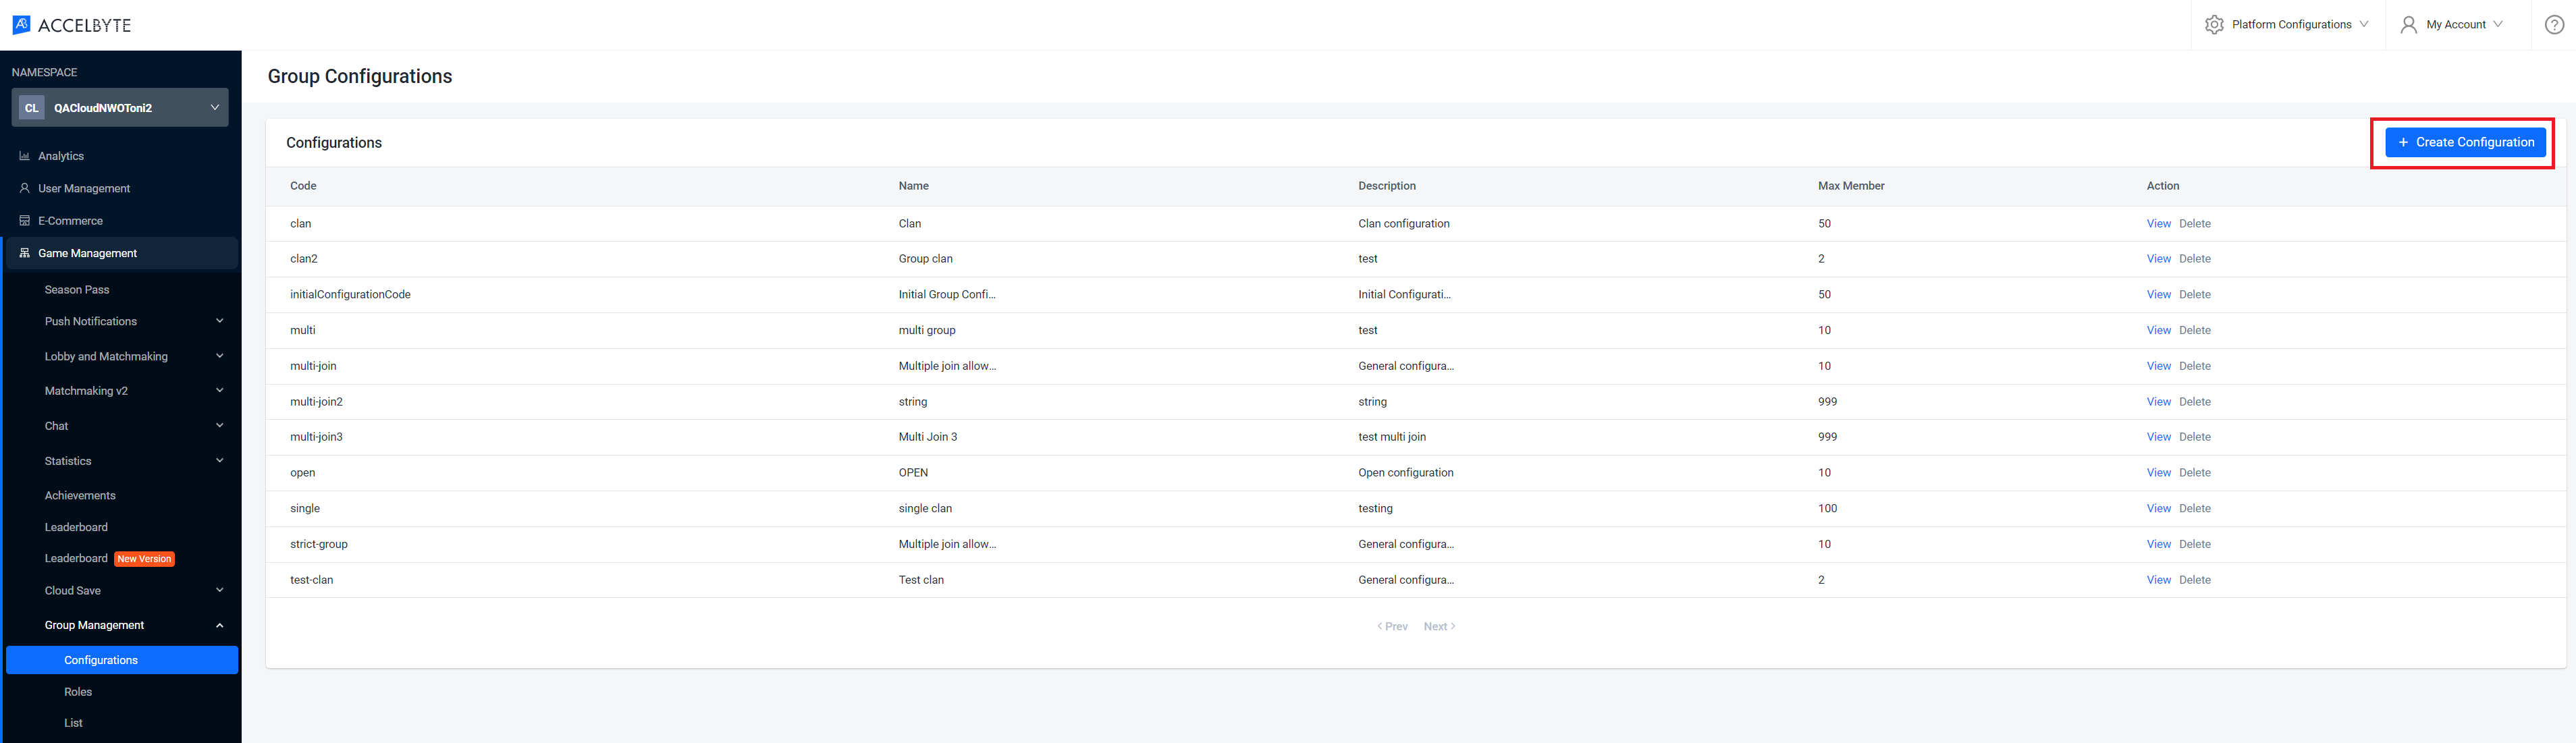
In this section, you will create a group configuration for a single clan system or a multiple group system.
On the Group Configurations page of the Admin Portal, click the Create Configuration button.
A pop-up will appear. Fill in the required fields.
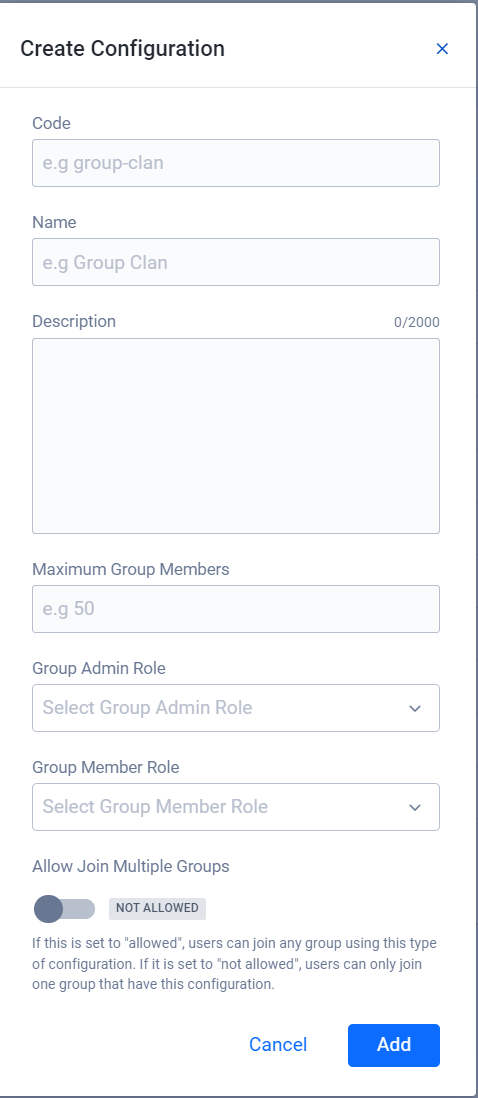
- Fill in Code with a unique identifier in an appropriate format (e.g., "group-clan").
- Fill in the Name and Description to provide extra information about the group configuration you're creating.
- Set the limit of the number of members that are allowed to join the group by filling in the Maximum Group Members.
- Use the dropdowns for Group Admin Role and Group Member Role to select a role for each from a list of roles that have been created.
- You can specify your group configuration to allow or disallow players to join a multiple groups at the same time by toggling Allow Join Multiple Groups.
- If it is set to ALLOWED, users can join any group using this type of configuration.
- If it is set to NOT ALLOWED, users can only join one group that has this configuration.
Click Add to complete and create your group configuration.