Unreal Engine Module - Login with Steam - Set Up Steam Login Method
Configure Steam Login Method in Admin Portal
In this tutorial section, you will learn how to add a Steam login method in the Admin Portal.
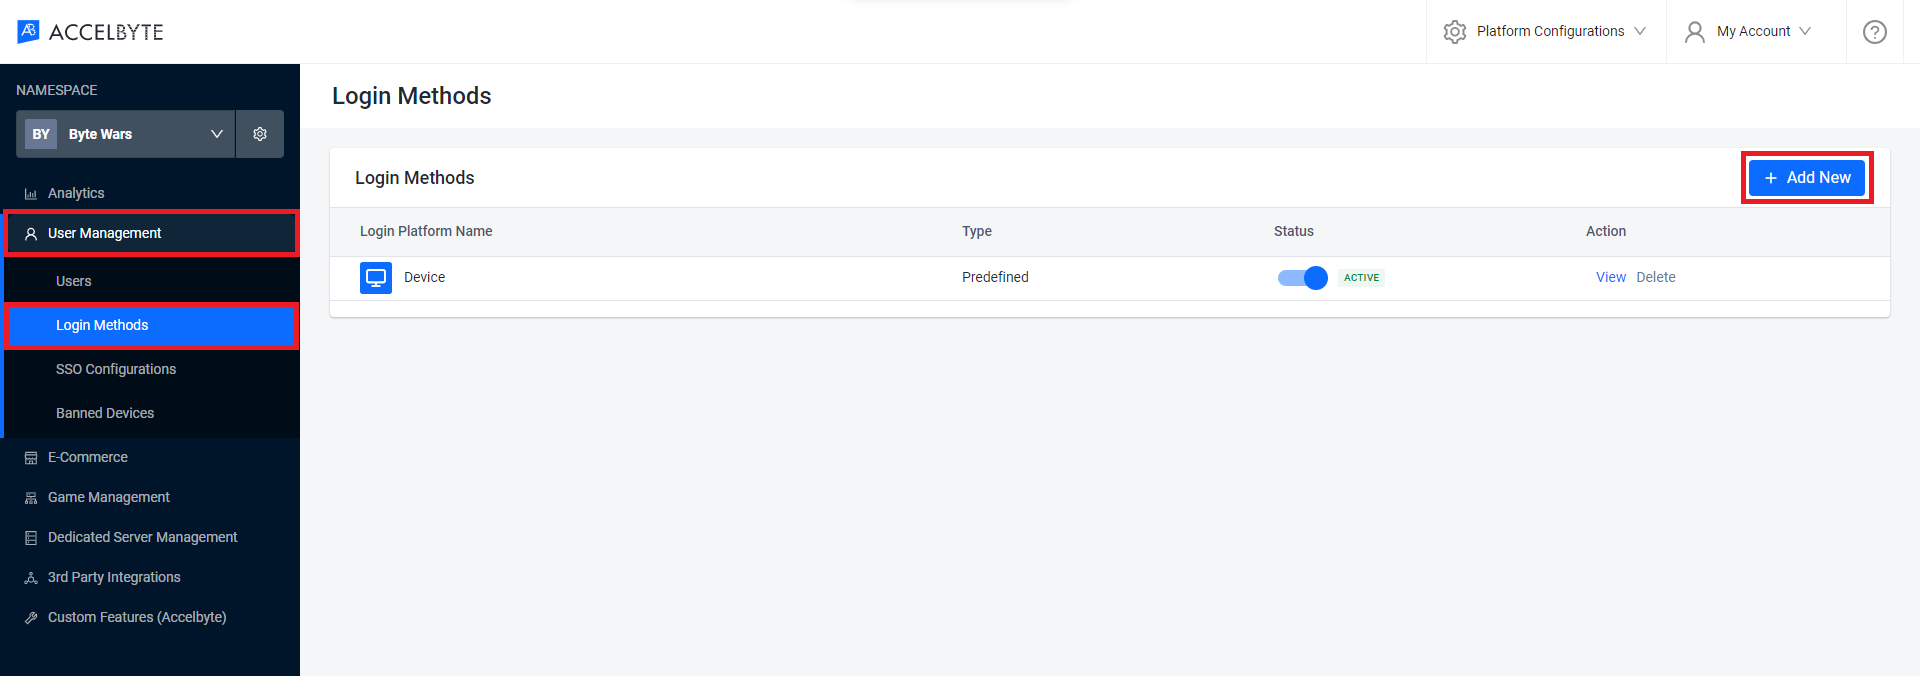
To activate the Steam login method, open AccelByte's Demo Admin Portal dashboard and select your game namespace. From the side menu panel of the dashboard, select User Management > Login Methods > Add New to add a new login method.
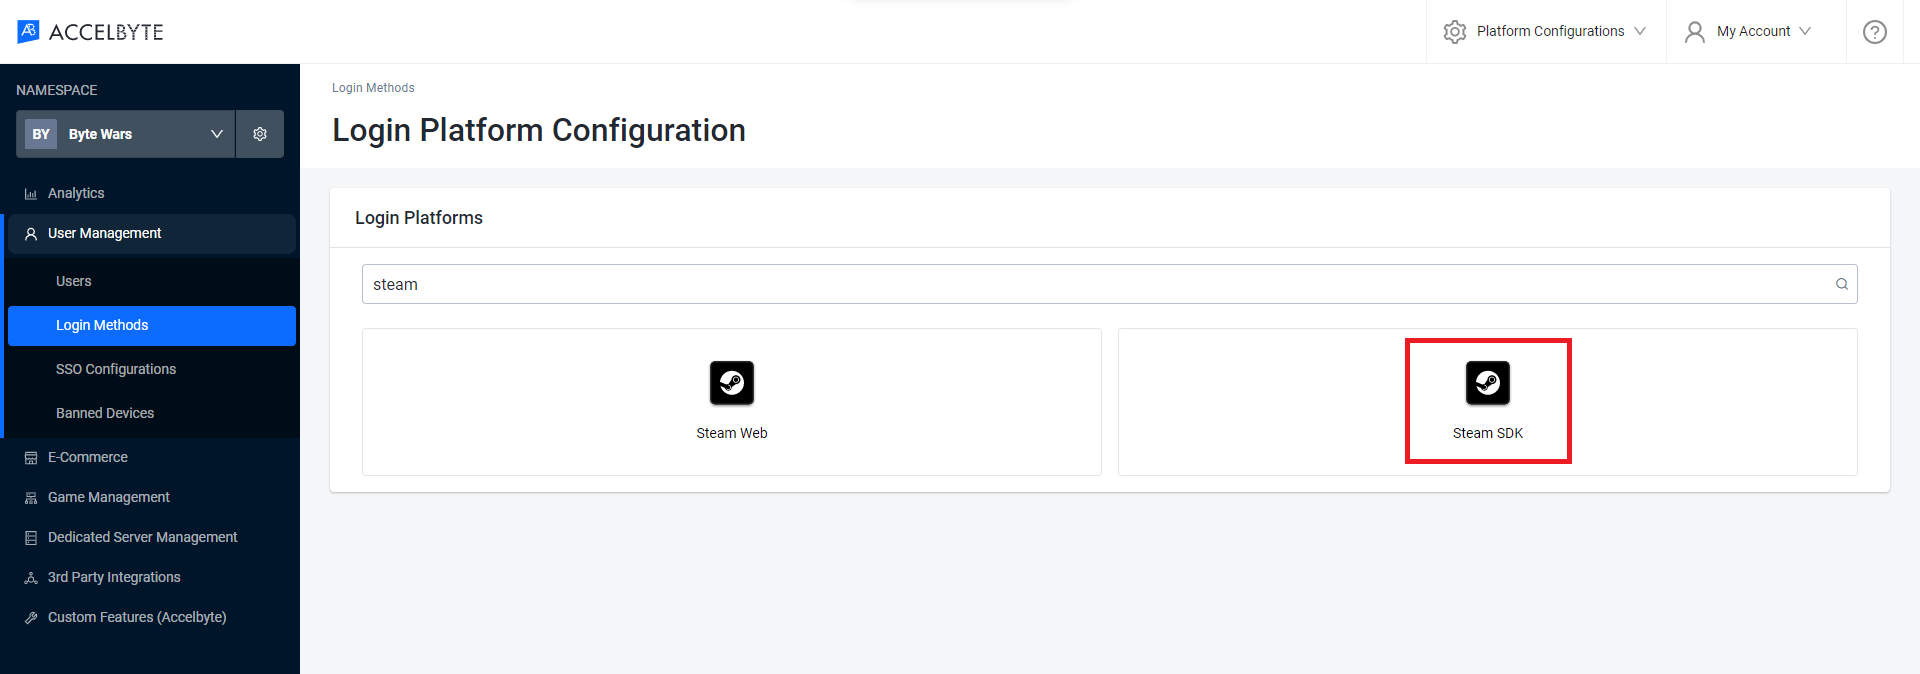
Then, you will be redirected to a new menu that displays all available log in methods supported by AccelByte. From the available options, select Steam SDK to add the Steam login method.
From there, a dialog window will pop up where you will need to fill in some information relating to your Steam application. Set the App ID and Steam Web API Key based on your Steam configuration. For the Redirect URI, set it to the default value, which is
http://127.0.0.1. Once done, click the Create button to finalize the configuration.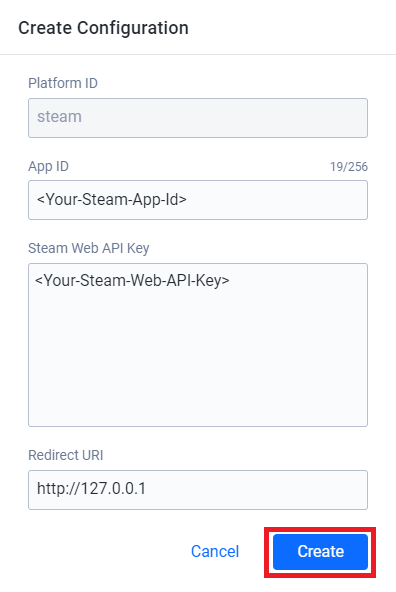
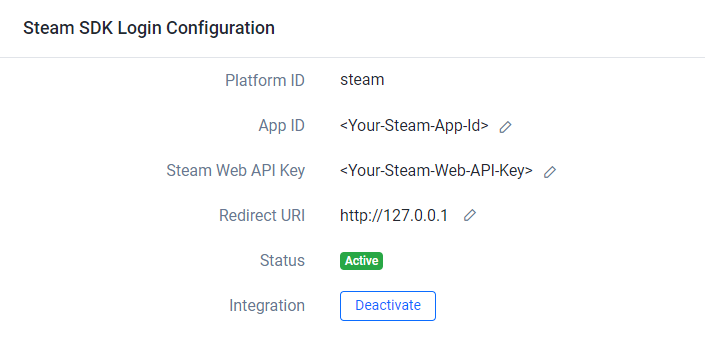
Now, you should see a new menu that displays your configuration settings. Your configuration status should show as Active. If it is not, you can manually click on the Activate button to activate the Steam login method.
Congratulations! You have successfully configured and activated the Steam login method in the Admin Portal.
Configure Steam OSS
To use Steam as Single Platform Auth, you need to configure the Steam OSS in the game project.
Open the Byte Wars project and open the
AccelByteWars.uprojectfile. Then, under thePluginsattribute, add a new entry for Steam OSS like the following. We have already set this up in Byte Wars, skip to the next step.{
...
"Plugins": [
...
{
"Name": "OnlineSubsystemSteam",
"Enabled": true
}
]
}Now, open the
/Config/DefaultEngine.inifile and add the following code. Replace theSteamDevAppIdwith your Steam App ID.[OnlineSubsystemSteam]
bEnabled=true
SteamDevAppId="<replace-with-your-Steam-App-ID>"
bUseSteamNetworking=falseNext, add your Steam App ID again to the
/Script/AccelByteUe4Sdk.AccelByteSettingsattribute in the/Config/DefaultEngine.ini.[/Script/AccelByteUe4Sdk.AccelByteSettings]
AppId="<replace-with-your-Steam-App-ID>"Then, set the Native Platform Service to Steam in the
/Config/DefaultEngine.ini.[OnlineSubsystem]
DefaultPlatformService=AccelByte
...
[OnlineSubsystem]
NativePlatformService=SteamNow, build your project and open it in the Unreal Editor.
To check whether the Steam OSS has been configured properly, you need to run your Steam launcher first.
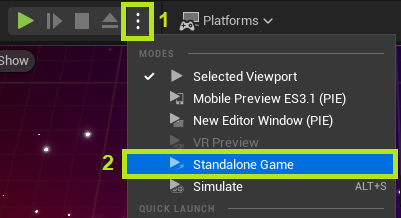
After that, play your game in the Standalone mode. This is because Unreal Engine loads the Steam OSS only in Standalone mode.
When you run your game in Standalone mode, you should see a Steam pop-up in the bottom-right corner.

Congratulations! You have successfully configured Steam OSS.