Unreal Engine Module - Initial Setup - Install the AccelByte Game SDK
About AccelByte Game SDK
The AccelByte Game Software Development Kit (SDK) for Unreal Engine provides a way to integrate AccelByte Gaming Services (AGS) into your game. The AccelByte Game SDK can be used in both your game's client and server builds/
The AccelByte Game SDK is made up of three parts. Each part has its own repository:
- AccelByte Unreal Online Subsystem GitHub Repository
- AccelByte Unreal SDK GitHub Repository
- AccelByte Network Utilities GitHub Repository
The AccelByte Unreal Online Subsystem (OSS) acts as a high-level API to interact with AGS making it quicker and easier to integrate with your game. In Byte Wars, we only use the AccelByte Unreal OSS, and we recommend this as the way to integrate AGS into your game as well.
The AccelByte Unreal OSS implements Unreal's Online Subsystem interfaces. You can find out more about Online Subsystems here Epic Games's Online Subsystem Documentation.
The AccelByte Unreal SDK and Network Utilities are lower level supporting APIs. You will not interact directly with them in Byte Wars, but it's useful to know they exist. You can find out more about the Unreal SDK and Network Utilities here:
- AccelByte Unreal SDK: A library that consists of APIs for the game client and game server to send requests to AccelByte services.
- AccelByte Network Utilities: A library that consists of network functionalities to communicate between game clients for P2P networking.
Project setup
To continue on this tutorial, switch the Byte Wars repository on your local to tutorialmodules branch and skip right to Set Up a Public IAM Client for the AccelByte Game SDK. If you want to know how to set up AccelByte's SDKs on your own project, then continue reading this section.
To switch your local repository, open a Command Prompt or Windows PowerShell, navigate to your local repository's root folder, and run the following command:
git switch -f tutorialmodules
Clone the AccelByte Game SDK
To use AGS, you first need to clone the AccelByte Game SDK plugins from our GitHub repos.
In this tutorial, we use a specific version of the AccelByte Game SDK that is tested as compatible with Byte Wars. Although you can use a newer version than the one shown, we recommend that you use the same version to avoid any possible incompatibilities. You can find a list of all available AccelByte Game SDK versions in the AccelByte Documentation > Release Notes.
Clone the AccelByte Unreal OSS
Open a Command Prompt or Windows PowerShell in the Byte Wars project folder (this is the folder containing the
.uprojectfile)Add the AccelByte Unreal OSS submodule using the following command
git submodule add git@github.com:AccelByte/accelbyte-unreal-oss.git Plugins/AccelByte/OnlineSubsystemAccelByteCheckout the AccelByte Unreal OSS submodule using the following commands
cd Plugins/AccelByte/OnlineSubsystemAccelByte

git checkout 0.8.11
Clone the AccelByte Unreal SDK
Go back to the Byte Wars project folder and add the AccelByte Unreal SDK submodule using the following command
git submodule add git@github.com:AccelByte/accelbyte-unreal-sdk-plugin.git Plugins/AccelByte/AccelByteUe4SdkCheckout the AccelByte Unreal SDK submodule using the following commands
cd Plugins/AccelByte/AccelByteUe4Sdk

git checkout 21.0.1
Clone the AccelByte Network Utilities
Go back to the Byte Wars project folder and add the AccelByte Network Utilities submodule using the following command
git submodule add git@github.com:AccelByte/accelbyte-unreal-network-utilities.git Plugins/AccelByte/AccelByteNetworkUtilitiesCheckout the AccelByte Network Utilities submodule using the following commands
cd Plugins/AccelByte/AccelByteNetworkUtilities

git checkout 2.9.0
To confirm all the plugins are set up correctly as submodules, check that the %PROJECTPATH%/.gitmodules file contains the configuration for all the submodules.
[submodule "Plugins/AccelByte/OnlineSubsystemAccelByte"]
    path = Plugins/AccelByte/OnlineSubsystemAccelByte
    url = git@github.com:AccelByte/accelbyte-unreal-oss.git

[submodule "Plugins/AccelByte/AccelByteUe4Sdk"]
    path = Plugins/AccelByte/AccelByteUe4Sdk
    url = git@github.com:AccelByte/accelbyte-unreal-sdk-plugin.git

[submodule "Plugins/AccelByte/AccelByteNetworkUtilities"]
    path = Plugins/AccelByte/AccelByteNetworkUtilities
    url = git@github.com:AccelByte/accelbyte-unreal-network-utilities.git
Configure the Byte Wars Project to use the AccelByte Game SDK plugins
Now that the plugins are correctly cloned in Plugins/AccelByte, you need to tell the Byte Wars project to use the AccelByte Game SDK plugins.
Add all the plugins to your
AccelByteWars.uprojectfile."Plugins": [
...
{
"Name": "AccelByteUe4Sdk",
"Enabled": true
},
{
"Name": "OnlineSubsystemAccelByte",
"Enabled": true
},
{
"Name": "AccelByteNetworkUtilities",
"Enabled": true
}
]Add the plugins to your
/Source/AccelByteWars.Target.csfileExtraModuleNames.AddRange(
new string[]
{
"AccelByteWars",
"AccelByteUe4Sdk",
"OnlineSubsystemAccelByte",
"AccelByteNetworkUtilities"
}
);Add the plugins to your
/Source/AccelByteWarsEditor.Target.csfileExtraModuleNames.AddRange(
new string[]
{
"AccelByteWars",
"AccelByteUe4Sdk",
"OnlineSubsystemAccelByte",
"AccelByteNetworkUtilities"
}
);Register the plugins to
PublicDependencyModuleNamesin your/Source/AccelByteWars/AccelByteWars.Build.csfilePublicDependencyModuleNames.AddRange(
new string[]
{
...
"AccelByteUe4Sdk",
"AccelByteNetworkUtilities",
"OnlineSubsystemAccelByte",
...
}
);With the plugins now registered, we need to repeat the steps in Module: Initial Setup - Clone and Run Byte Wars - Compile Byte Wars to ensure that the game still compiles and runs
ImportantYou must regenerate the Visual Studio project files again before you try to compile the project.
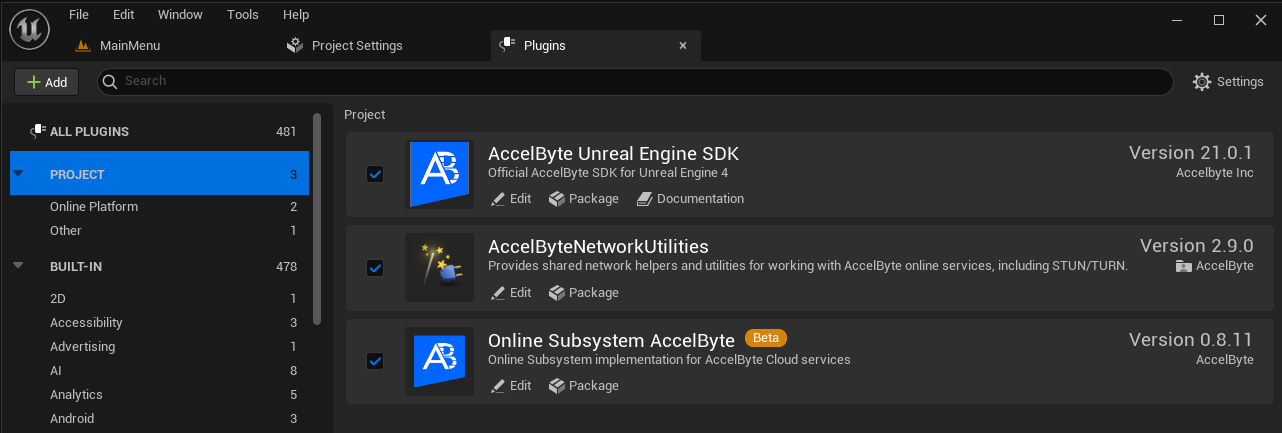
Run the Unreal Editor after the compilation has finished, then make sure the AccelByte Game SDK Plugins are enabled for your project in the Unreal Editor by going to Edit > Plugins from the top menu bar. It should look the same as in the image below
Set up a public IAM Client for the AccelByte Game SDK
In order for the AccelByte Game SDK to be able to access your AccelByte Client Environment, you will need to add a public IAM Client in the AccelByte Admin Portal.
Go to your AccelByte Admin Portal's domain. In this tutorial we are using AccelByte's Demo Environment.
Login to the Admin Portal with your account. The account you log in with must have an Admin Role.
NoteIf you don't have an account with an Admin Role then please ask for help.
Go to the Namespace page.
Add a new Game Namespace by clicking on the + Create New Button. Fill in the form with the following:
TipFor more information about these fields and how to use Namespaces see Resources
- Enter
Byte Warsas the Display Name - Enter
bytewarsas the Namespace ID
- Enter
Click Create at the bottom of the form to create the new Game Namespace.
Next up, add a new IAM Client by going to Authorizations > IAM Clients in the sidebar on the left. Then, click the + Create New button. Fill in the form with the following:
TipFor more information about these fields and how to use IAM Clients see Additional Resources
- Select
Publicas the Type. - Enter
ByteWars-GameClientas the Client Name. - Enter
http://127.0.0.1as the Redirect URI. - Leave all other fields unchanged.
- Select
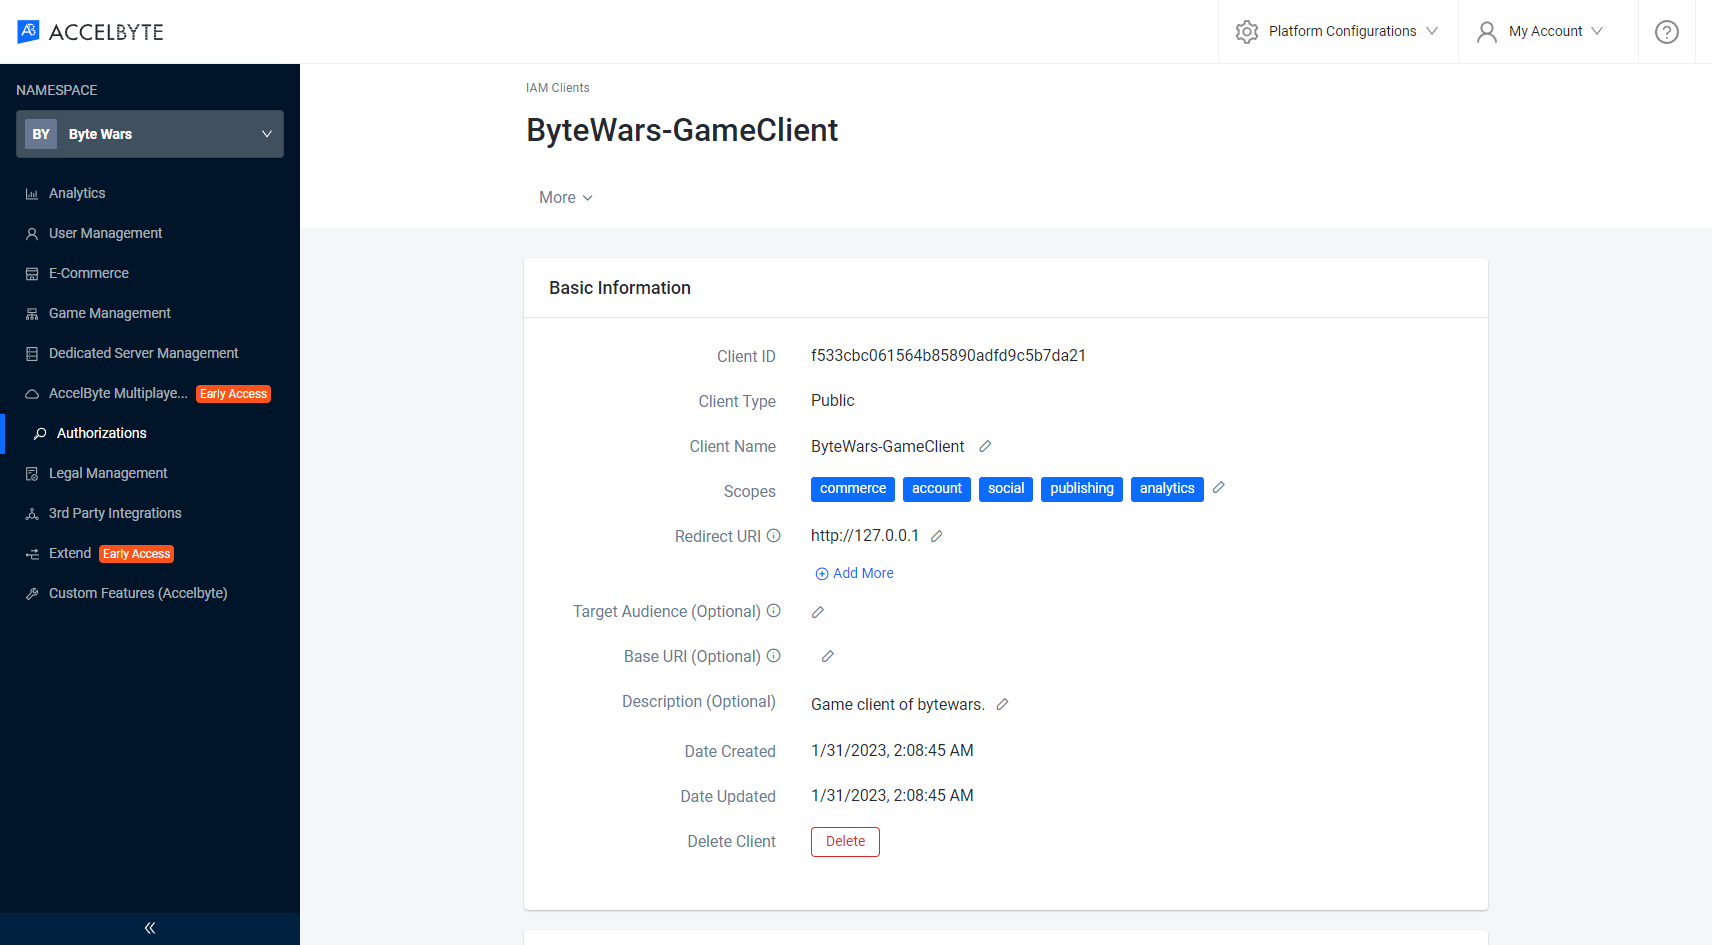
Click Create at the bottom of the form to create the new IAM Client.
After the IAM Client is created it should look the same as the image below.
Configure the AccelByte Game SDK to Use Your IAM Client
Before using the AccelByte Game SDK, you will need to configure it to use the IAM Client you just created. This can be done by editing %PROJECTPATH%/Config/DefaultEngine.ini in the Byte Wars project.
Open
/Config/DefaultEngine.iniin a text editorFind the
[/Script/AccelByteUe4Sdk.AccelByteSettings]section insideDefaultEngine.iniand add the information as shown below. Replace theXXXXXXXXwith the Client ID generated in Set Up a Public IAM Client for the AccelByte Game SDK- AGS
- AGS Starter
[/Script/AccelByteUe4Sdk.AccelByteSettings]
ClientId=XXXXXXXX
ClientSecret=
Namespace=bytewars
PublisherNamespace=accelbyte
BaseUrl="https://demo.accelbyte.io"[/Script/AccelByteUe4Sdk.AccelByteSettings]
ClientId=XXXXXXXX
ClientSecret=
Namespace=bytewars
PublisherNamespace=accelbyte
BaseUrl="https://<Game TitleID>.gamingservices.accelbyte.io"TipClientIdis randomly generated and used to uniquely identify the IAM Client. It can be found in the AccelByte Admin Portal under the IAM Client you created in step #6 of Set Up a Public IAM Client for the AccelByte Game SDK.ClientSecretis left blank because our IAM Client is public. If you are using a private IAM Client you would fill this field with the associated secret from the AccelByte Admin Portal.Namespaceis the NameSpace ID of the Game Namespace you created in step #4 of Set Up a Public IAM Client for the AccelByte Game SDK. This should not to be confused with the Display Name which is a convenience name for use in the AccelByte Admin Portal.
Check the AccelByte Game SDK is Configured Correctly
As a last step we want to check that the AccelByte Game SDK initializes successfully.
Ensure that you have log level for
LogAccelByteOSSinConfig/DefaultEngine.iniset to Log or higher.[Core.Log]
LogAccelByteOSS=LogSave and close the
DefaultEngine.inifile.Run the Unreal Engine editor, show the Output Log Window by going to Window > Output Log, if "AccelByte API initialized!" log is there, then the SDK is configured properly.
LogAccelByteOSS: Starting OnlineSubsystemAccelByte module!
...
LogAccelByteOSS: AccelByte API initialized!
Alternatively, you can run the game in Unreal Editor to check whether your SDK is configured properly or not. When you play the game, you should end up in one of the following scenarios.
If the SDK configured properly, you will be redirected to the Main Menu.
If the SDK is not configured properly, an error message will be shown.

At this stage, you might see a few errors from LogAccelByte stating you have not configured the DefaultEngine.ini properly, yet. If you are planning to continue with the tutorial, using tier higher than the AccelByte Gaming Service (AGS) Starter tier, and are planning to use dedicated server, ignore those message, as it will be resolved later and will not hinder the flow of the tutorial. Otherwise, open DefaultEngine.ini, navigate to [/Script/AccelByteUe4Sdk.AccelByteServerSettings] and set the value of ClientId, Namespace, and BaseUrl to " ".
Resources
- The files used in this tutorial section are available in the Byte Wars GitHub repository.
- Access: Namespace
- Access: IAM Clients