Unreal Engine Module - Run a Dedicated Server on AccelByte Multiplayer Server (AMS) - Upload the dedicated server to AMS
Set up an AMS account
To use the AccelByte Multiplayer Servers (AMS) service, you need to configure it first. In this section, you will learn how to create an initial server configuration for your AMS.
Open your Demo AGS Admin Portal dashboard. Select your game namespace and go to AccelByte Multiplayer Servers > Setup AMS Account.
Under Don't have a AMS Account?, enter an account name.
Click Create and then Yes on the confirmation notice.
Congratulations! You have created an AMS account.
Upload dedicated server to AMS
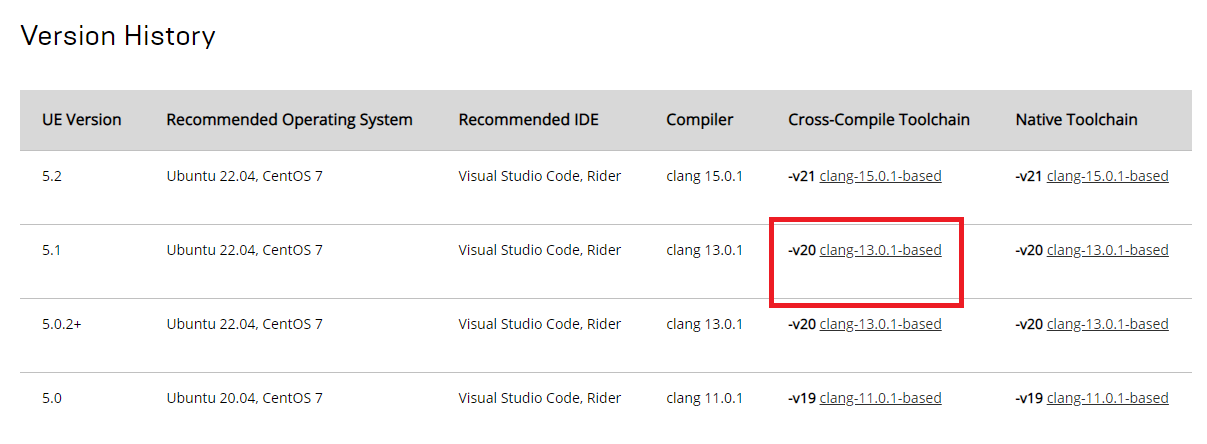
In order to upload your dedicated server to AMS, you need to package your game as a Linux game server. To package a Linux game server in Unreal Engine, you need to install the Cross-Compile Toolchain. You can download it from the Unreal Engine website here. From that website, find the version history section and download and install the -v20 clang-13.0.1-based version. Once it is installed, restart your computer and follow the steps below.
Open your Byte Wars project in the Unreal Engine editor.
In the Unreal editor, package your project by going to Platforms > Linux, selecting Shipping and AccelByteWarsServer, and clicking Package Project. Then, save the project to a location on your computer.
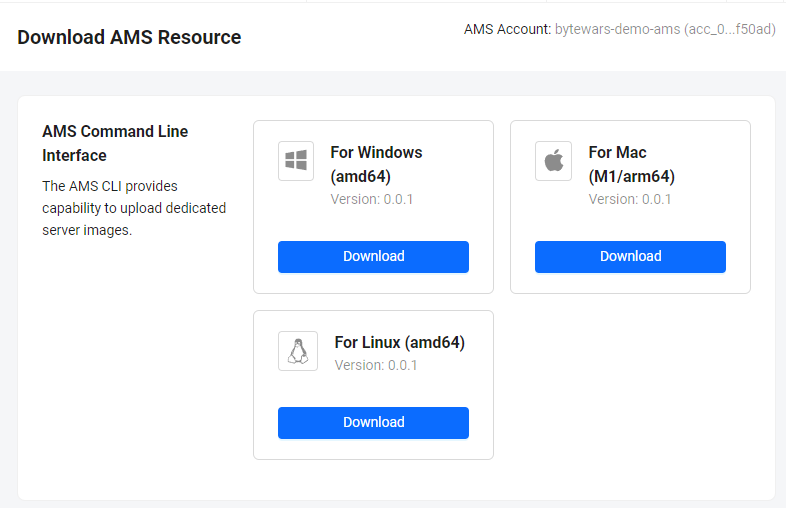
Open your Demo AGS Admin Portal dashboard. Select your game namespace and go to AccelByte Multiplayer Servers > Download Resource.
Click the Download button to download the AMS Command Line Interface For Windows (amd64).
Place the downloaded ams.exe file in the same parent directory as the packaged project folder you created in Step 2 of this section.

The next step is to upload the Linux dedicated server using the AMS CLI. Run ams.exe using a Windows Command Prompt with the following batch command. Please use your own the client ID and client secret from the IAM Setup tutorial of this module to replace
<AMSCLI_ClientID>and<AMSCLI_ClientSecret>.ams.exe upload -H demo.accelbyte.io -c <AMSCLI_ClientID> -s <AMSCLI_ClientSecret> -n unreal-bytewars-v1.0.19-ams-1 -p C:/Users/ab-dev/Documents/ByteWars -e AccelByteWars/Binaries/Linux/AccelByteWarsServertipUse the template command below to upload the dedicated server binaries to AMS using AMS CLI:
ams.exe upload -H <AMSHostURL> -c <AMSCLI_ClientID> -s <AMSCLI_ClientSecret> -n <DSImageName> -p <DSPathAbsolute> -e <DSLinuxBinary>Here are the details of each mandatory field. Replace them with your own credentials.
- AMSHostURL: the platform url (e.g.,
demo.accelbyte.io). - AMSCLI_ClientID: the IAM client ID used to authenticate.
- AMSCLI_ClientSecret: the IAM client secret used to authenticate.
- DSImageName: the name of the dedicated server image that will be built later after the upload process is complete.
- DSPathAbsolute: the path to the directory to upload.
- DSLinuxBinary: the relative path within the directory to upload the dedicated server executable to run.
- AMSHostURL: the platform url (e.g.,
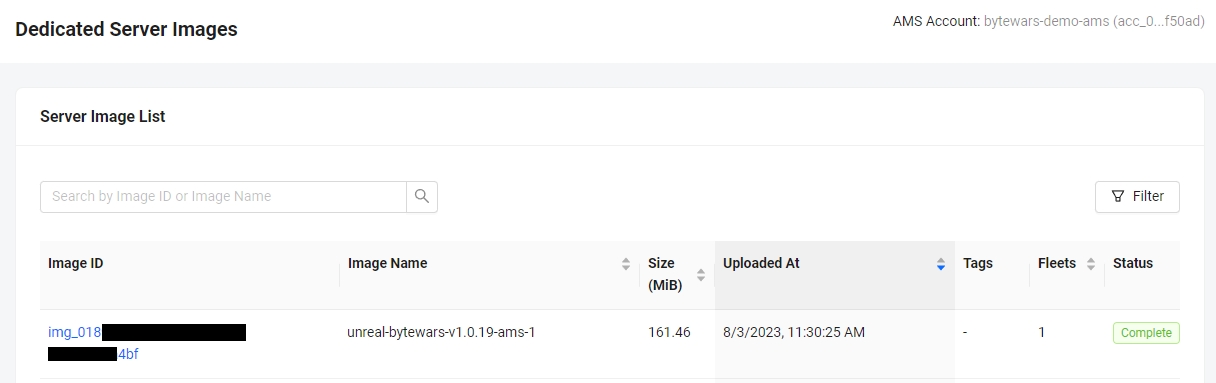
Once the uploading process is finished, your new dedicated server image will be listed on the AccelByte Multiplayer Servers > Server Images page of the AGS Admin Portal. There will be two states after the upload process:
- Uploaded: the dedicated server binaries successfully uploaded.
- Complete: the dedicated server image was successfully created and is ready to go. It takes a few minutes for the DS image state changes from uploaded to complete.
Congratulations! You have successfully uploaded your dedicated server to AMS. The next step is to create a fleet to deploy and manage the DS.
Create a fleet to manage the dedicated server
AMS fleets function to scale virtual machines and manage dedicated servers that are hosted within those virtual machines based on regional configurations. In this section, you will learn how to create a fleet for your game. Follow the steps below to create a fleet.
Open your Demo AGS Admin Portal dashboard. Select your game namespace and go to AccelByte Multiplayer Servers > Fleet.
Next, enable the regions where you want the fleet to be deployed. In this tutorial, we enable the
ap-southeast-1andus-east-2regions. Then, click on the Create Fleet button to create a new fleet. note
noteCreate Fleet will walk you through five steps: Fleet & Image, Deployment Profile, DS Host, Region, and Summary.
For the Fleet & Image step, fill in fleet name
bytewars-ams-fleet1and select the dedicated server image that we just uploaded. Then, click Next.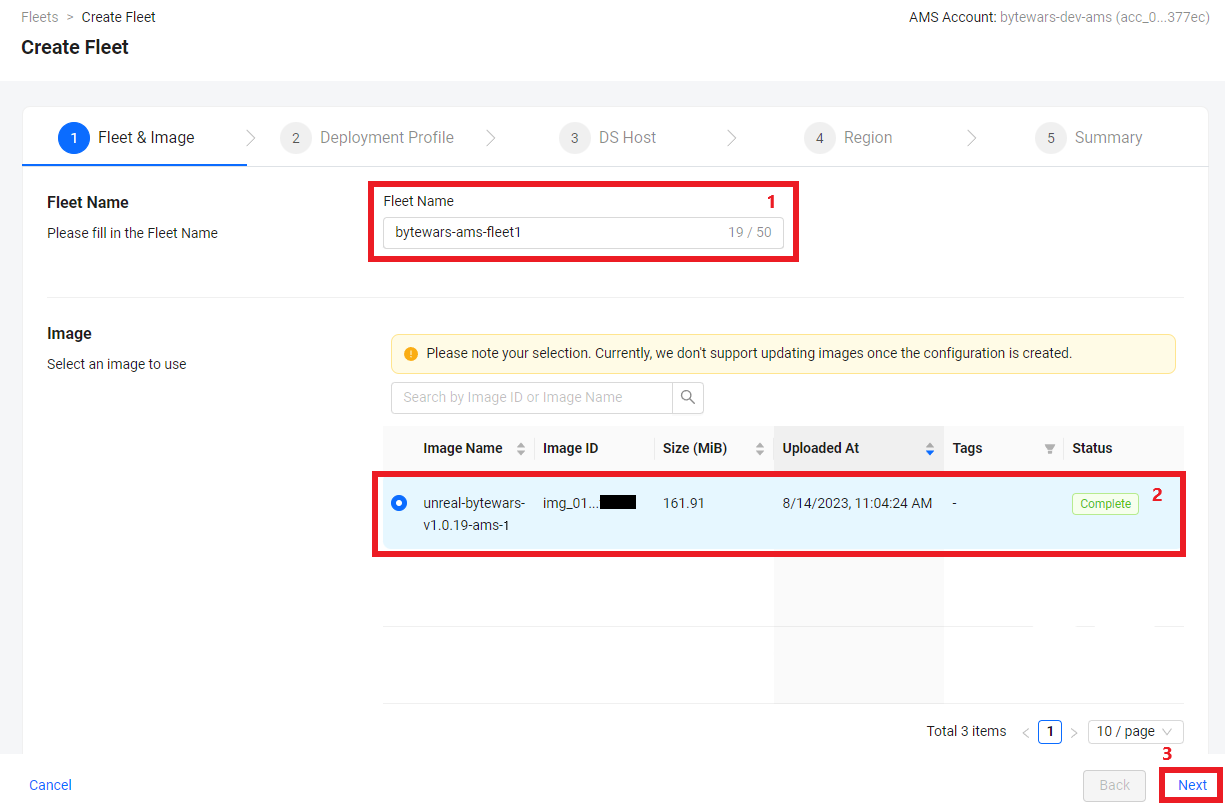
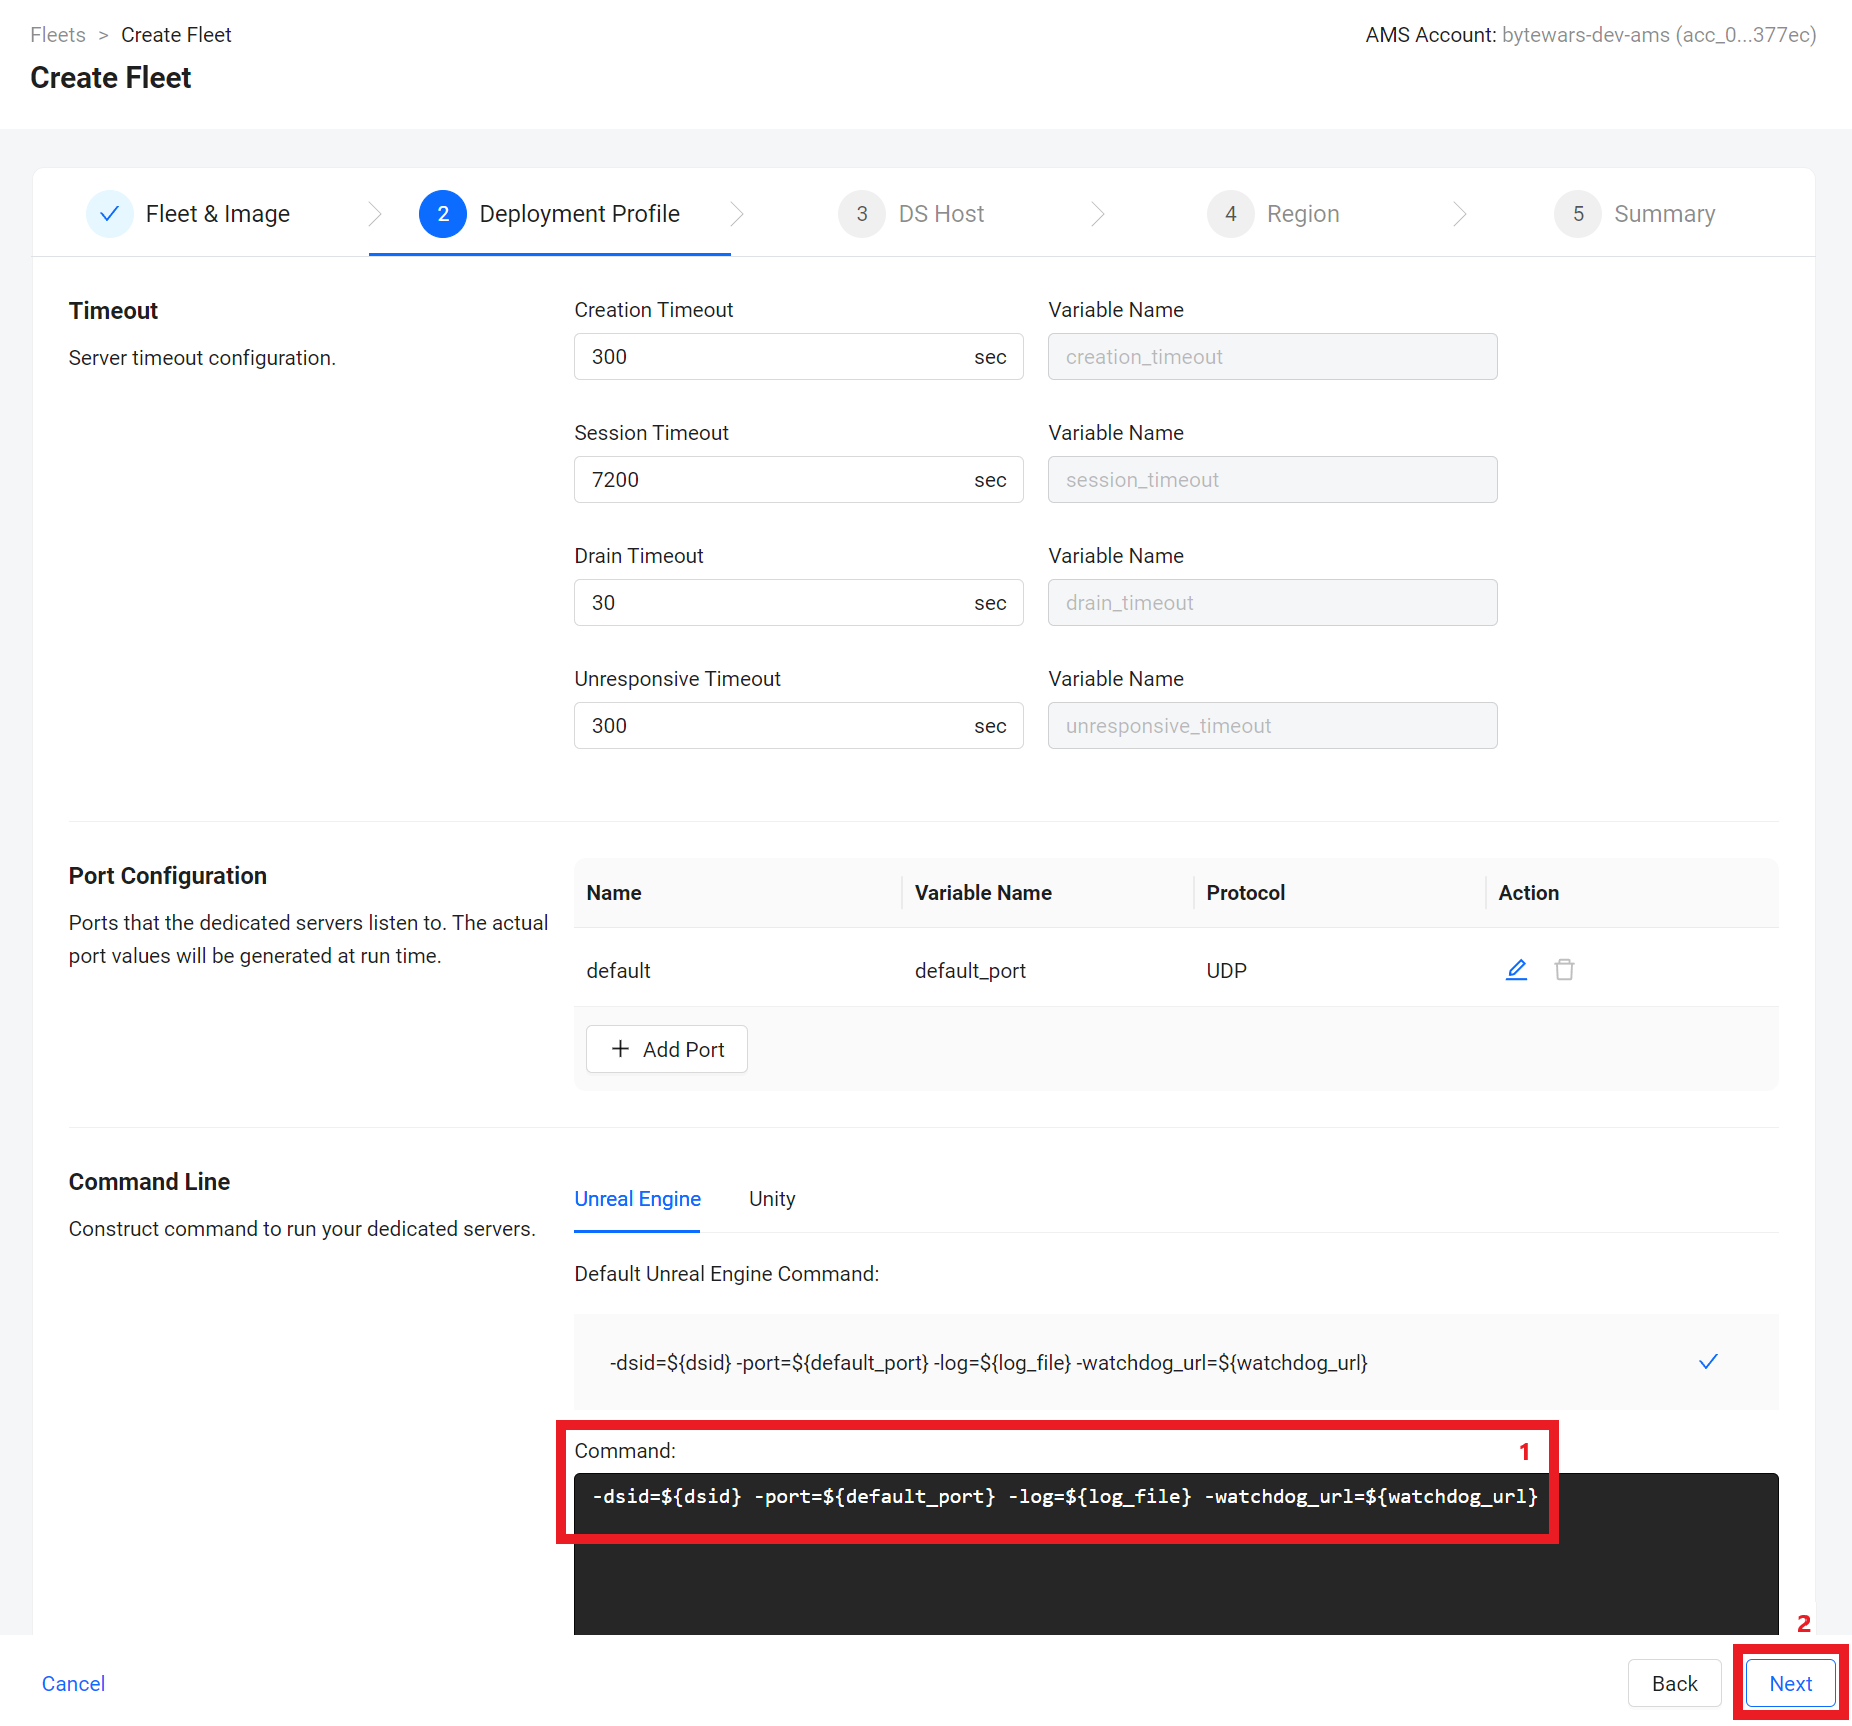
For Deployment Profile, leave Timeout and Port Configuration as default. For Command Line, enter the following command:
-dsid=${dsid} -port=${default_port} -log=${log_file} -watchdog_url=${watchdog_url}. Then, click Next.noteLeaving Port Configuration as default will override Unreal Engine's port configuration.
On the DS Host step, for VM Instance, select
glx1.2x. Set the Number of server to1. Then, click Next.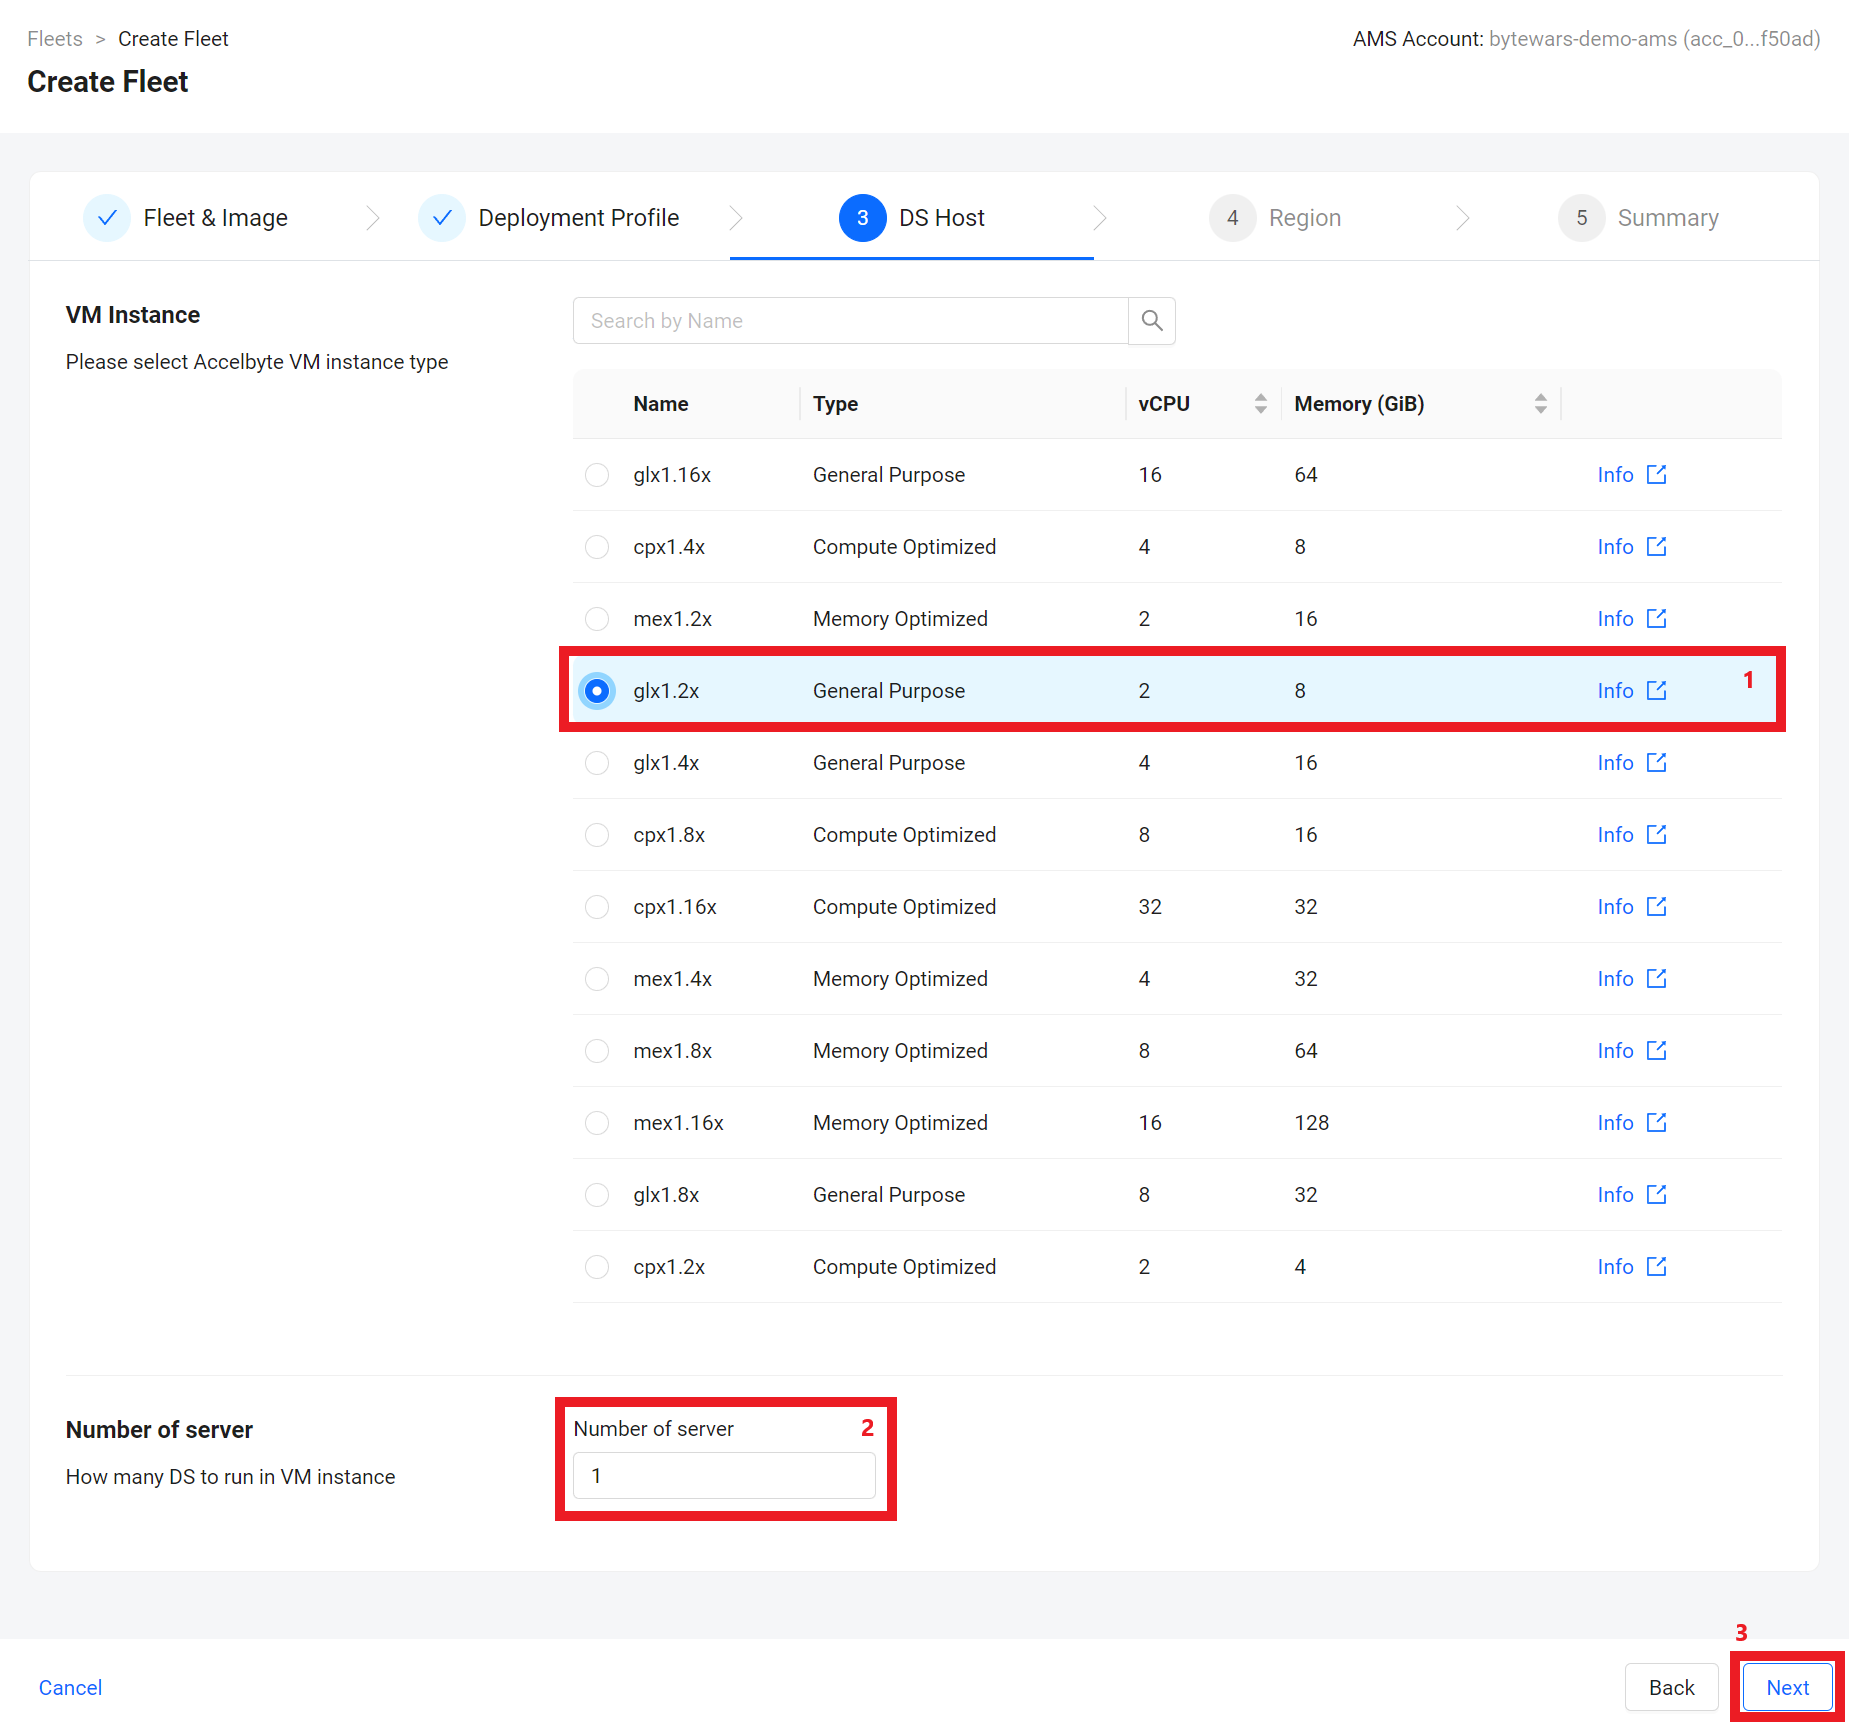
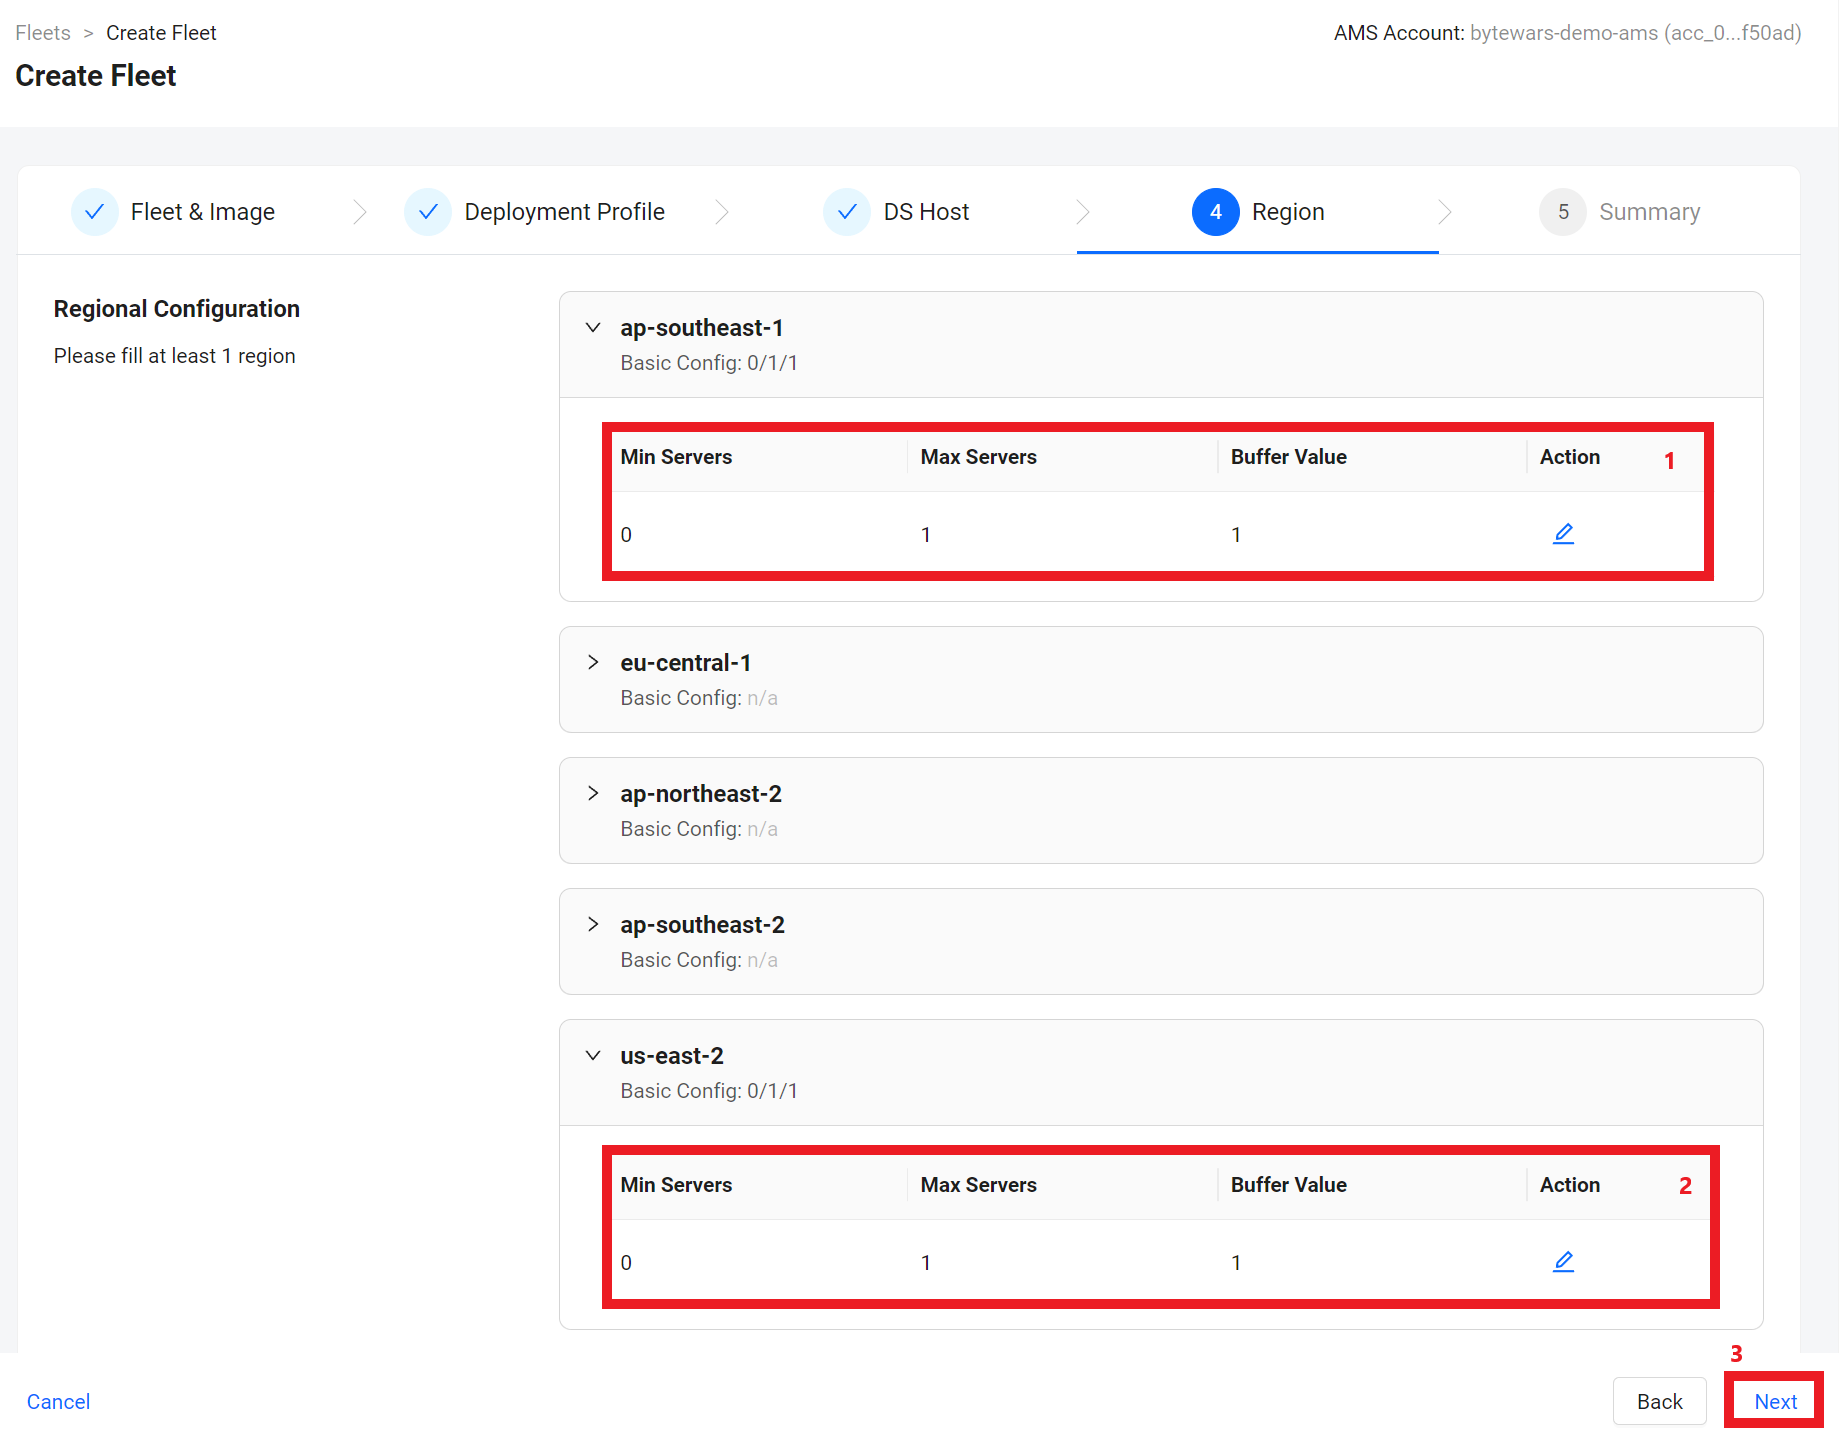
For Regions, expand the ap-southeast-1 and us-east-2 regions, click the edit icon under the Action column next to them, and set the following configurations to each region:
- Min Servers: 0
- Max Servers: 1
- Buffer Value: 1
info- Min Servers: The minimum number of servers that the deployment needs to maintain, regardless of whether the servers are in the "Ready" (warmed buffer) state or “In Session” (serving a game session) state. This value is useful to handle the baseline concurrent users by ensuring that there are enough servers ready to go.
- Max Servers: The maximum number of servers that the region can maintain. This value is useful as a limiter to make sure the cost of game servers will not go over budget.
- Buffer Value: The buffer value tells the fleet the exact number of servers to maintain as warmed buffers.
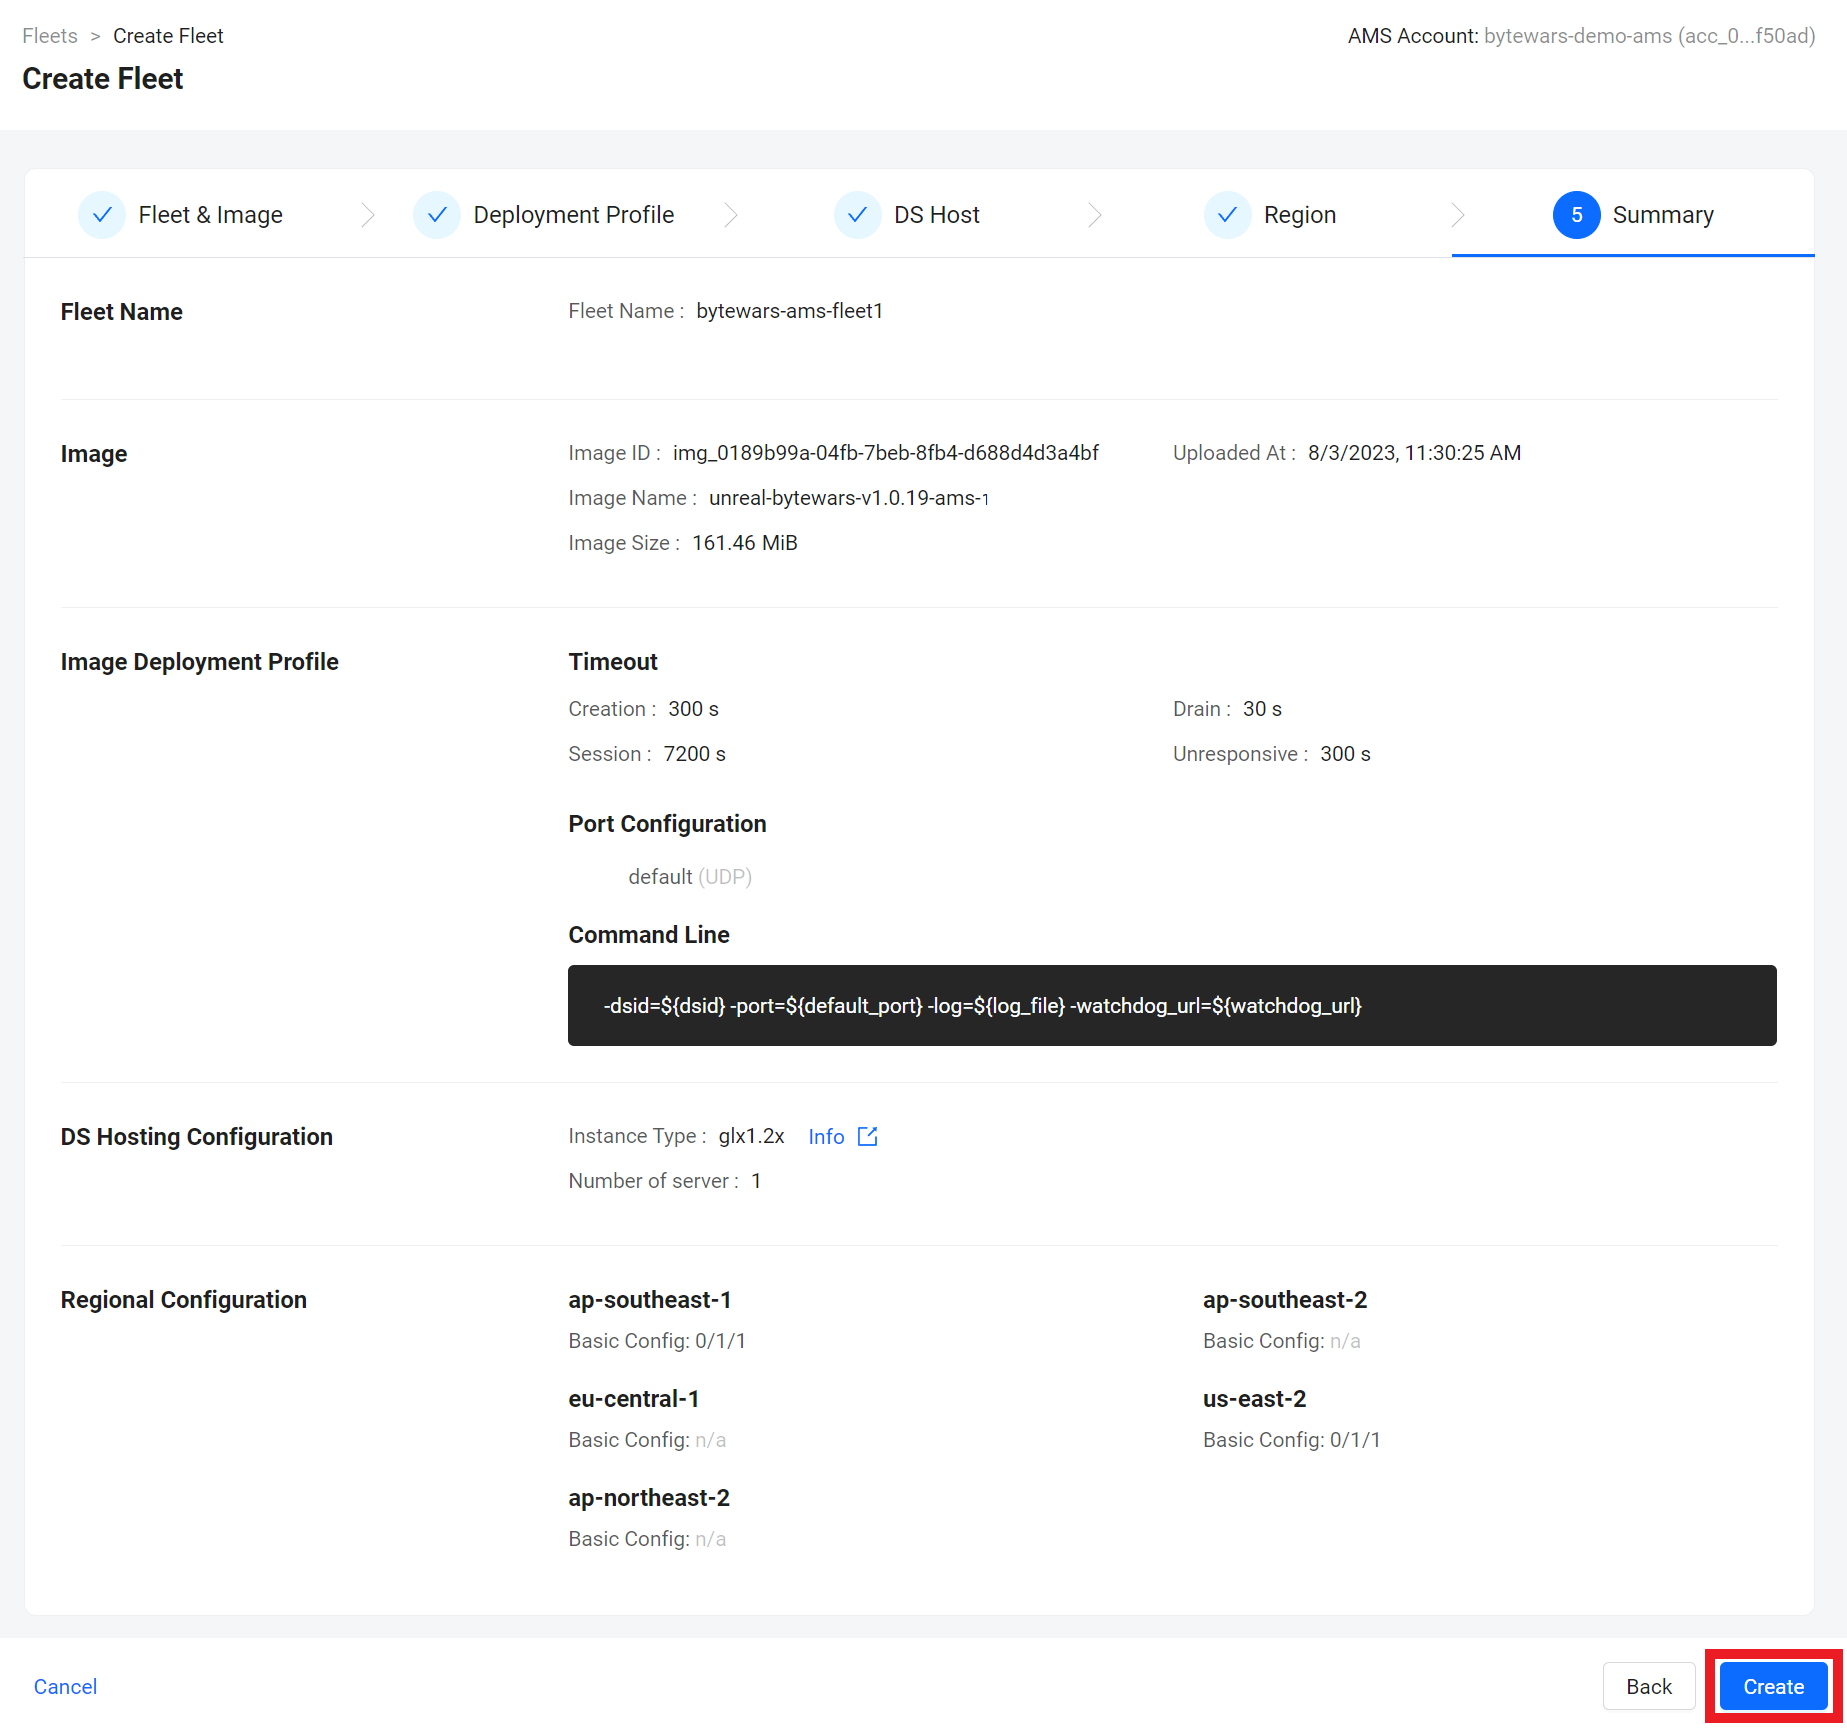
For Summary, review your fleet's configurations. If it looks how you want it, click Create and activate it.
Here what its look like after we activated the fleet. Note that it will some time to get the dedicated server to up and running.
Congratulations! You have successfully created an AMS fleet. The next step is to adjust the session configuration to use our fleet for Byte Wars matchmaking.
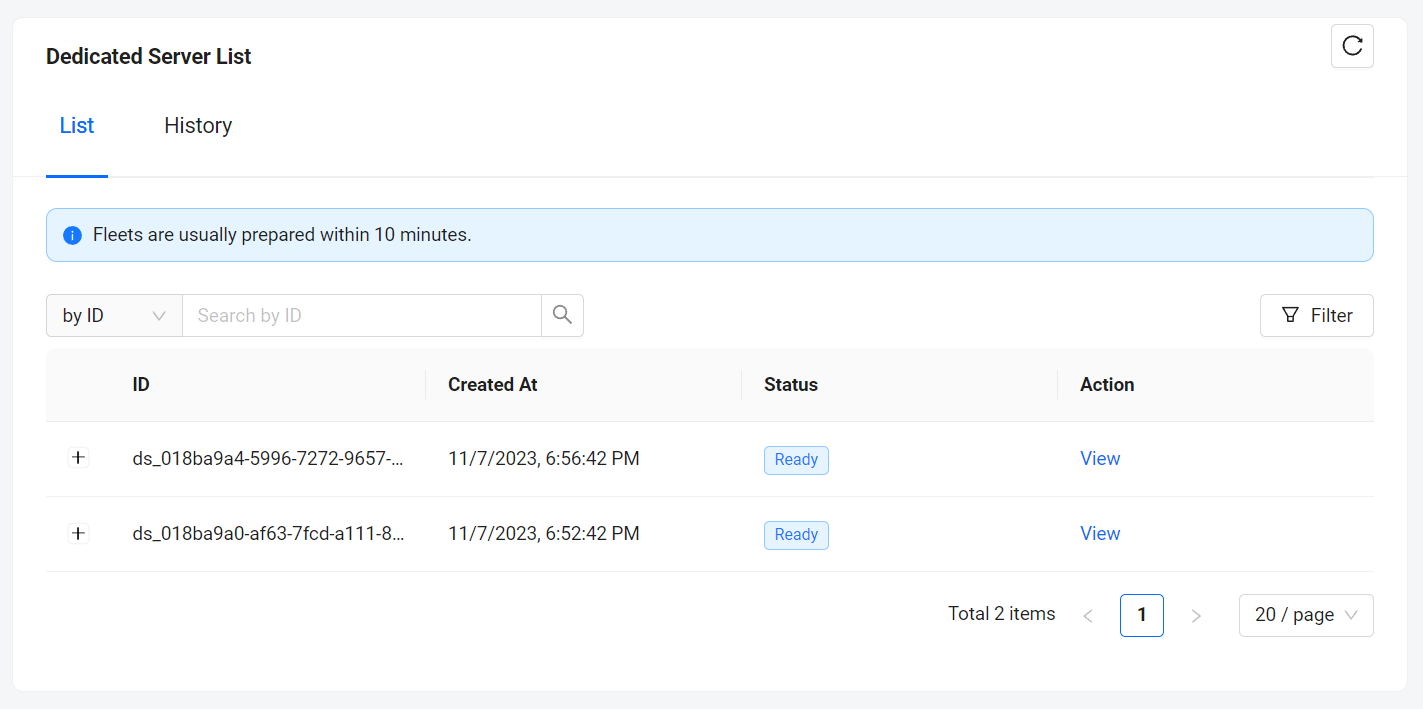
It will take some time to spin up the new virtual machines and its dedicated server. Once the virtual machine is up, you will be able to see the status of the dedicated server in the fleet details under the dedicated server list. Below are the states of the dedicated server readiness:
- Creating: the dedicated server is currently initializing (not yet calling the send ready message to AMS watchdog).
- Ready: the dedicated server has sent a ready signal to AMS and is ready to go.
- Claiming: the fleet manager is currently claiming the dedicated server to a session using a claim key.
- Claimed: the dedicated server is already bound to a game session and the game is currently in progress.
- Removed: the dedicated server is removed from the fleet.
Set up a game session to use an AMS dedicated server
In this section, you will learn how to set up the game session to use the dedicated server from our new AMS fleet.
Create claim keys for the fleet
Open your Demo AGS Admin Portal dashboard. Select your game namespace and go to AccelByte Multiplayer Servers > Fleet. Then, click on the fleet we created in this tutorial.
Under the Fleet Information section, click the + Add More button next to the Claim Keys field and add
bytewars-ams-test.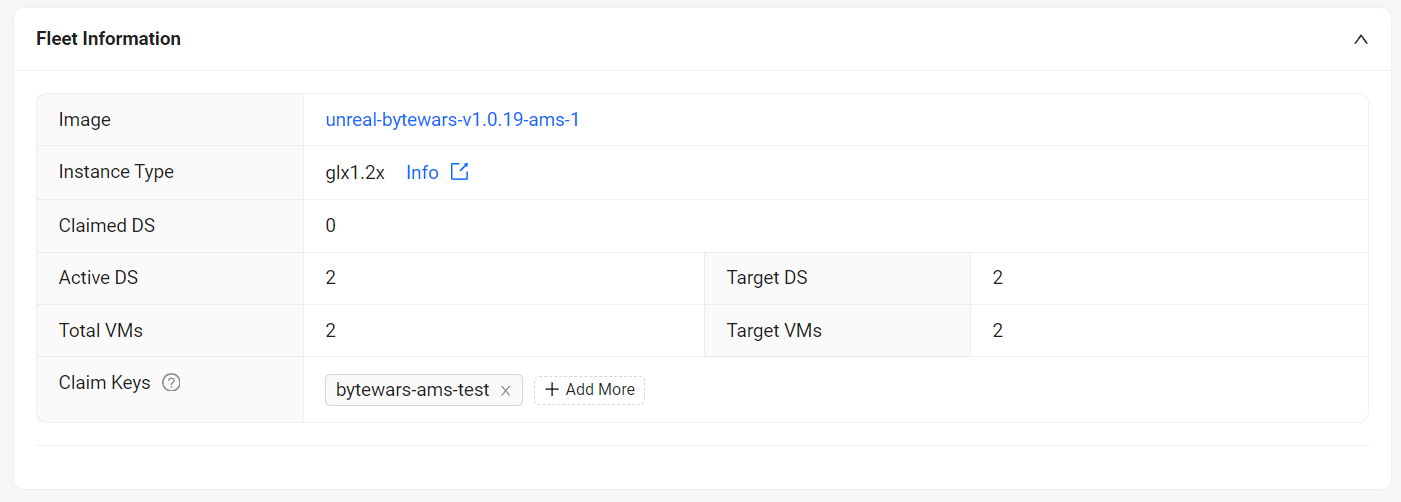
Set up the session configuration
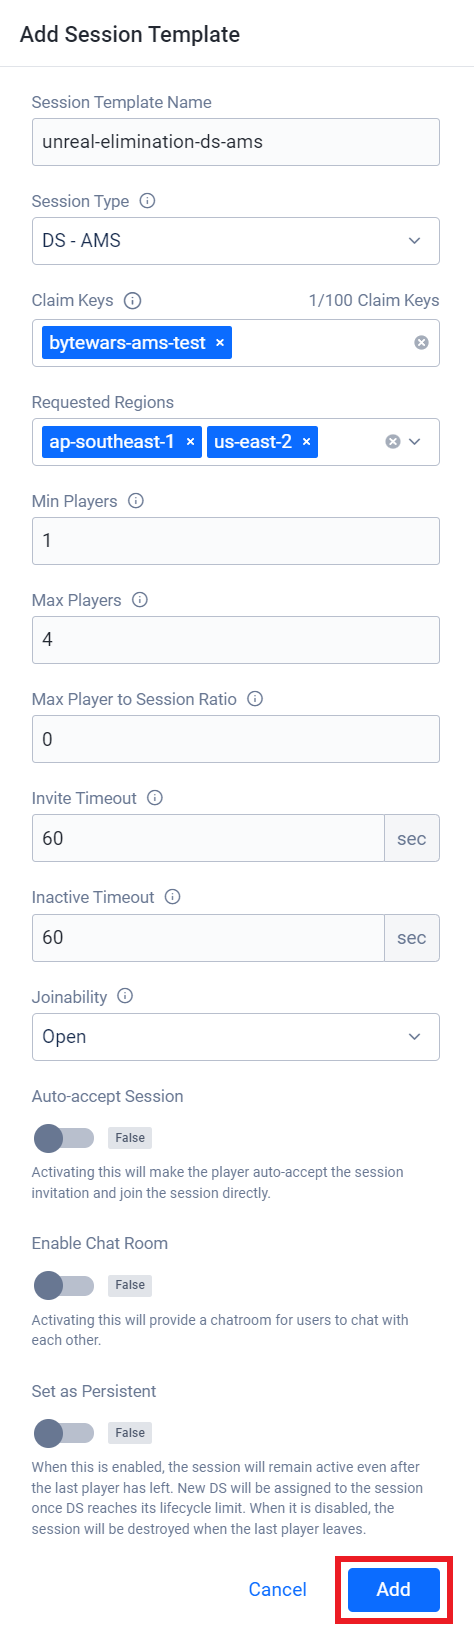
Open your Demo AGS Admin Portal dashboard. Select your game namespace and go to Game Management > Matchmaking v2 > Session Templates. Then, click Add Session Template.
Fill in the session template as follows and click on the Add button once completed:
- Session Template Name:
unreal-elimination-ds-ams - Session Type:
DS-AMS, - Claim Keys:
bytewars-ams-test - Requested Regions:
ap-southeast-1us-east-2 - Min Players: 1
- Max Players: 4
- Joinability: Open
- Session Template Name:
Congratulations! You have successfully created a session using an AMS fleet.