Unreal Engine Module - Run a Dedicated Server on AccelByte Multiplayer Server (AMS) - Setup a dedicated server IAM client
About
IAM clients are used to give permissions to certain resources in AccelByte Gaming Services (AGS). In order for your game's dedicated server to be able to communicate with AccelByte Multiplayer Servers (AMS), you need to set up the correct IAM client permissions.
Create a server IAM client
The server IAM client is an IAM client that gives permissions for your game server. Sufficient permissions are needed for your game server so it can communicate with AccelByte Multiplayer Servers (AMS).
Go to the AGS Demo Admin Portal dashboard and select your game namespace. Then, go to Authorizations > IAM Clients.
On the IAM Clients page, click the Create New button to create a new server IAM client.
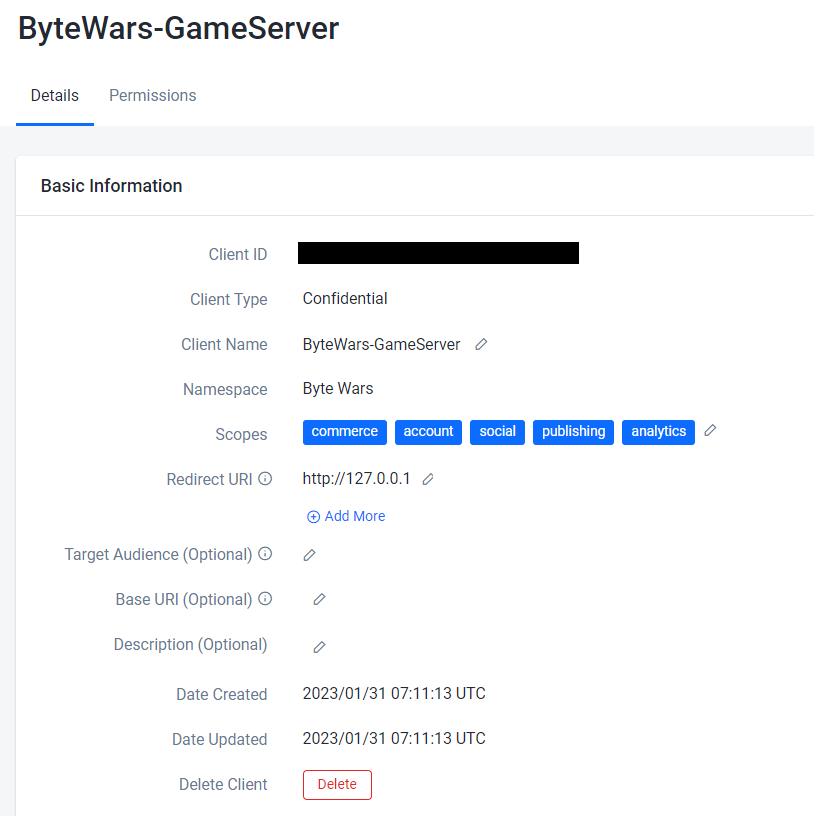
Fill out the Create New IAM Client form. Keep in mind that a server IAM client should be set to Confidential, which means you'll need to enter the client's Secret (or generate one using Generate Client Secret).
WarningThe client Secret will not be shown again after this form is closed. Be sure to save this information.
Click Create and your server IAM client information will be displayed.
Go to the Permissions tab on the page that appeared after creating the server IAM client and click on the Add button.

Add the following permissions. These permissions are needed for your game server to manage matchmaking-related services.
Resource Permission NAMESPACE:{namespace}:DSM:SERVER Update NAMESPACE:{namespace}:SESSION:GAME Create, Read, Update, Delete NAMESPACE:{namespace}:SESSION:GAME:PLAYER Create NAMESPACE:{namespace}:SESSION:PARTY Read ADMIN:NAMESPACE:{namespace}:SESSION:GAME Update ADMIN:NAMESPACE:{namespace}:SESSION:PARTY Read NAMESPACE:{namespace}:MATCHMAKING:BACKFILL Create, Update, Delete
Your final server IAM client's permissions should look like this:
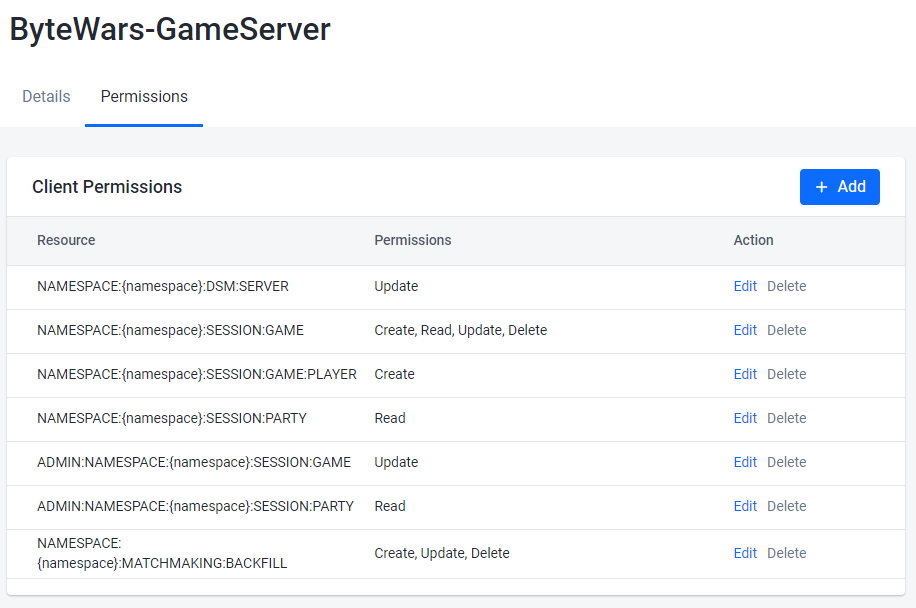
Congratulations! You have successfully created a new Server IAM Client.
Create an AMS CLI IAM client
The AMS CLI IAM client is an IAM Client that gives permission for you to upload your server to AMS. You will learn more about how to upload your server in later tutorials.
Go to the AGS Demo Admin Portal dashboard and select your game namespace. Then, go to Authorizations > IAM Clients.
On the IAM Clients page, click the Create New button to create a new CLI IAM client.
Fill out the Create New IAM Client form. Keep in mind that a CLI IAM client should be set to Confidential, which means you'll need to enter the client's Secret (or generate one using Generate Client Secret).
WarningThe client Secret will not be shown again after this form is closed. Be sure to save this information.
Click Create and your CLI IAM client information will be displayed.

Go to the Permissions tab on the page that appeared after creating the CLI IAM client and click on the Add button.
Add the following permissions. These permissions will allow you to upload your server to AMS.
Resource Permission AMS:UPLOAD Create, Update
Your final CLI IAM client's permissions should look like this:
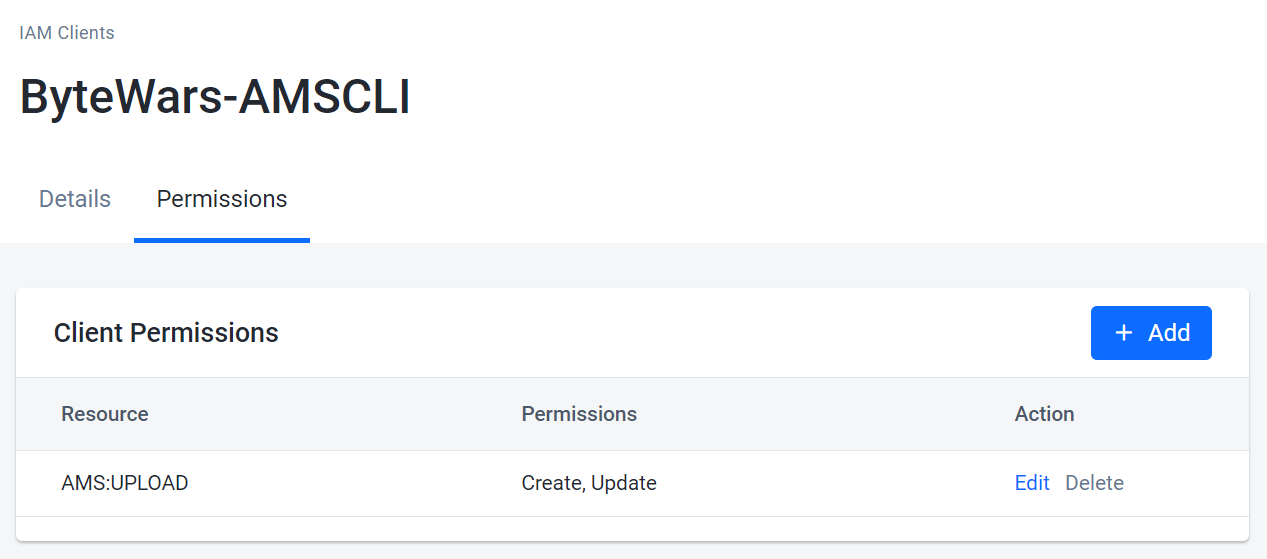
Congratulations! You have successfully created a new AMS CLI IAM client.
Configure the Server SDK
Once your server IAM client is configured in the AGS Admin Portal, you'll need to configure the Server SDK in your game project. This section will guide you on how to configure the Server SDK so your game server is authorized to communicate with AccelByte Multiplayer Servers (AMS).
Open the
DefaultEngine.inifile located inConfigfolder of your Byte Wars project directory.Inside the file, find the
[/Script/AccelByteUe4Sdk.AccelByteServerSettings]section and add the data as shown below, replacing theXXXXXXXXwith the Client ID and Client Secret from Step 3 of the Create a server IAM client section. Then, flip the boolean forbManualRegisterServerandbServerUseAMSto true, lastly bump some log categories verbosity level to verbose under[Core.Log].[/Script/AccelByteUe4Sdk.AccelByteServerSettings]
ClientId=XXXXXXXX
ClientSecret=XXXXXXXX
Namespace=bytewars
PublisherNamespace=accelbyte
RedirectURI="http://127.0.0.1"
BaseUrl="https://demo.accelbyte.io"
[OnlineSubsystemAccelByte]
bManualRegisterServer=True
[/Script/AccelByteUe4Sdk.AccelByteSettings]
bServerUseAMS=True
; ByteWars tutorial module specific
[/ByteWars/TutorialModule.DSEssentials]
bServerUseAMS=true
[Core.Log]
LogAccelByte=Log
LogAccelByteOSS=Verbose
LogAccelByteAMS=Verbose
LogAccelByteDSHub=VerboseTips- ClientId is randomly generated and used to uniquely identify your server IAM client.
- ClientSecret is the secret (password) for your server IAM client.
- Namespace is the namespace ID of your game namespace. You created this in Module: Initial Setup
- PublisherNamespace is the publisher ID of your publisher namespace. The default value is
accelbyte. - RedirectURI is the URI that will redirect your game server after the server authorization is completed. The default value is
http://127.0.0.1. - BaseUrl is the base URL of your AGS Admin Portal environment.
- bManualRegisterServer a flag for dedicated server that allows server to manually tell AMS that we are ready to welcome players. This is to avoid issue where the server is still in the initialization state (loading assets, fetching some cloud save configuration, etc) but the players already trying to connect to the server.
- bServerUseAMS a flag for game client to grab AMS available location using AccelByte SDK.
Save the
DefaultEngine.inifile and rebuild your Byte Wars project.