Set up Xbox as an identity provider
Overview
This guide helps verified Xbox developers connect Xbox accounts with AccelByte Gaming Services (AGS). You may need to set up additional features not listed here within Xbox services. For full information about setting up Xbox services, we recommend contacting your Xbox representative and reviewing Xbox documentation.
You can request confidential guide materials from your AccelByte Technical Producer.
Goals
Enable the Xbox authentication method for your game with the AGS SDK, and your publisher website with the AGS Player Portal.
Prerequisites
Web login integration
You will need the following for web login integration:
- Access to Microsoft Azure Active Directory and the permission to create the app registration.
- An AGS Admin Portal account to set up authentication and manage permissions.
- If you haven't done so already, set up a publisher namespace for your player portal and launcher.
- A player portal.
In-game login integration
You will need the following for in-game login integration:
- A Microsoft partner account in order to generate the Business Partner Certificate. To register, go to the Microsoft Partner website.
- If you are using Unreal Engine, you need:
- Access to the Unreal Private Console Platform.
- The Xbox Game Development Kit (GDK).
- The Unreal Engine Platform Extension.
- The latest version of the AGS Unreal SDK.
- An Unreal game project with an imported AGS SDK.
- If you are using Unity, you need:
- Windows 10 or 11.
- Visual Studio 2019 & Visual C++ Build Tools.
- Windows 10SDL 10.0.19041.0.
- A (Unity Engine Pro License).
- The Unity Xbox Add-On for your version of Unity.
- Xbox GDK Microsoft June 2022 Update GDKX (10.0.22000.4429) & Latest Microsoft Console Recovery.
- Unity Game Core Support Module.
- The latest version of the AGS Unity SDK.
- A Unity game project with an imported AGS SDK..
- An AGS Admin Portal account to set up authentication and manage permissions.
- A game namespace.
- Familiarity with AGS IAM clients.
Set up Xbox Live web login integration
Azure Active Directory app registration
Follow the guide for registering an application with the Microsoft identity platform. Under "Who can use this application or access this API", select the option Accounts in any organizational directory (Any Azure AD directory - Multitenant) and personal Microsoft accounts (e.g. Skype, Xbox). Under "Redirect URI (optional)", select Web in the dropdown and then add these URIs:
https://<Base-URL>/https://<Base-URL>/player/account/linked-accountshttps://<Base-URL>/account/linked-accountshttps://<Base-URL>/iam/v3/platforms/xblweb/authenticate
BaseURL is your domain address. Example: https://development.accelbyte.io
Set up Xbox in-game login integration
Configure web service and relying party on Partner Center
Configure the web service, certificate, and relying party at the Microsoft Partner Center. Please follow the guide for setting up web services at Partner Center. When Configuring Relying Party, Make sure you include these claims on the token:
- Xbox user ID (xid). We recommend you to include xid on token claims. Partner Xbox user ID (ptx) is suitable for account linking, but most GDK and service-to-service (S2S) functions that call to Xbox services (e.g., session, friends, achievements, etc.) require xid. If you have already added xid, don’t add ptx to the claims.
xid is not available by default. You must submit an exception request to Xbox to make it available for token claims.
- Gamertag (gtg) or Modern Gamer Tag (mgt). Depending on the implementation for your game, you can choose between gtg or mgt to display your Xbox player name.
- Sandbox ID (sbx).
- Delegation token (dlt).
- Device Pairwise ID (dpi).
- Device type (dty).
Please contact your AccelByte Technical Producer for help if you have trouble setting up the web service and relying party on Microsoft Partner Center.
Configure a sandbox
To configure a sandbox, please follow the setting up sandboxes guide.
Configure a test account
A test account is useful for your development and testing phases. To configure a test account, follow the creating test account guide.
Configure single sign-on (SSO)
Please follow the guide for configuring SSO in Partner Center.
Get your title ID and SCID
Please follow the guide on getting your IDs.
Create an RSA private key for AGS
Create an RSA Private Key by converting the relying party certificate
.pvkinto.pemfile by executing this command:openssl rsa -inform PVK -outform PEM -in <pvk file> -out <pem file>
You need to enter the pass phrase from your xbox.pvk file.
- Open the
PKCS#1.pemfile with any text editor. Your.pemfile should begin with "-----BEGIN RSA PRIVATE KEY-----" and end with "-----END RSA PRIVATE KEY-----". Make sure there is no new line after the end tag.
Set up Xbox login method
Web login
Use the following steps to set up Xbox web logins in the player portal. This will allow your players to sign in to your player portal using their Xbox Live accounts.
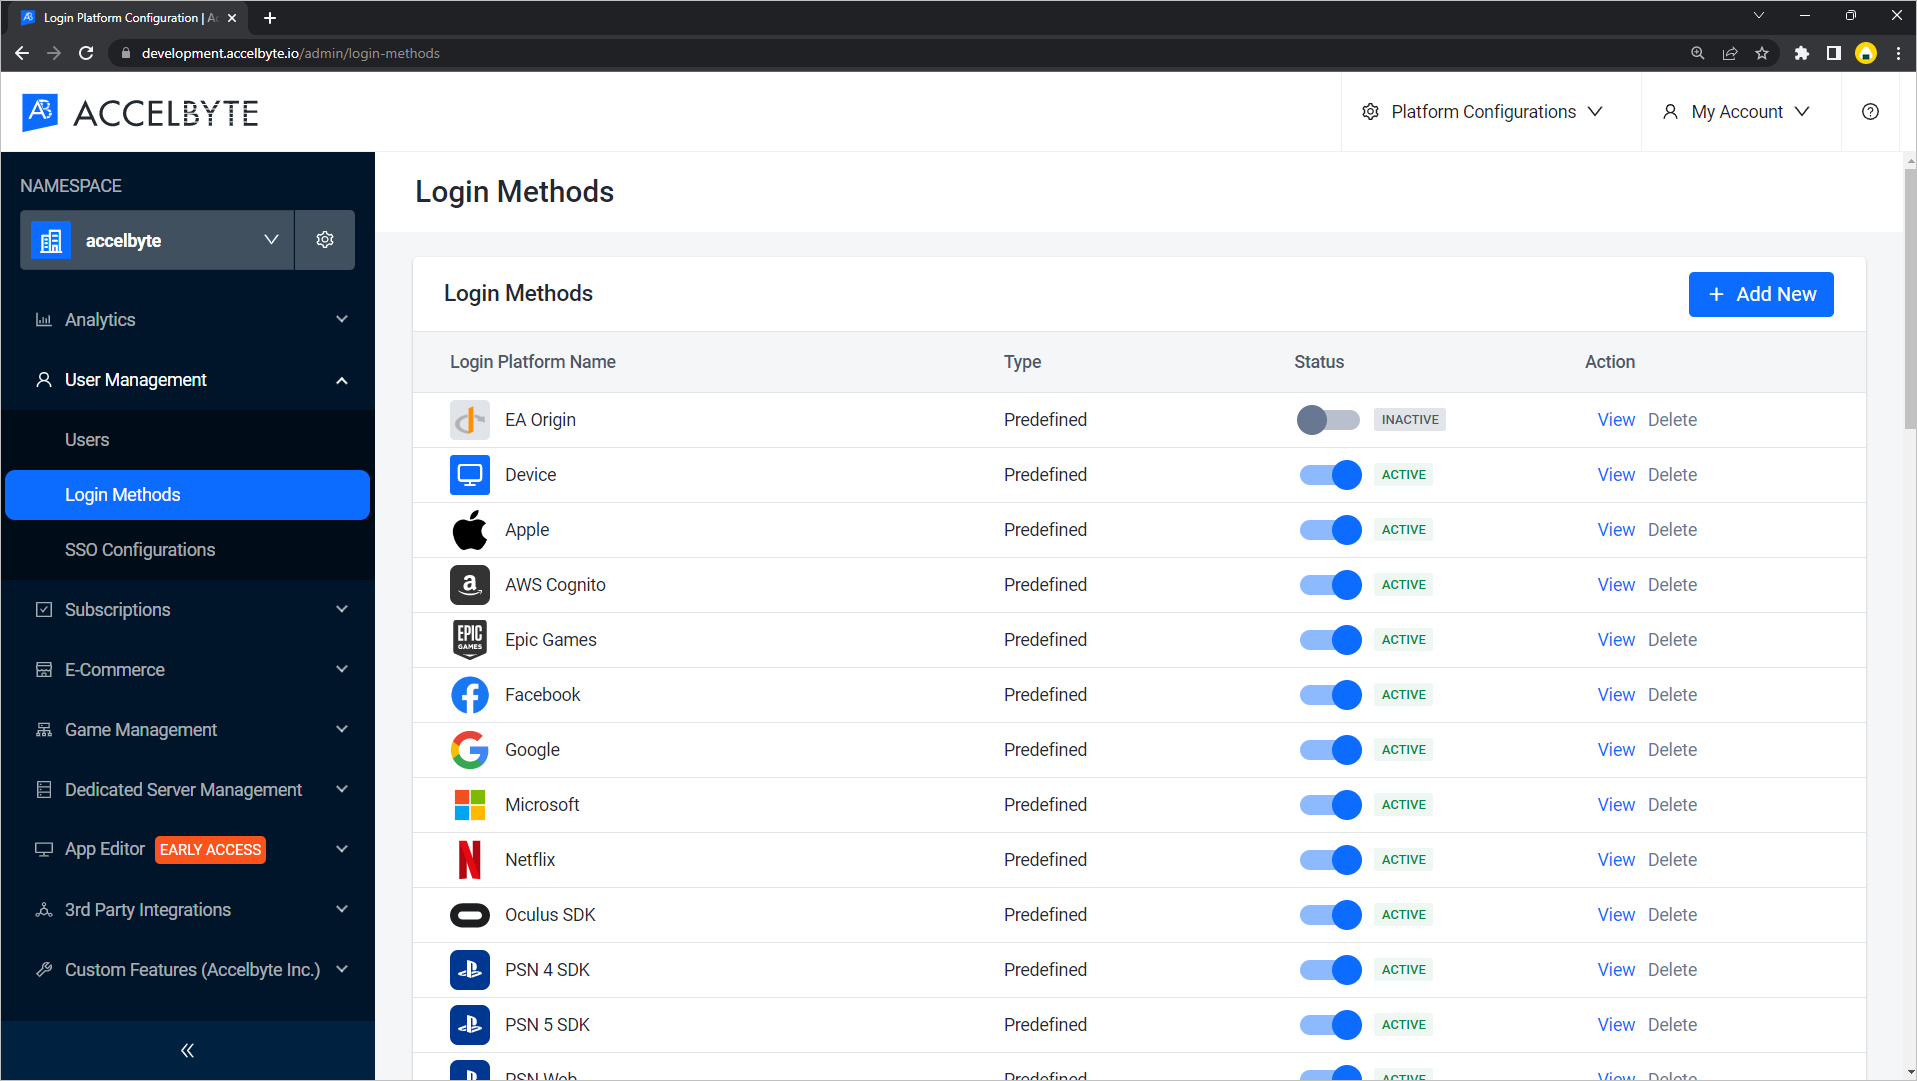
Log in to the AccelByte Admin portal, choose your Publisher Namespace, click Login Method below the User Management sidebar, and click the + Add New button on the right side.
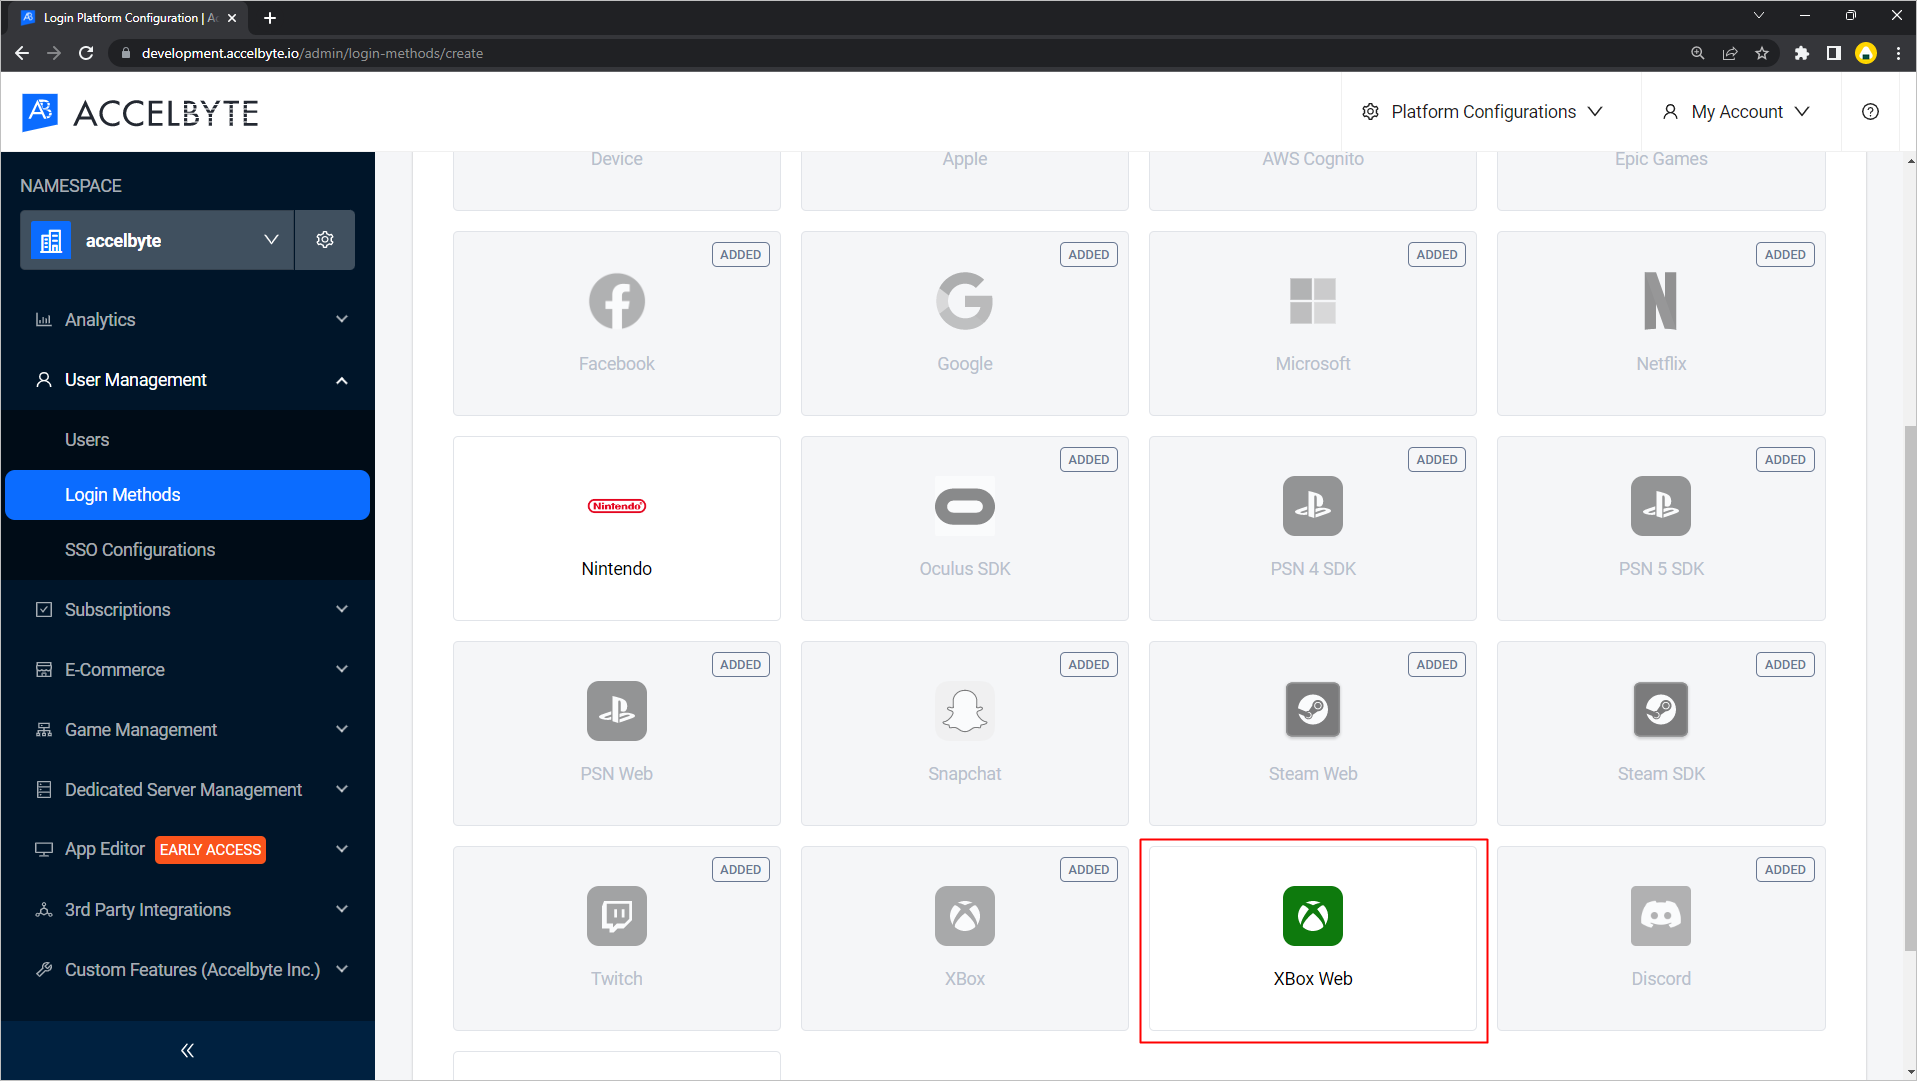
Click on Xbox Web.
Fill in Client ID, Client Secret, and Redirect URI.
- Fill in Client ID with your application (client) ID. You can find it on the App Registrations page in your Azure Active Directory.
- Fill in Client Secret with the secret value that you get from the Certificates & Secrets section in your app in your Azure Active Directory.
- Fill in Redirect URI with Your Web Redirect URI:
<baseURL>Please be aware not to add "/" at the end of the URL since it can break the implementation. (BaseURL is your domain address. e.g:https://development.accelbyte.io)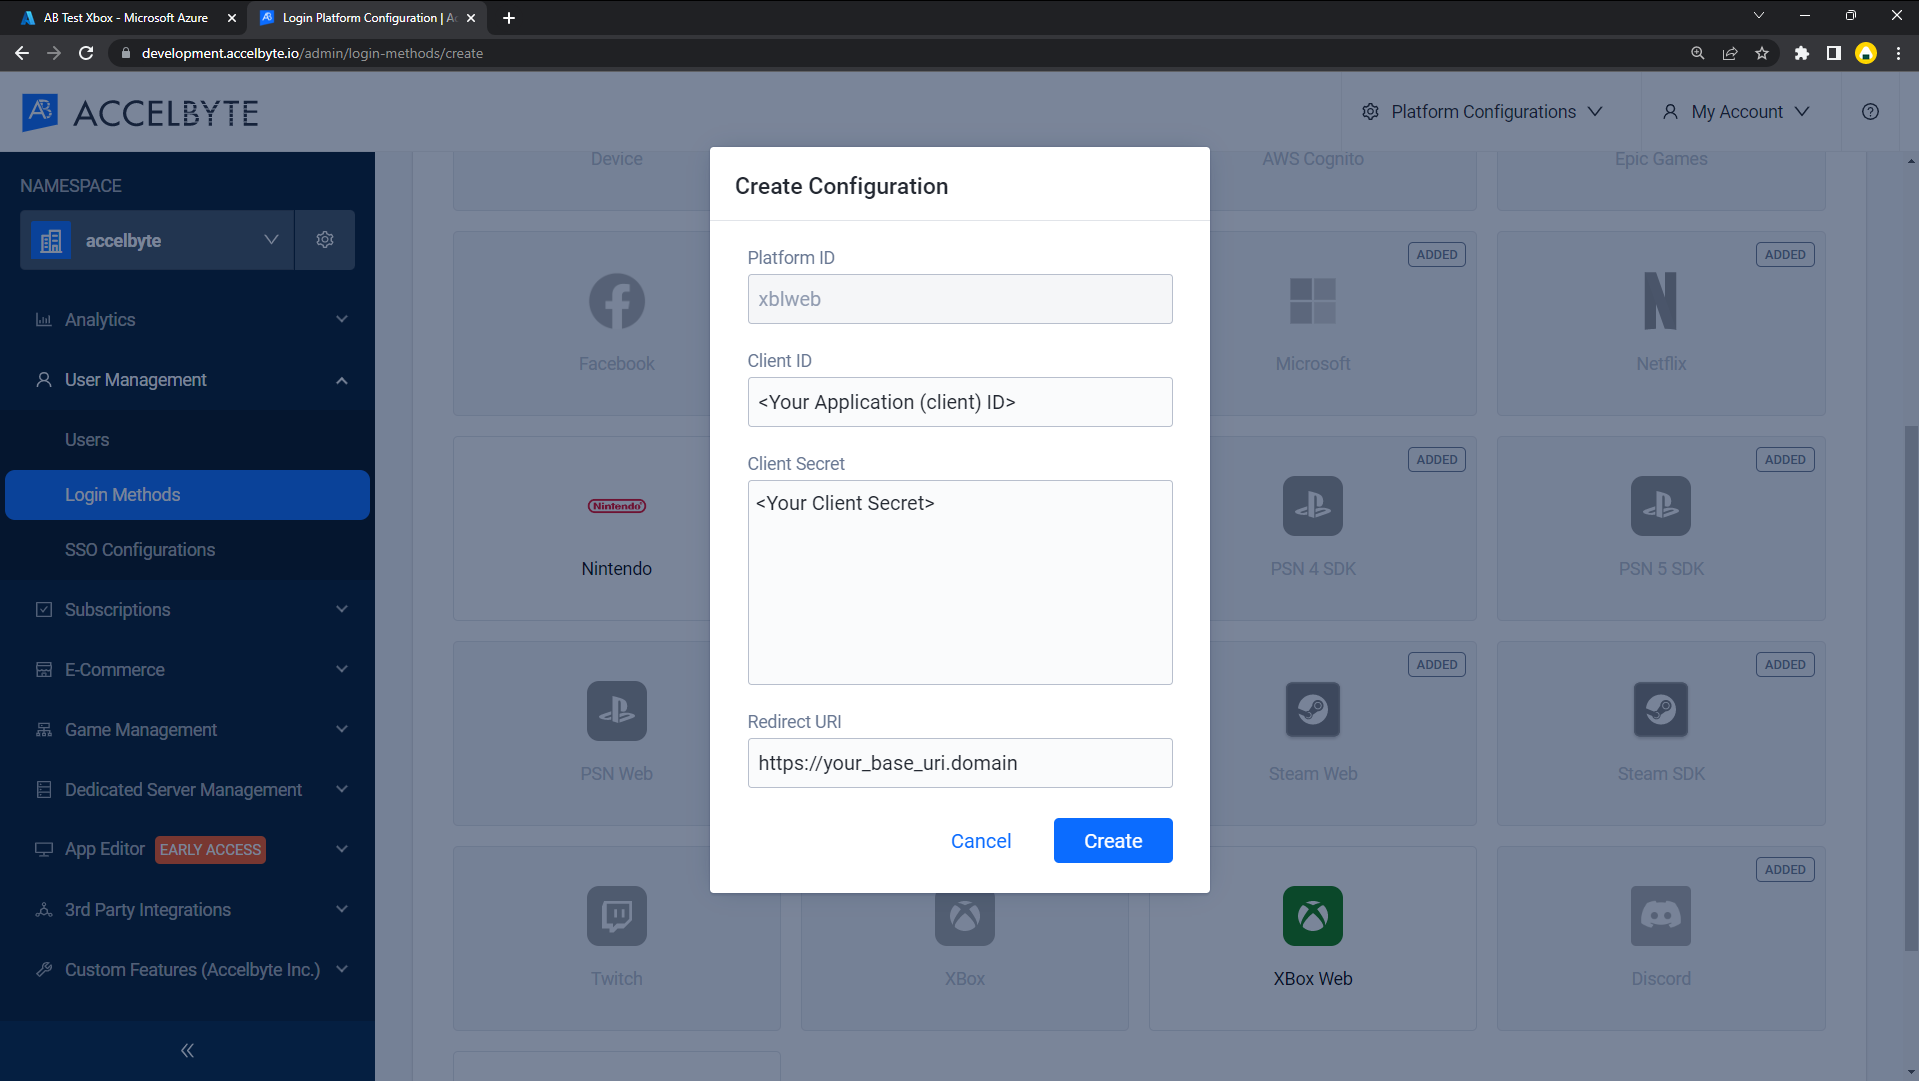
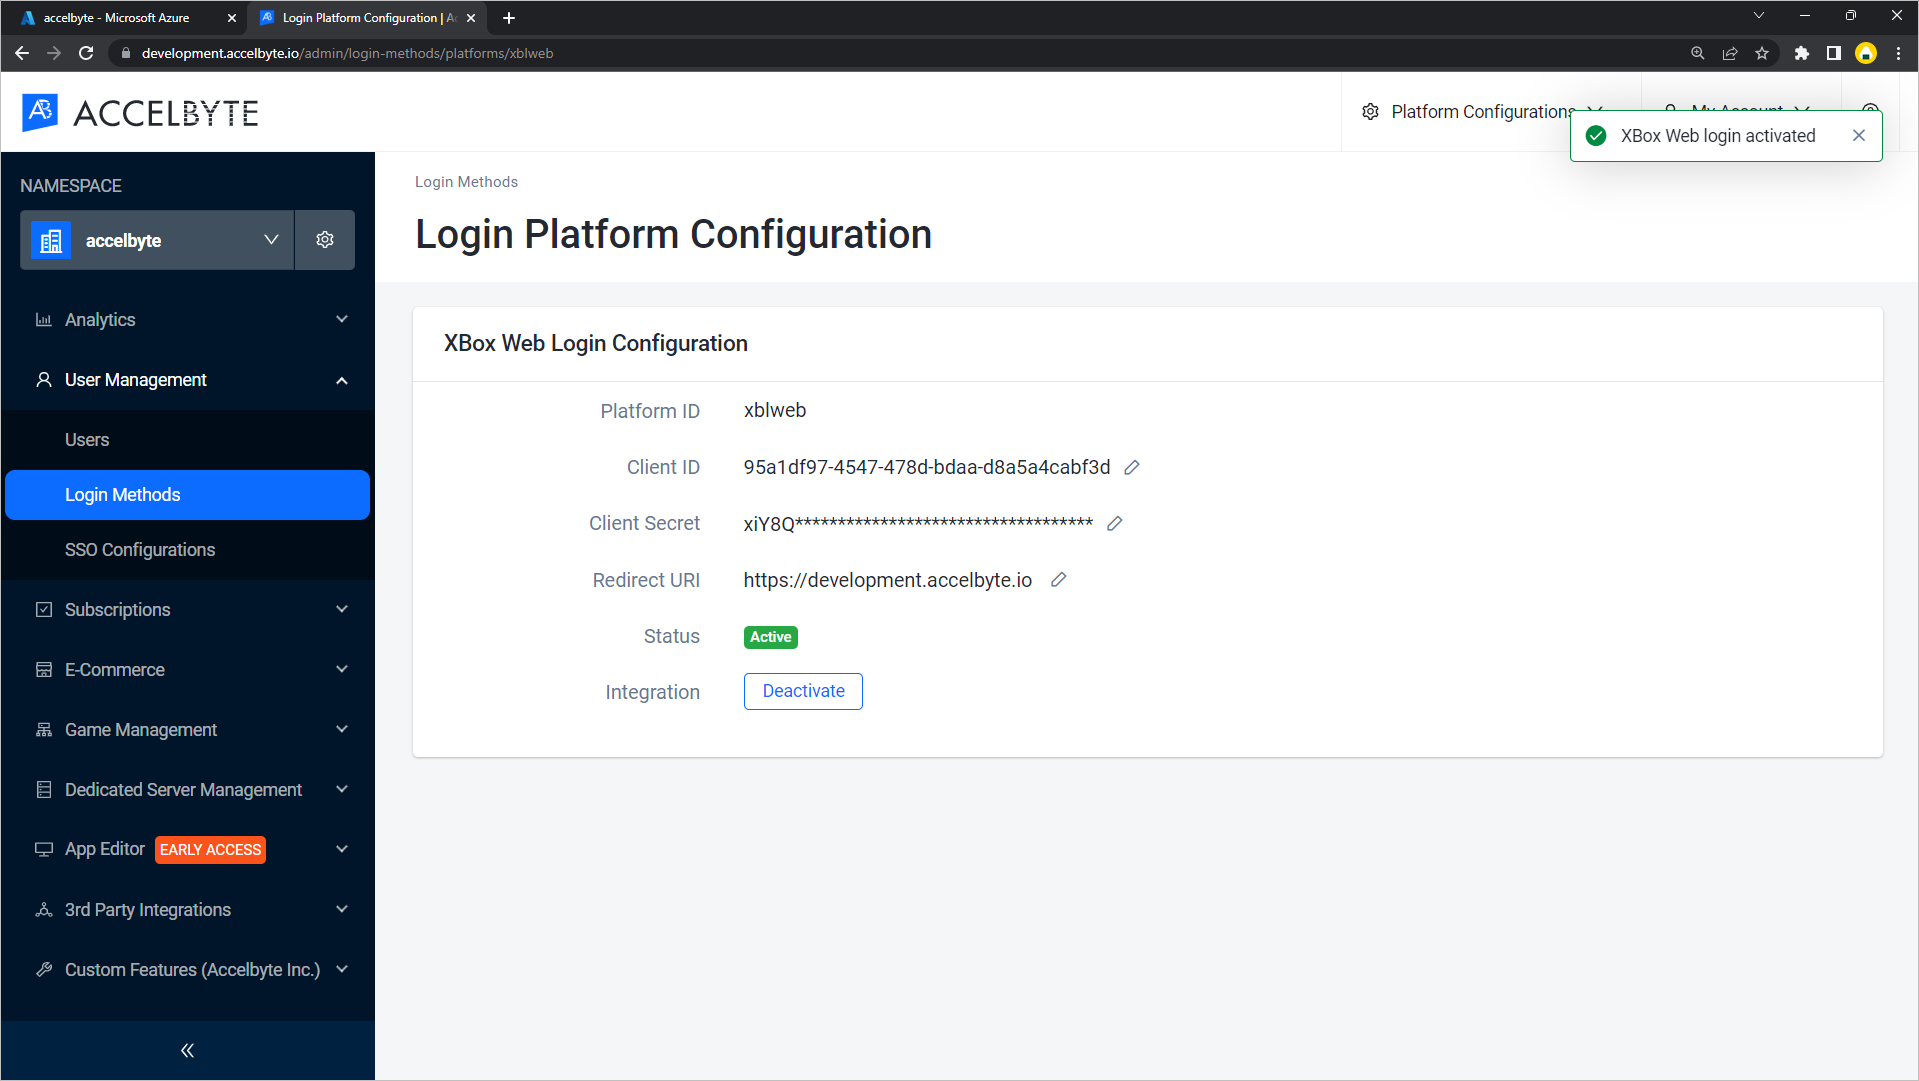
You will redirect to the details page. Activate it and it will be usable.
User login from Player Portal using Xbox Live account
Make sure you already set up the Xbox Live Login Method on your Publisher Namespace.
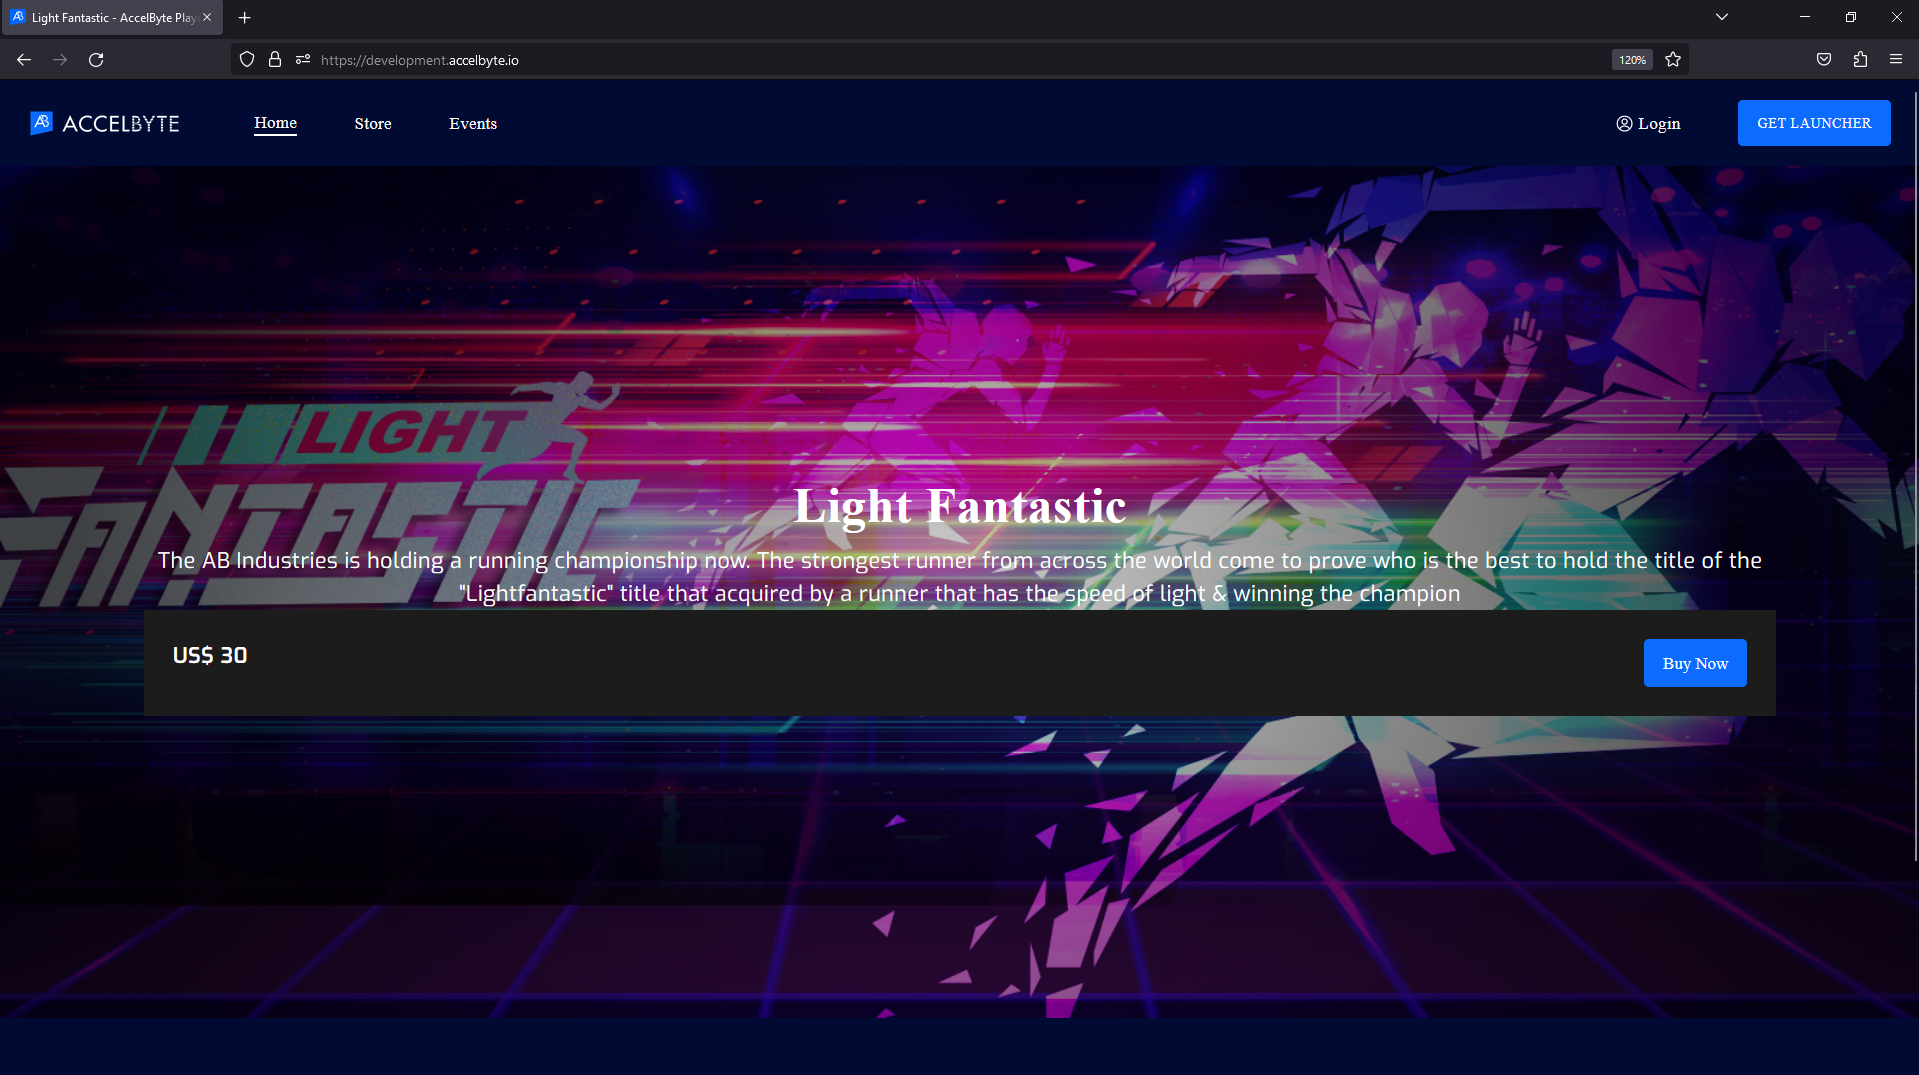
Go to the Player Portal and click Login.
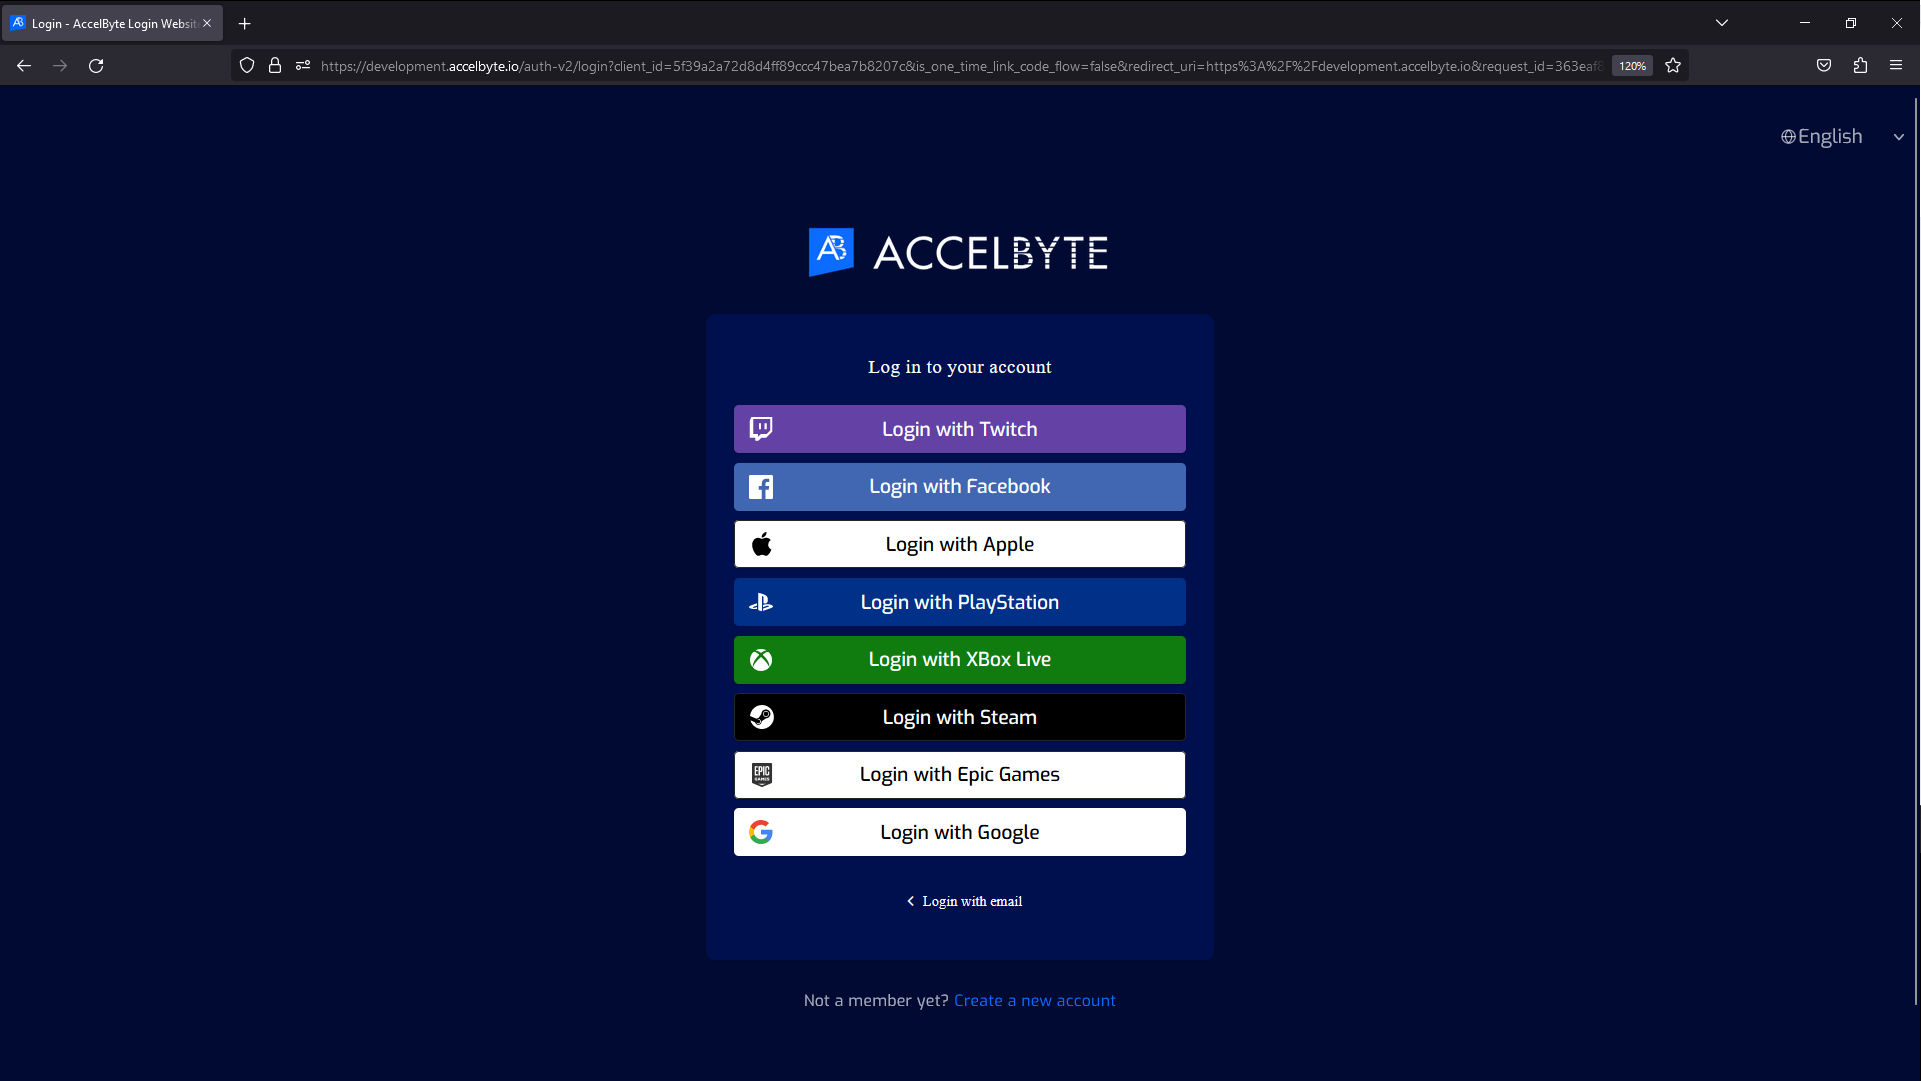
If there’s no Xbox logo displayed, click More login options.
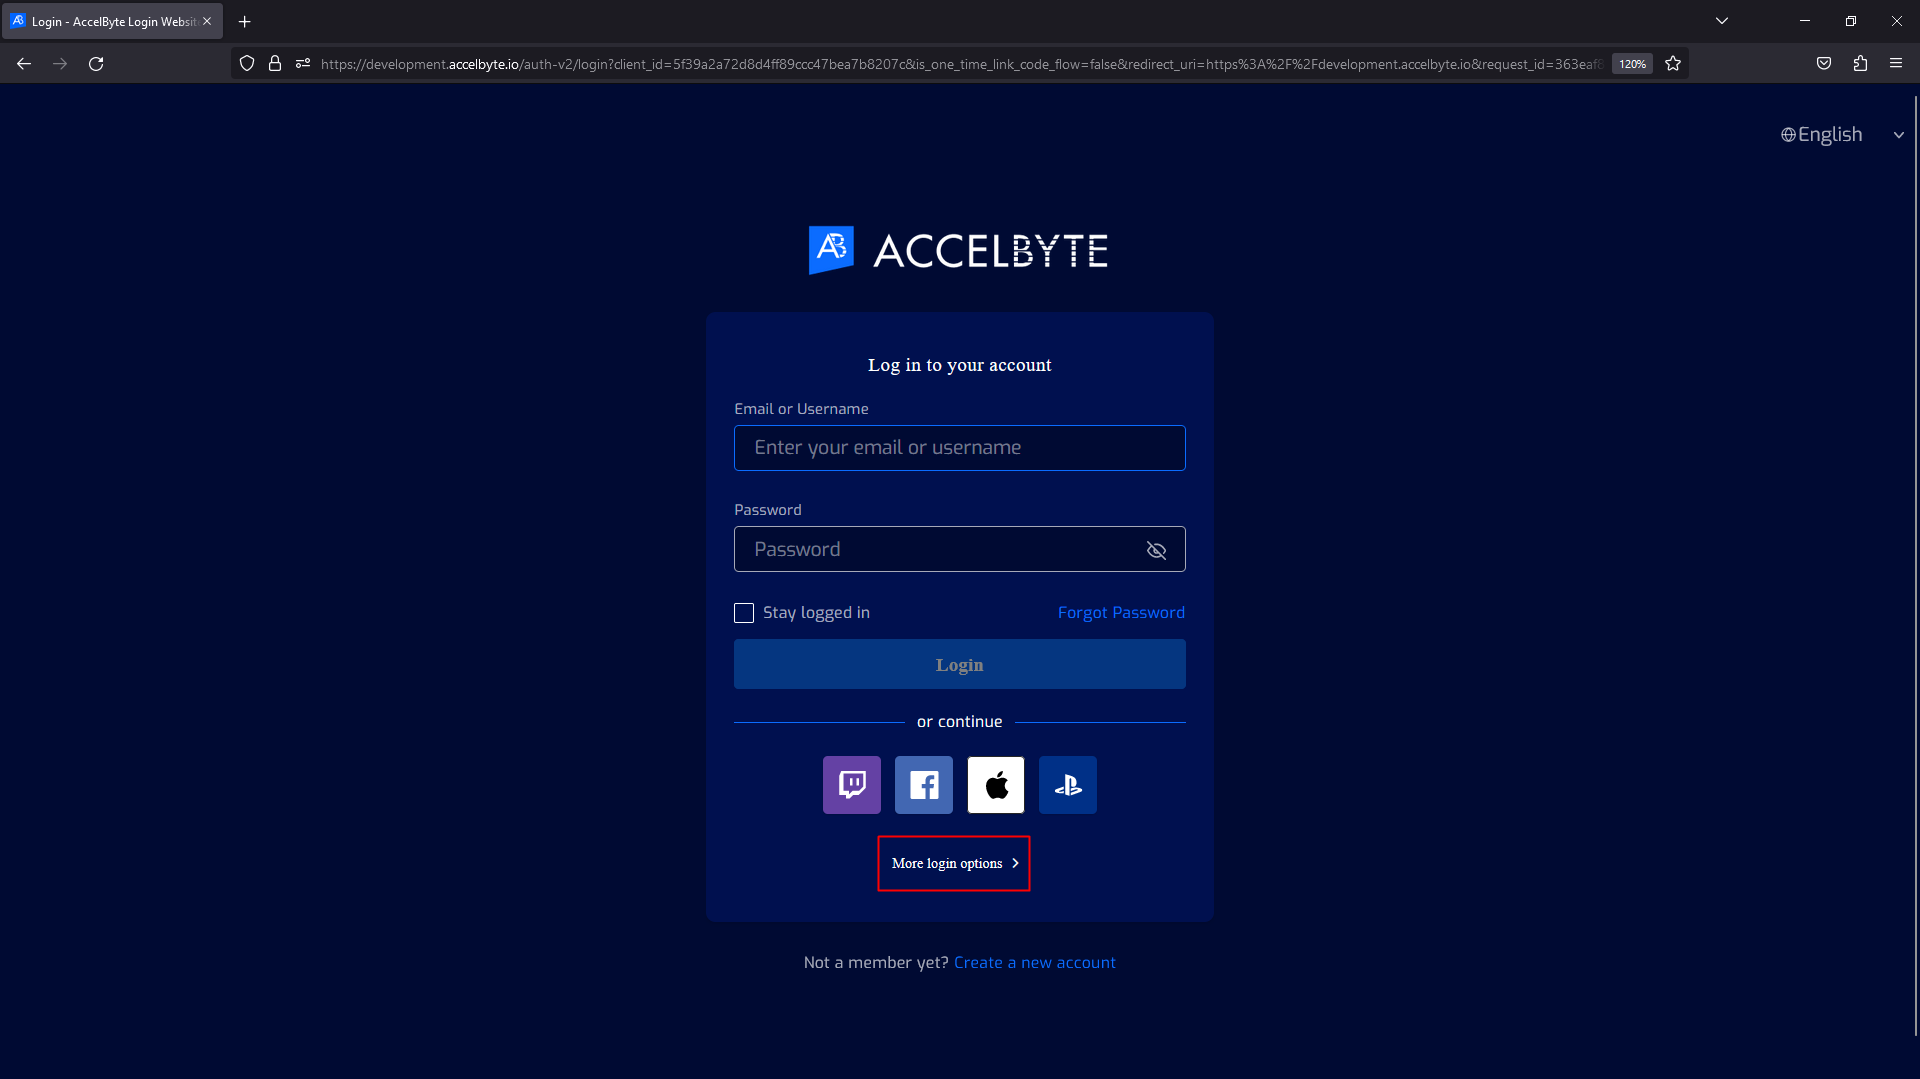
Click on Login with Xbox Live.
You will be redirected to the Microsoft/Live sign in page. Log in with your Xbox Live account.
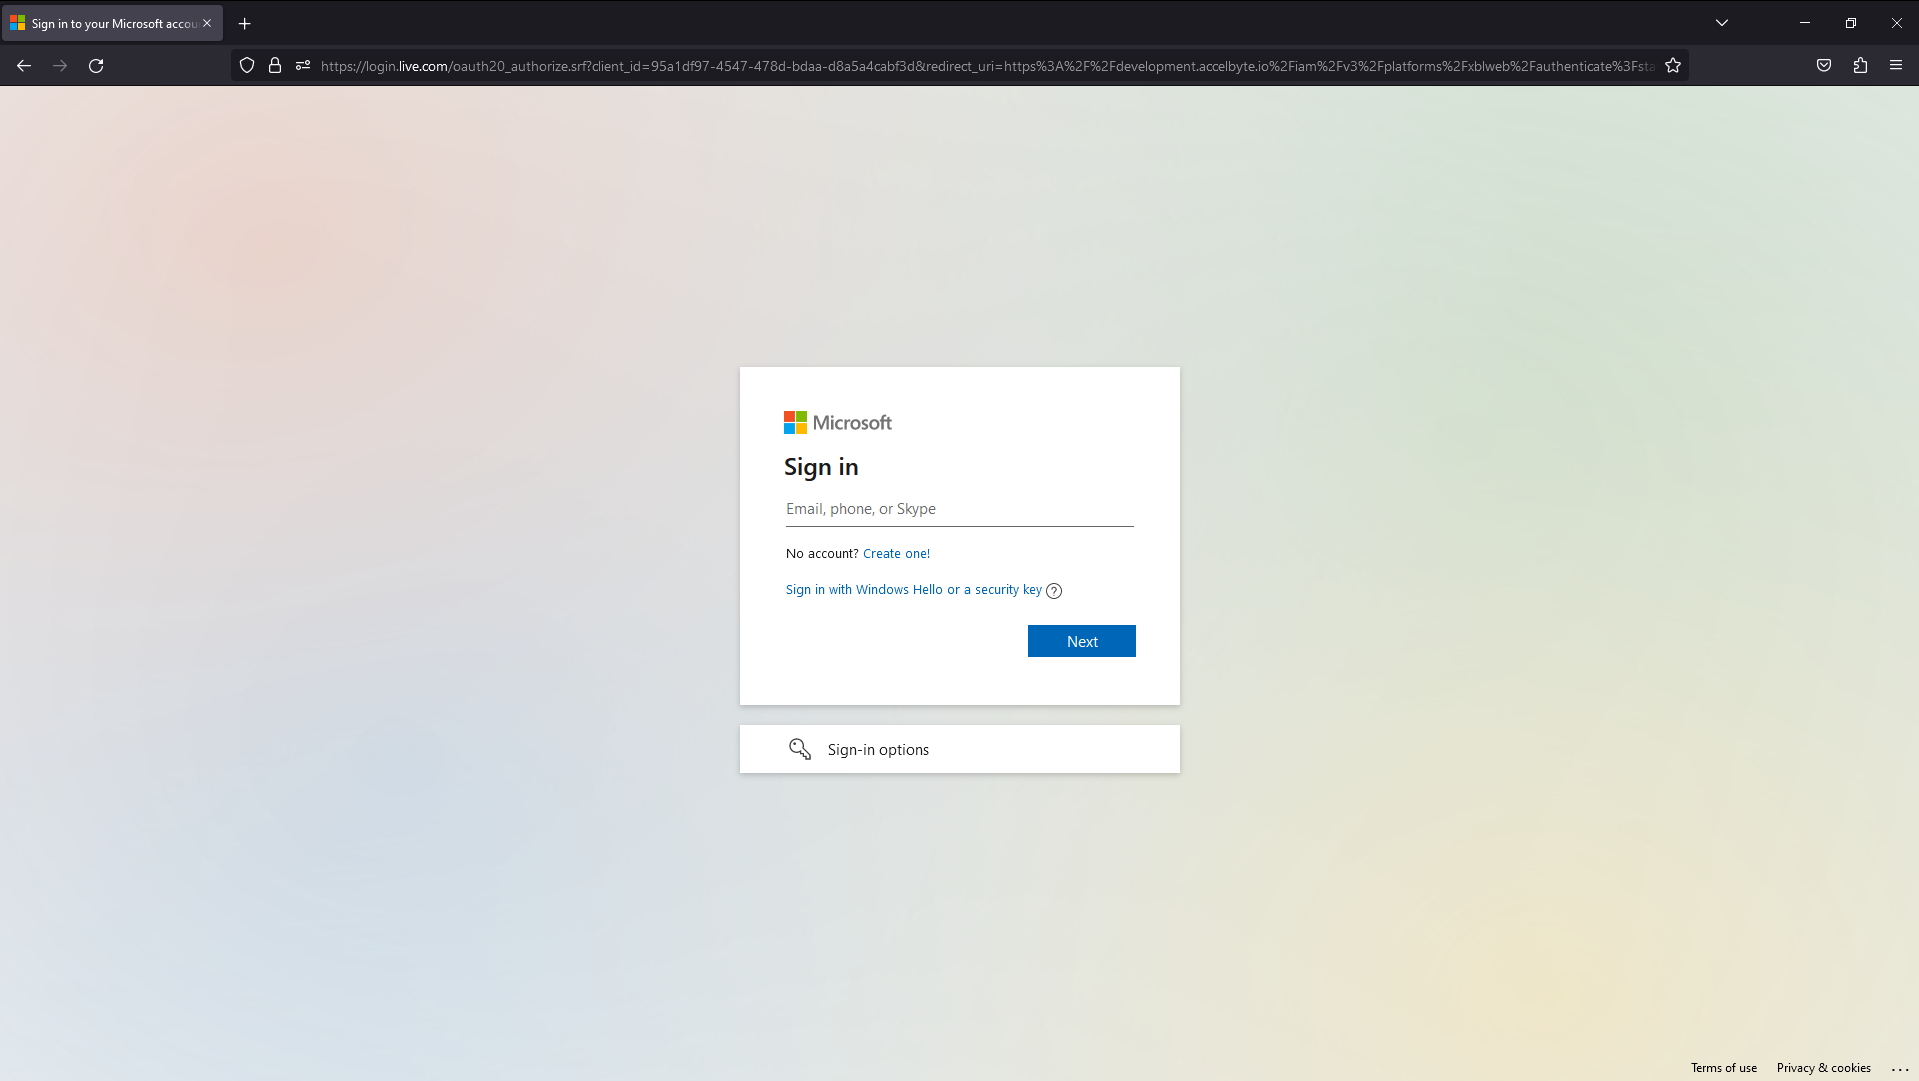
The system asks players to link their Xbox account with an existing or new AccelByte account. AccelByte is working on the ability to enable players to log in to the Player Portal with a headless account.
In-game login
Use the following steps to set up Xbox in-game login. This will allow your players to sign in to your game using their Xbox accounts.
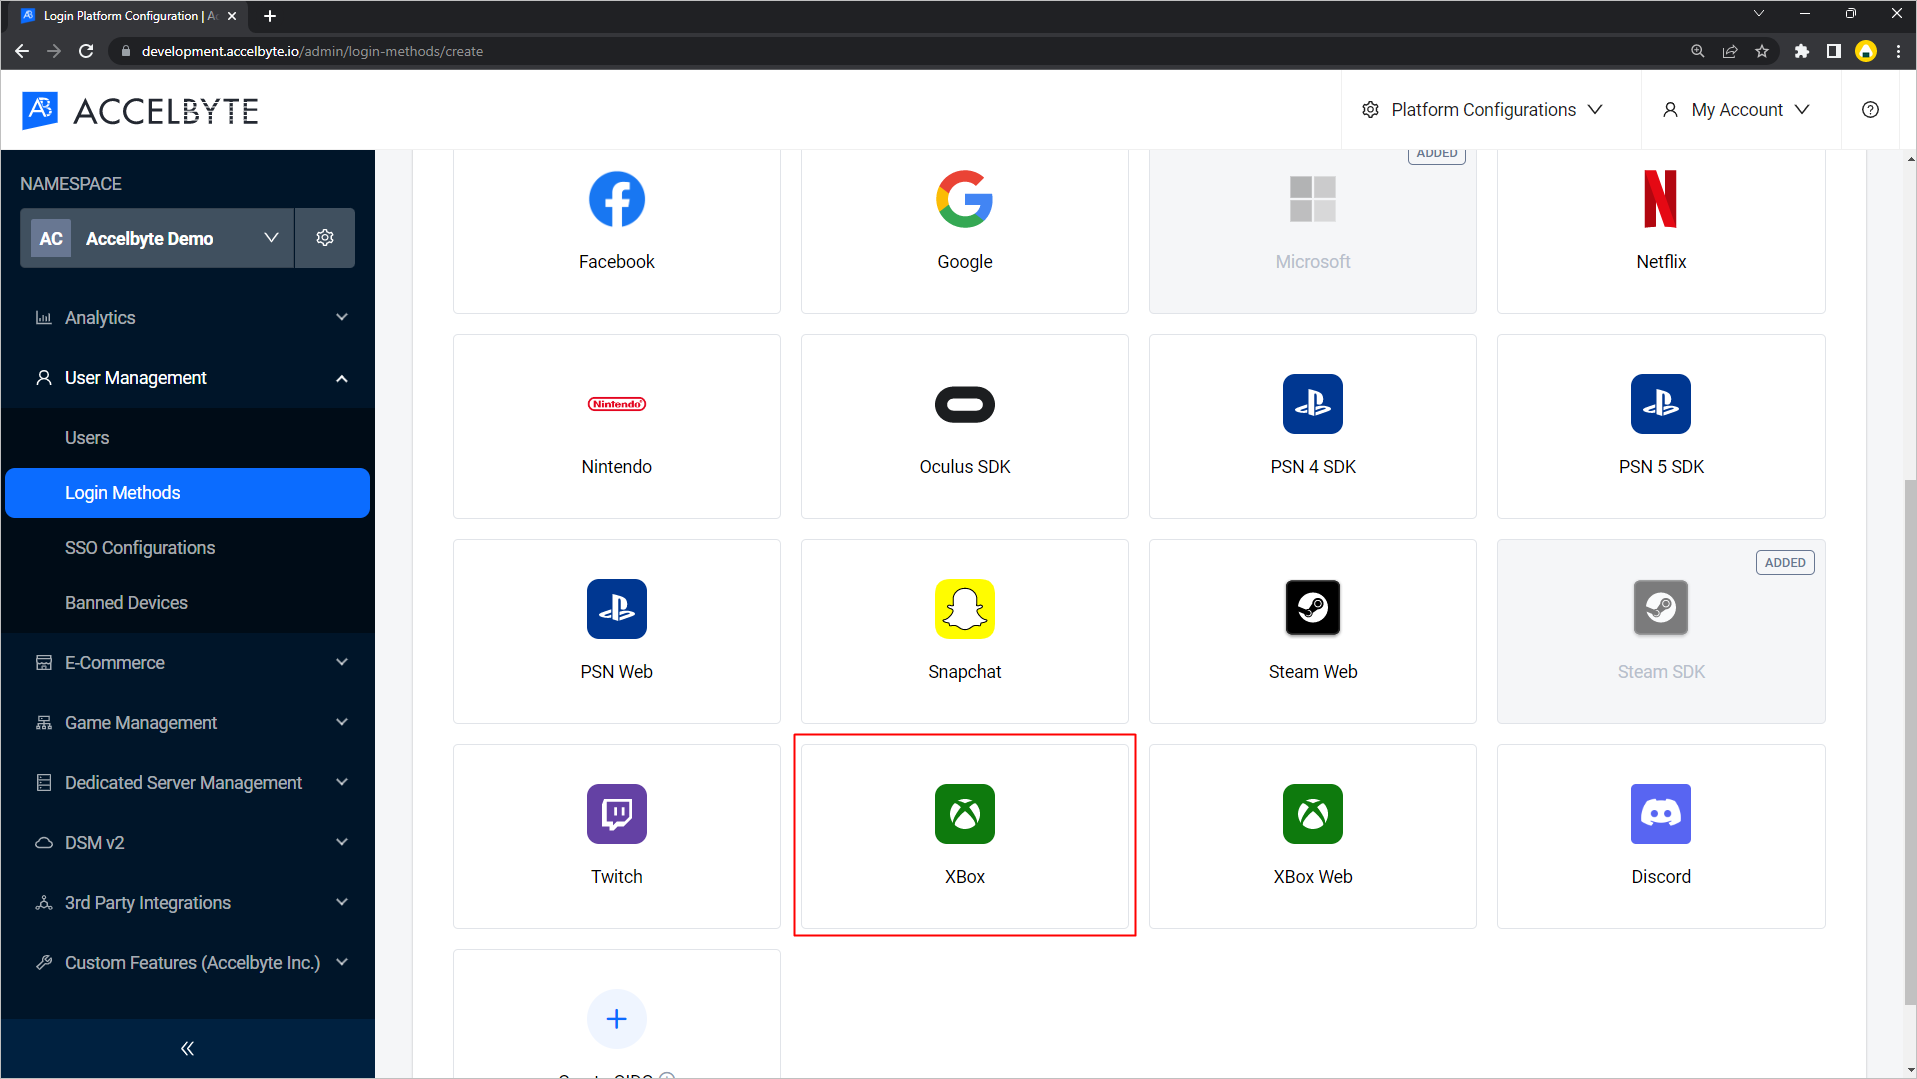
Go to the Login Methods Menu in the AGS Admin Portal. Click the Add New button.
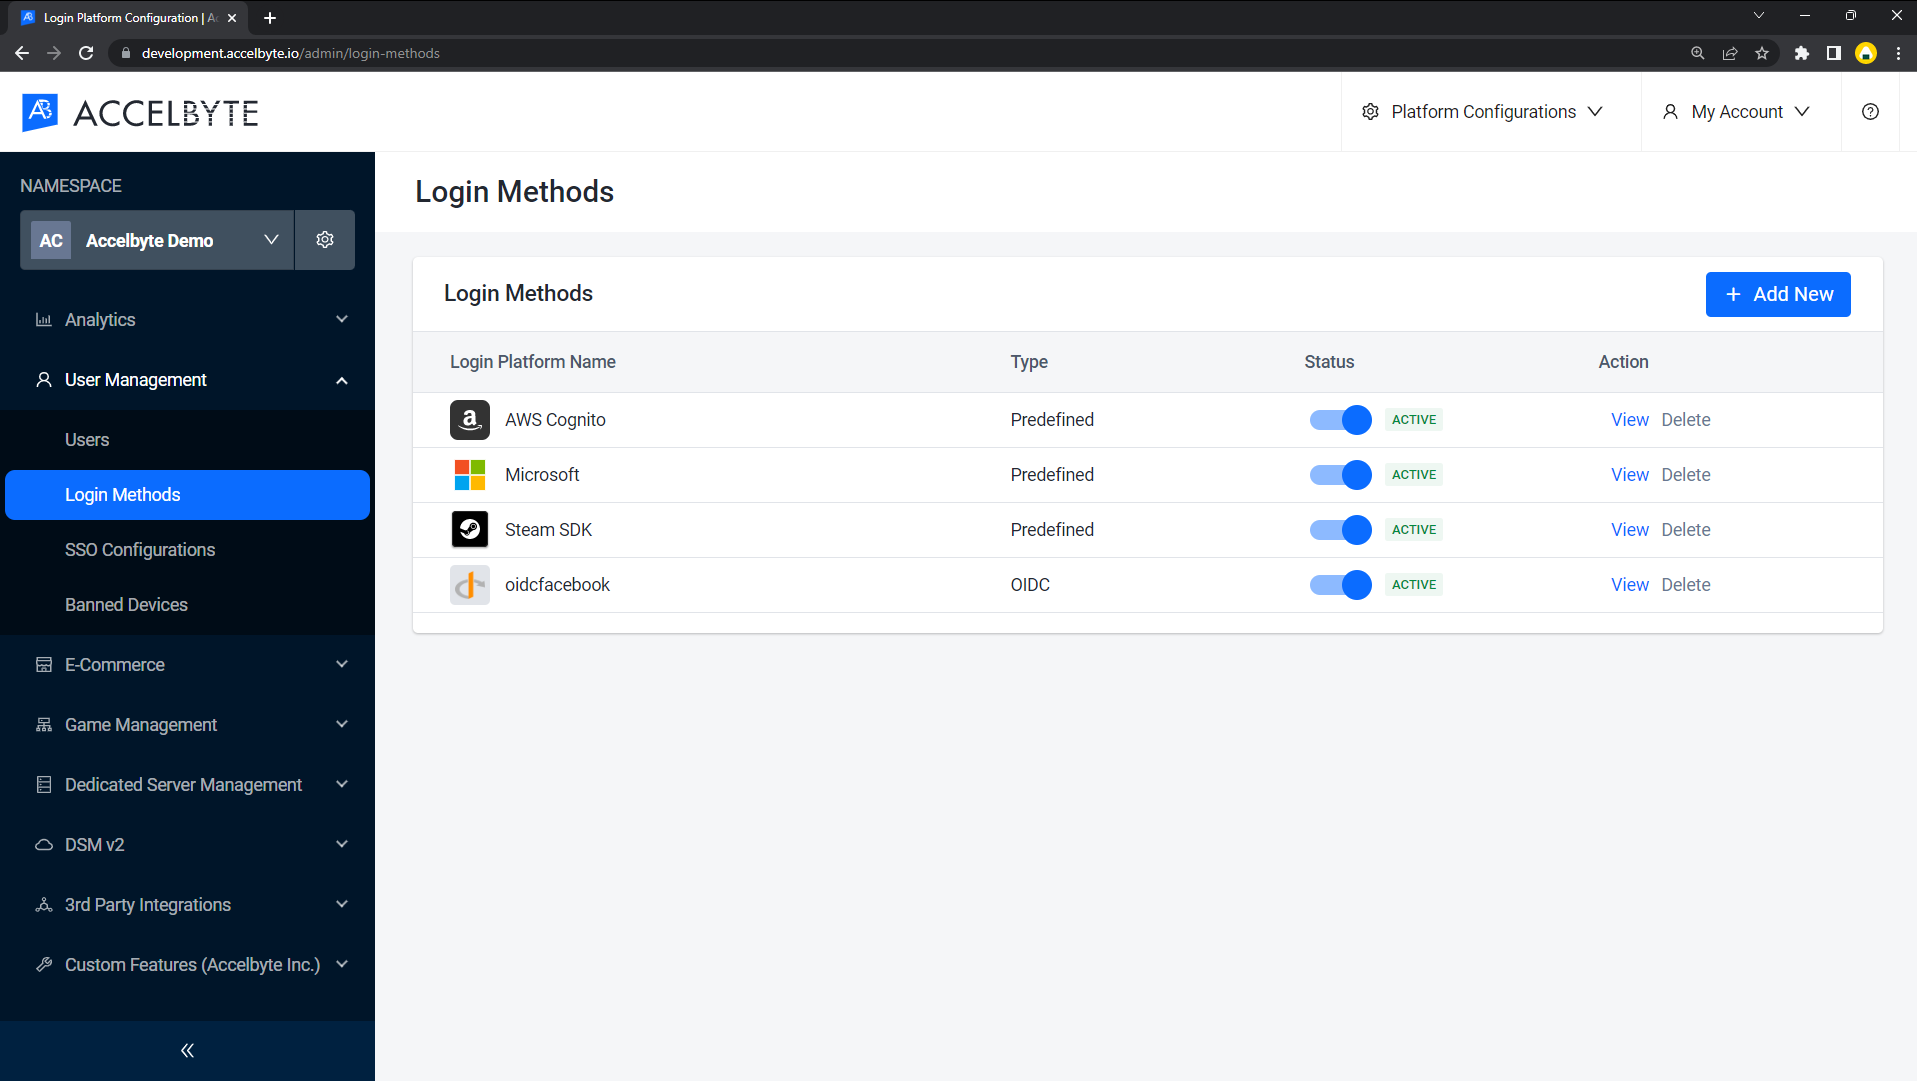
Click on Xbox.
Upload your
.pemfile from the "Create an RSA private key for AGS" section.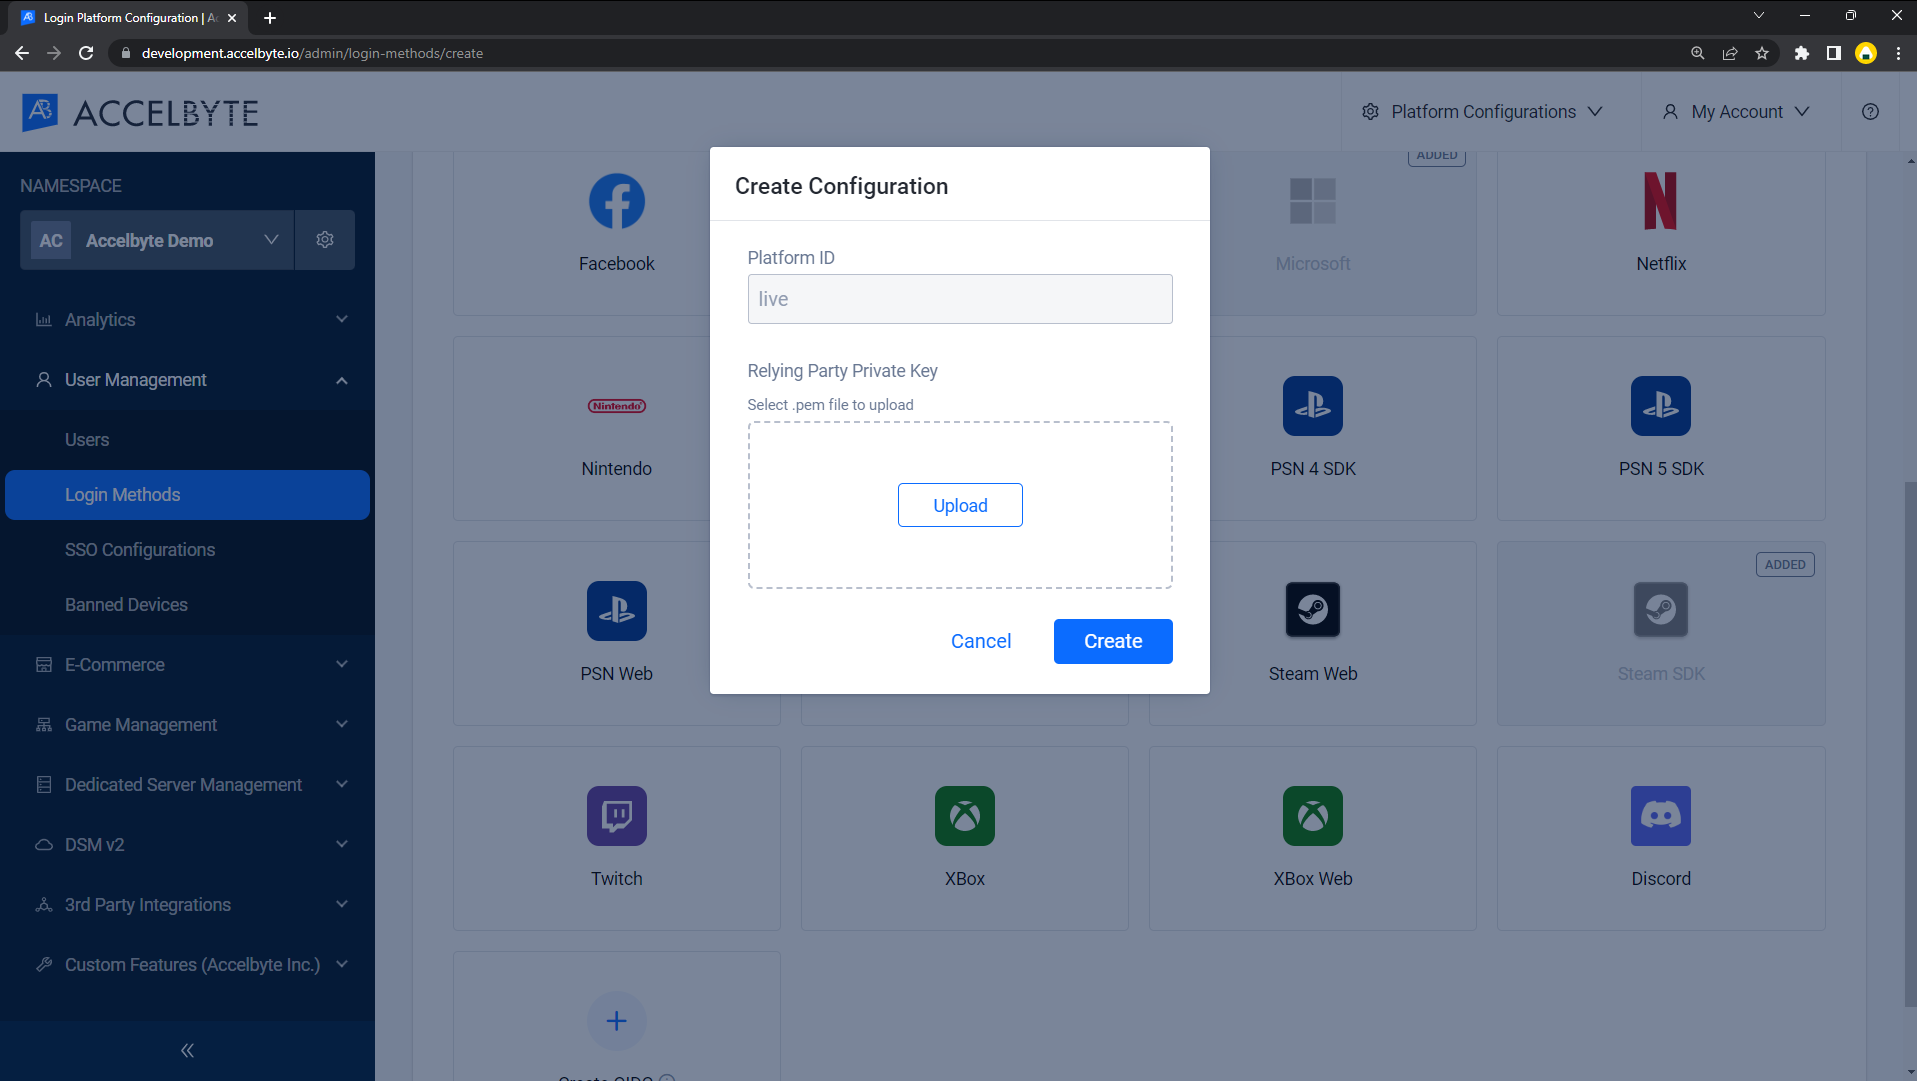
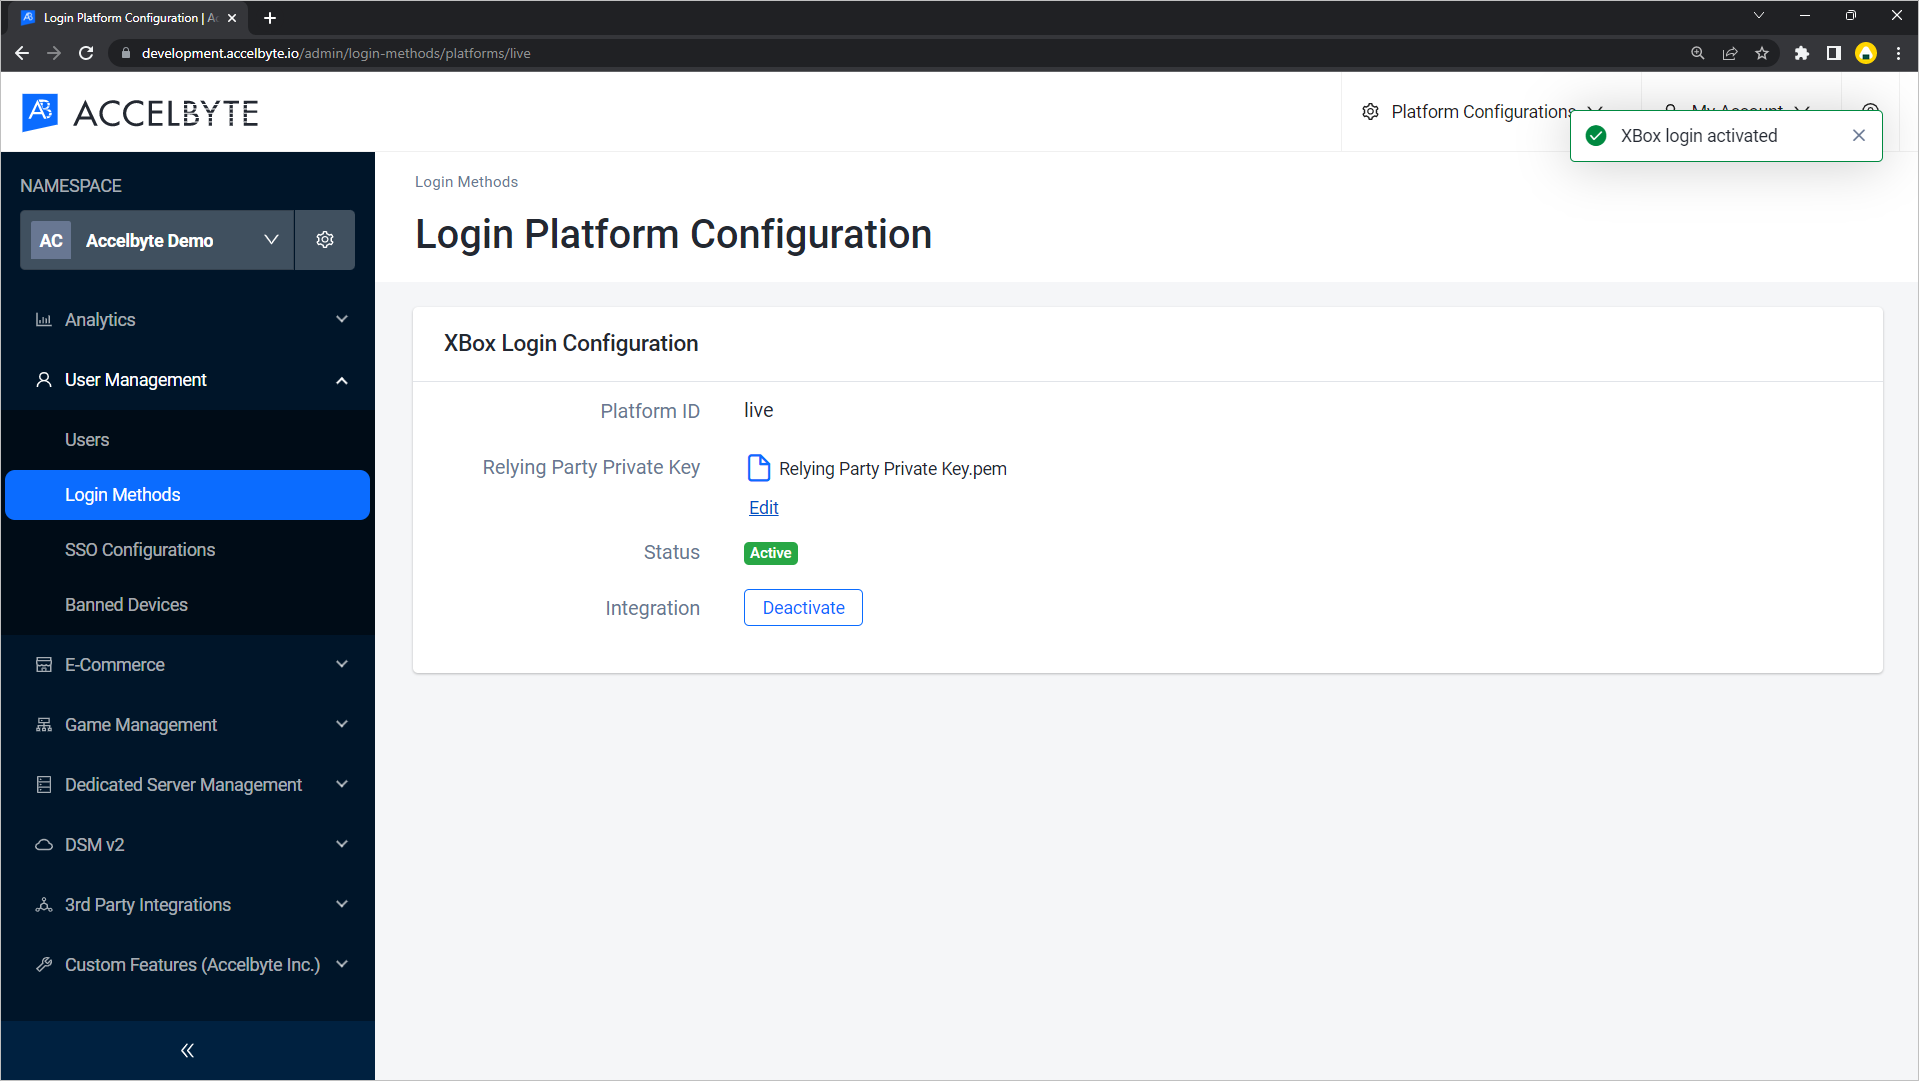
You will redirect to the detail page. Activate it and it will usable.
Create IAM clients
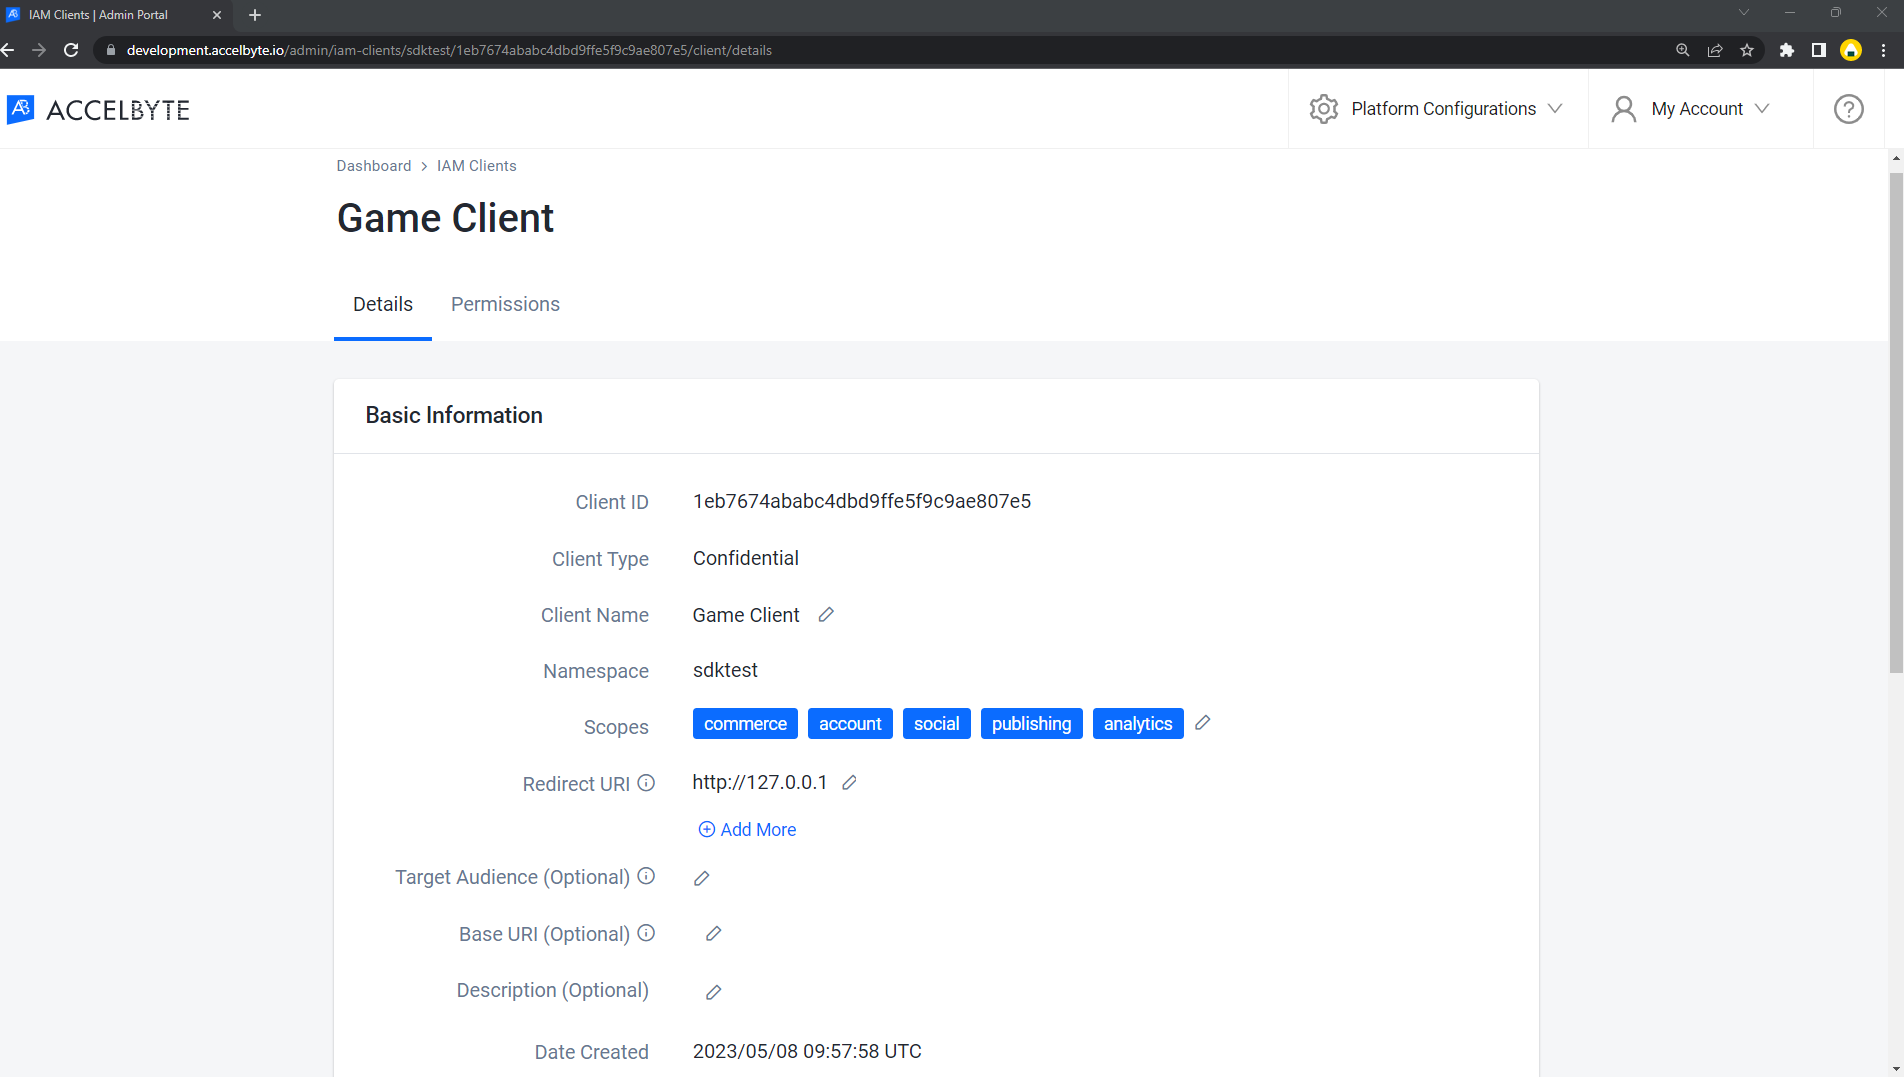
An Identity and Access Management (IAM) client represents the game client that you want to release on the Xbox platform. With an IAM Client, your game client can request access to protected AGS resources using the appropriate permissions. Learn more about IAM clients by reading the documentation on managing access control for applications.
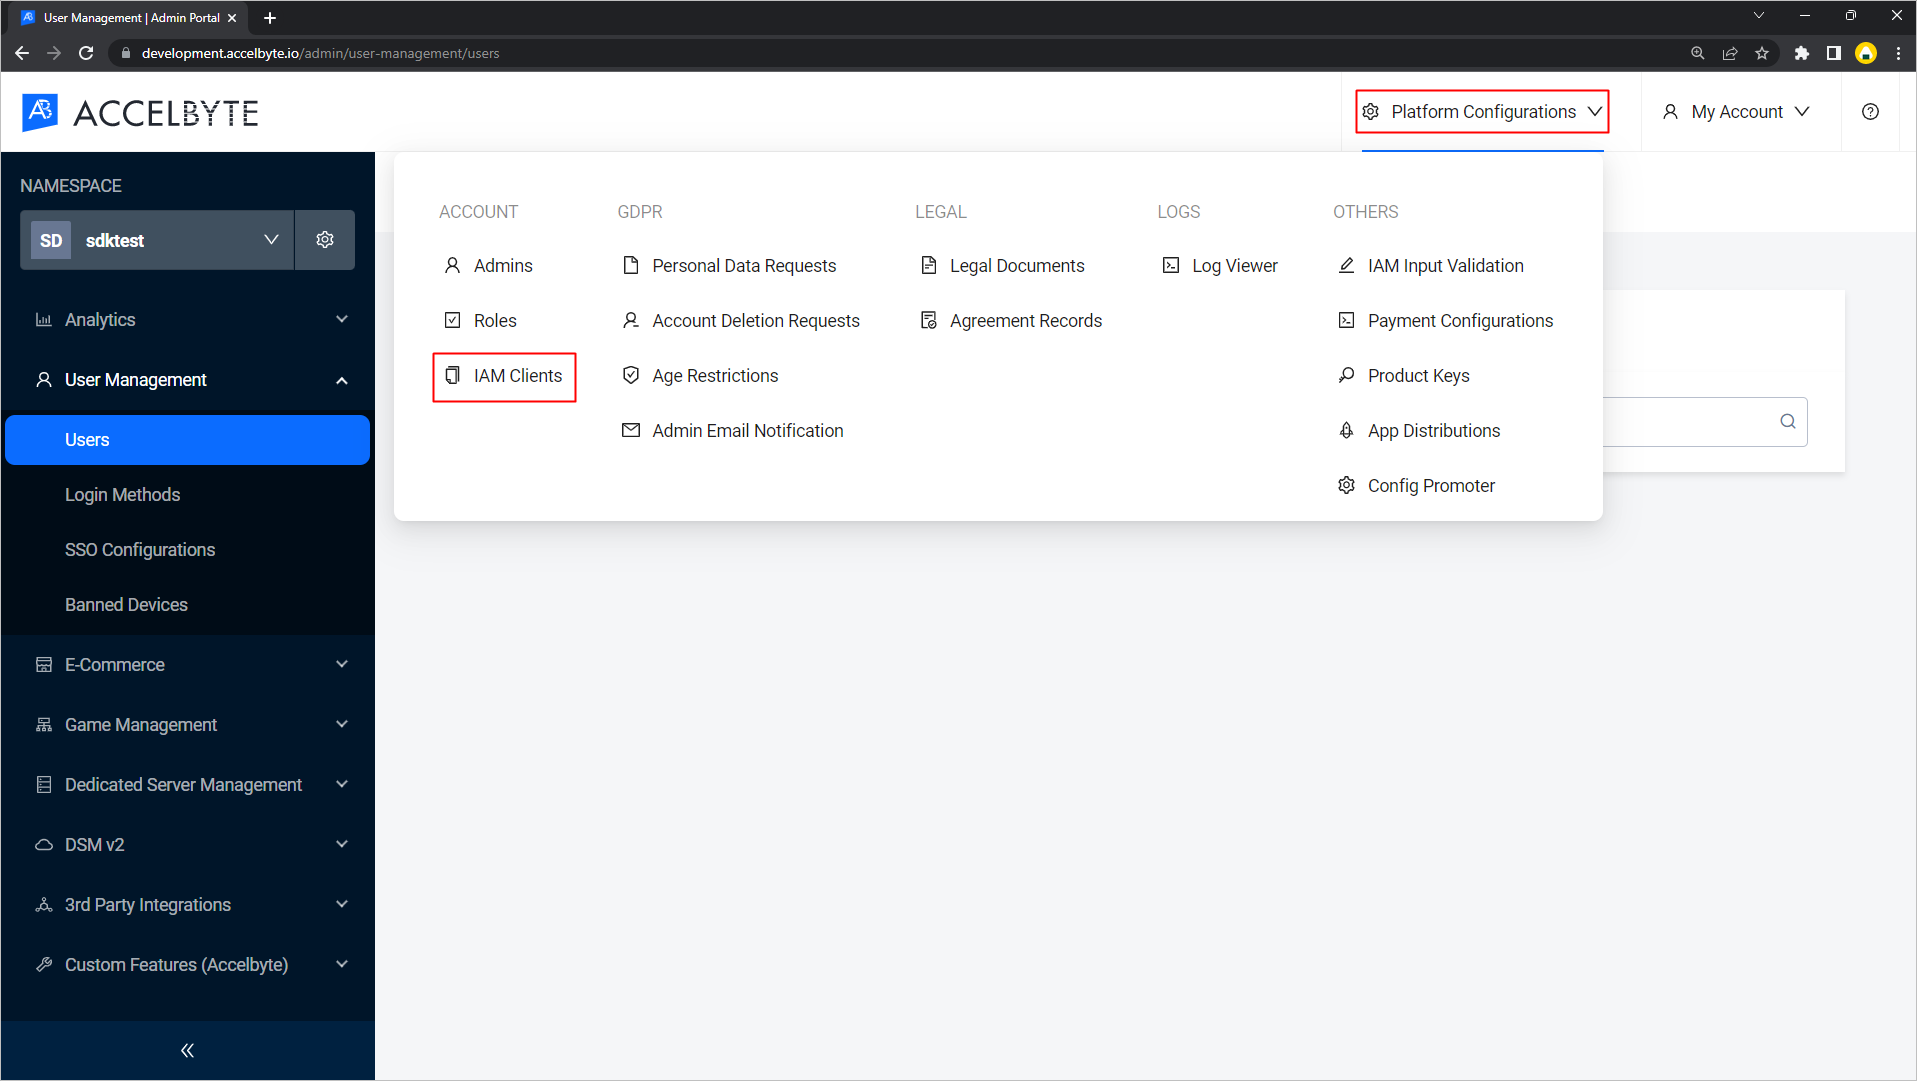
Go to Platform Configurations, then IAM Clients.
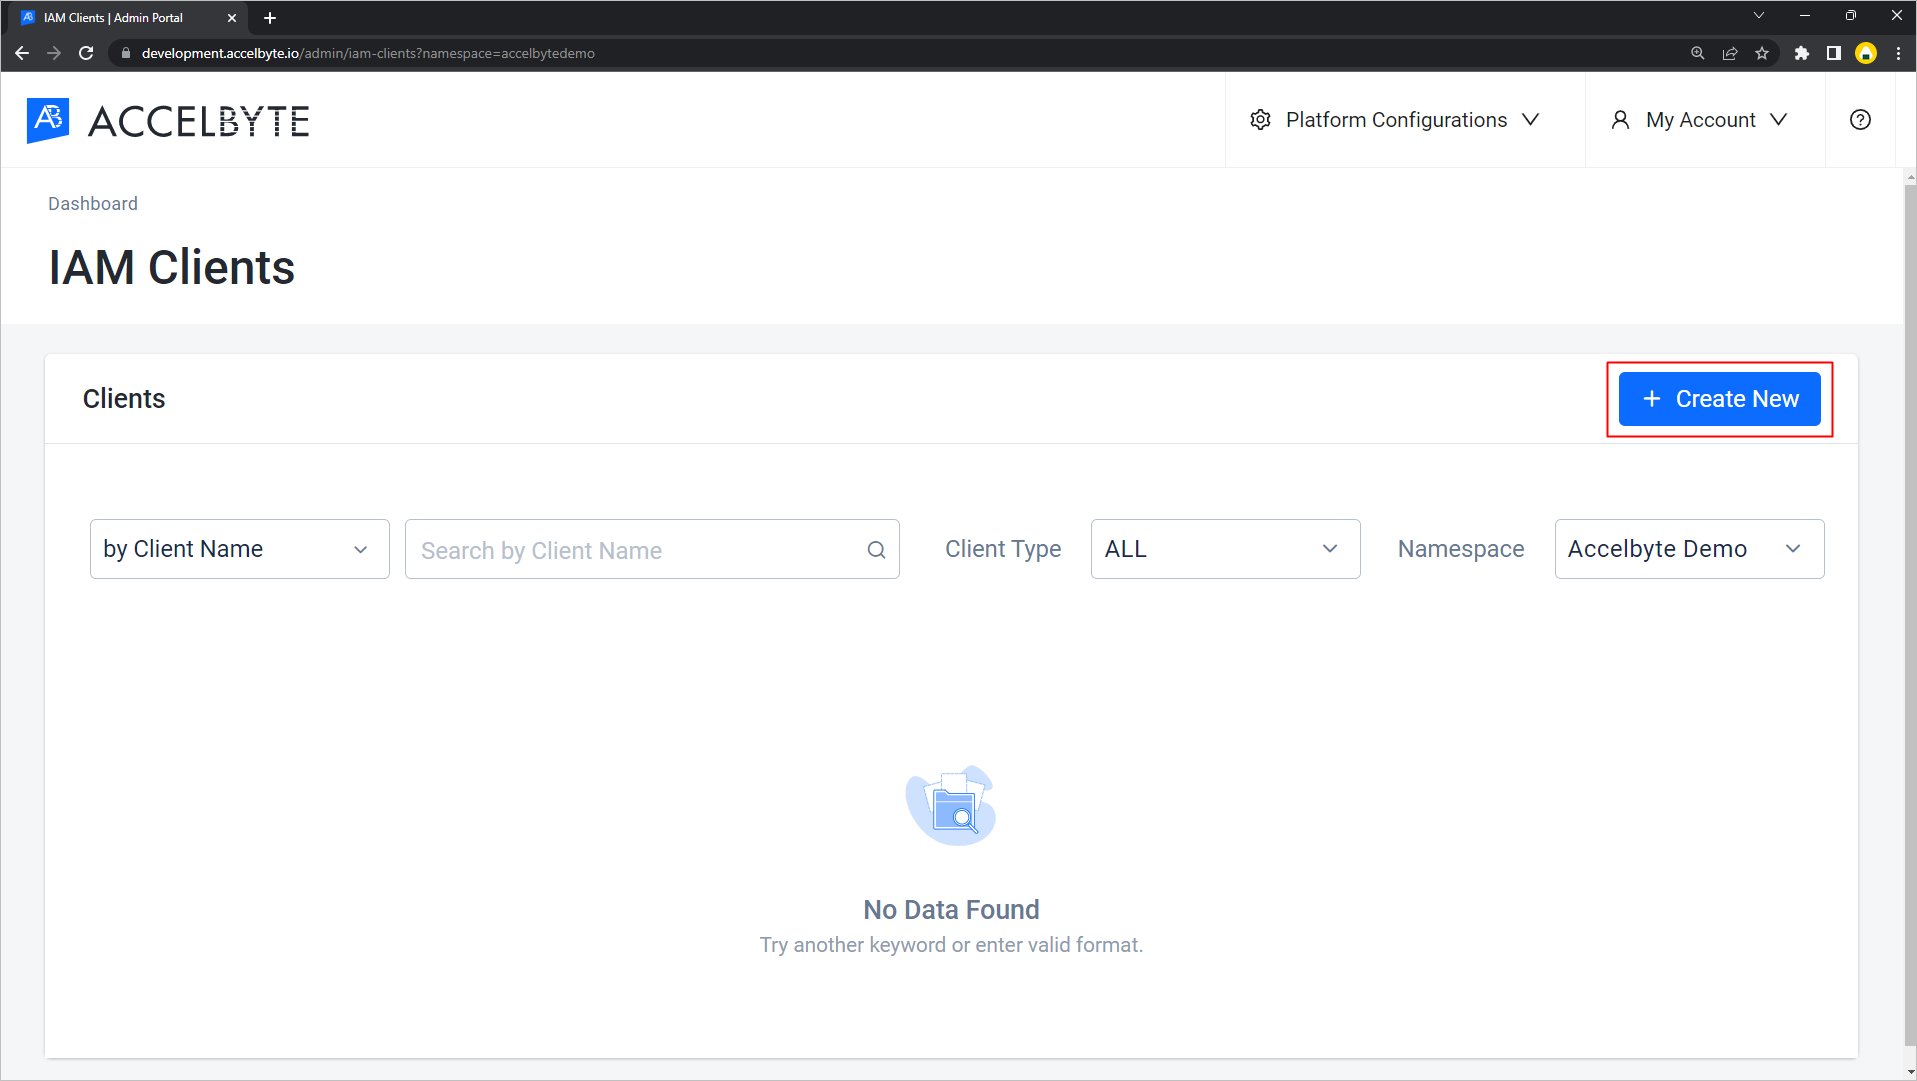
Click Create New to create a new IAM client.
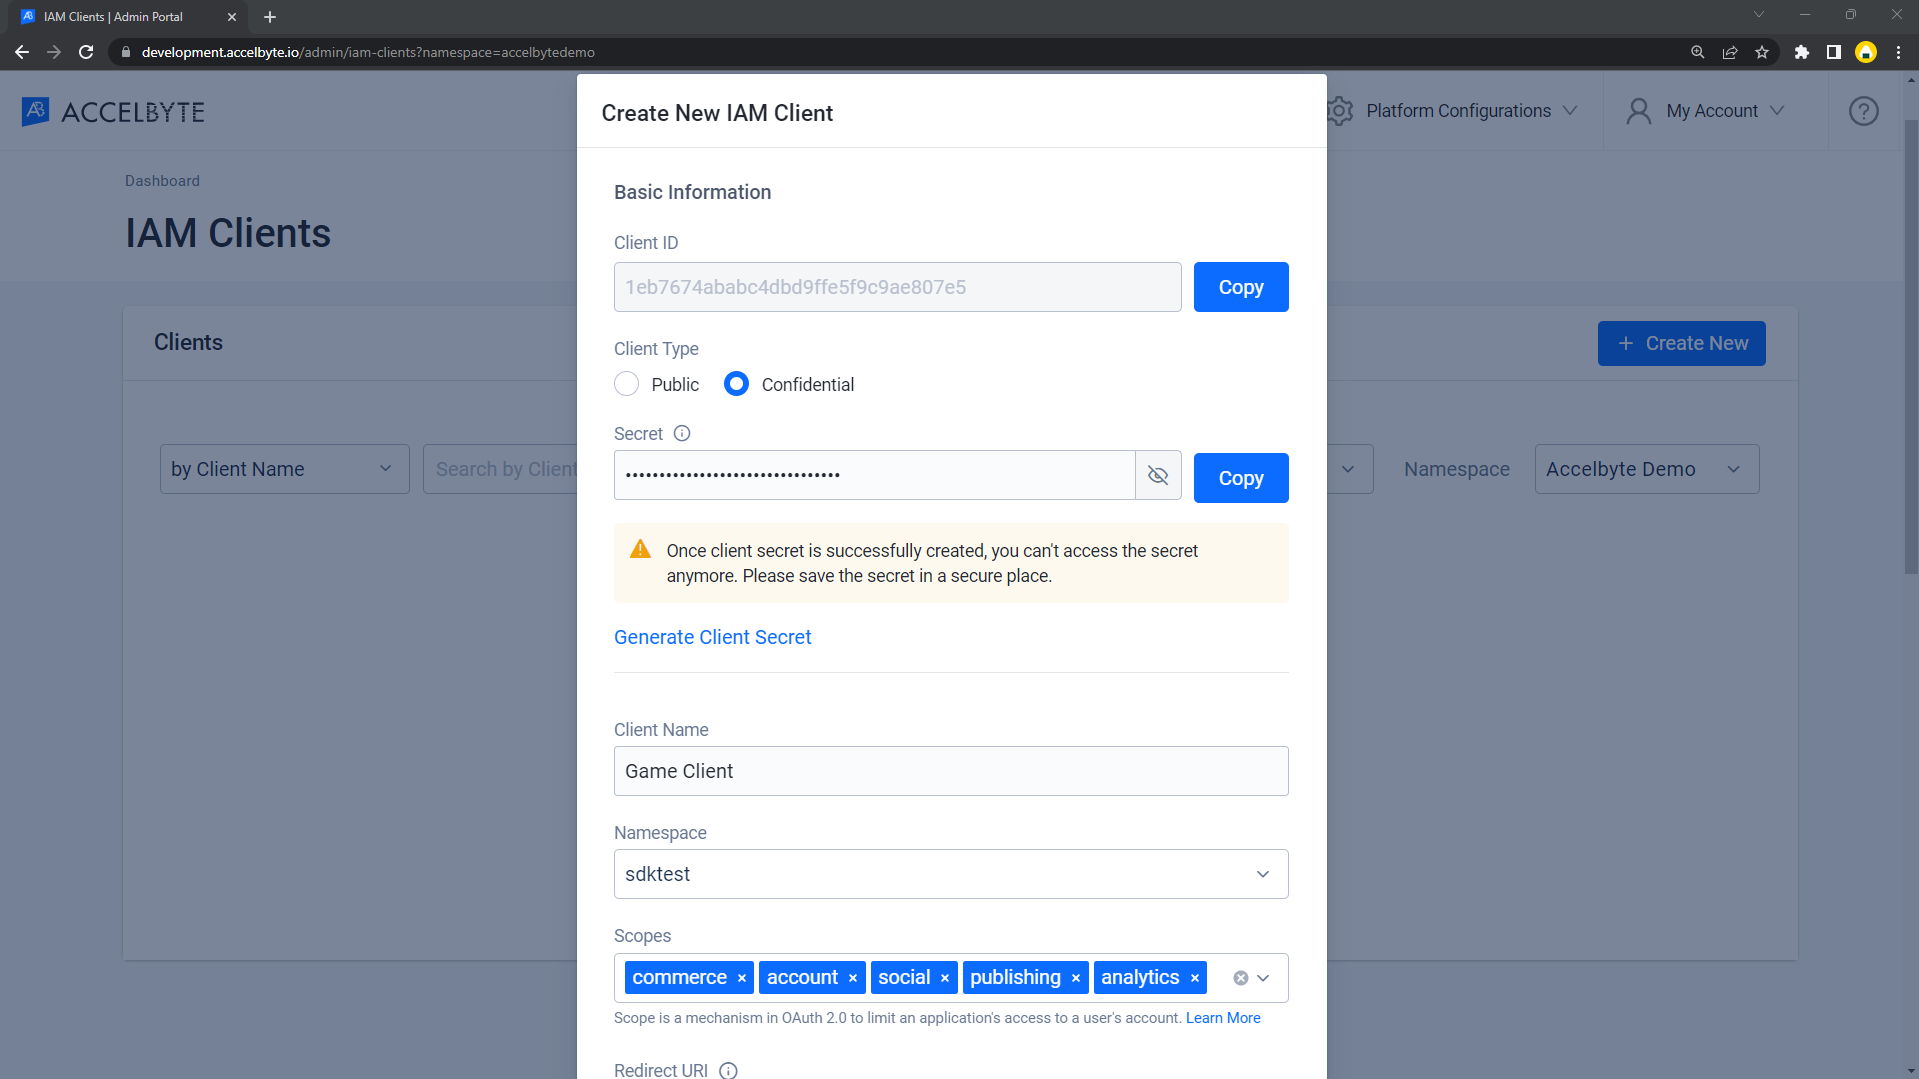
a. Enter the Client Type. We recommend you use the Confidential client type, since you might need to add some permissions to this IAM Client later for accessing AGS resources. Adequate security is not available if you use the Public client type.
b. In the Secret field, type the secret yourself or click Generate Client Secret to generate a secret key.
危険The client secret isn't visible after this creation step. It is vital that you copy and save the value as you'll need it when you set up your game configuration.
c. Fill in the Client Name. You can name it with specific name such as
<game name> xbox build, since this IAM Client will be specific for the Xbox platform.d. Choose your game Namespace.
e. For Scopes, you can leave the default value.
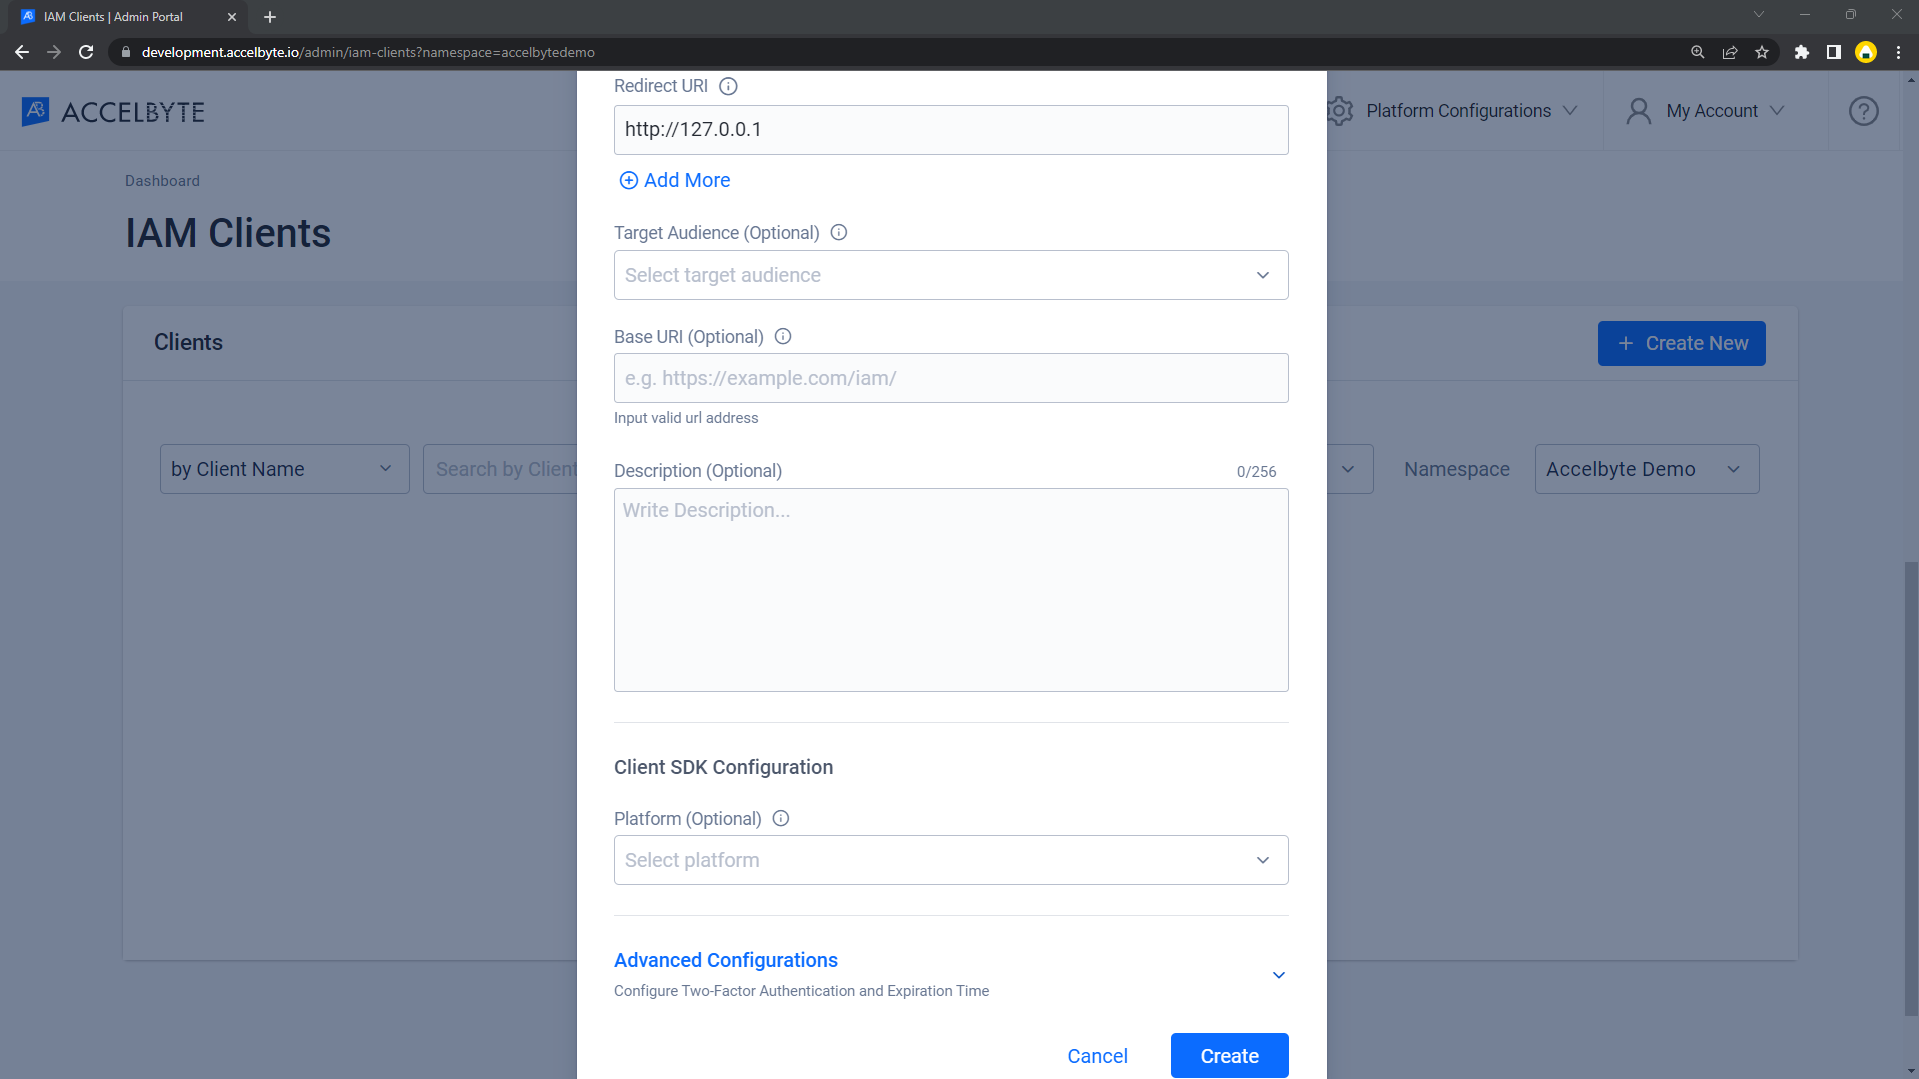
f. For Redirect URI, enter
http://127.0.0.1as it's for the Game Client Build.g. You can leave Target Audience blank.
h. You can also leave BASE URI blank.
i. You can describe the IAM Client in the Description field.
j. Platform Input in the SDK Configuration means the Target Platform for your game. In this case, set it to Xbox.
k. Advanced Configuration consists of additional features, such as 2FA and override expiration time. Since this is for a Game Client build, you can leave these as default / disabled.
 注記
注記The client ID will already be generated, so you can copy it. You can use the client ID in your SDK configuration for your game build later on.
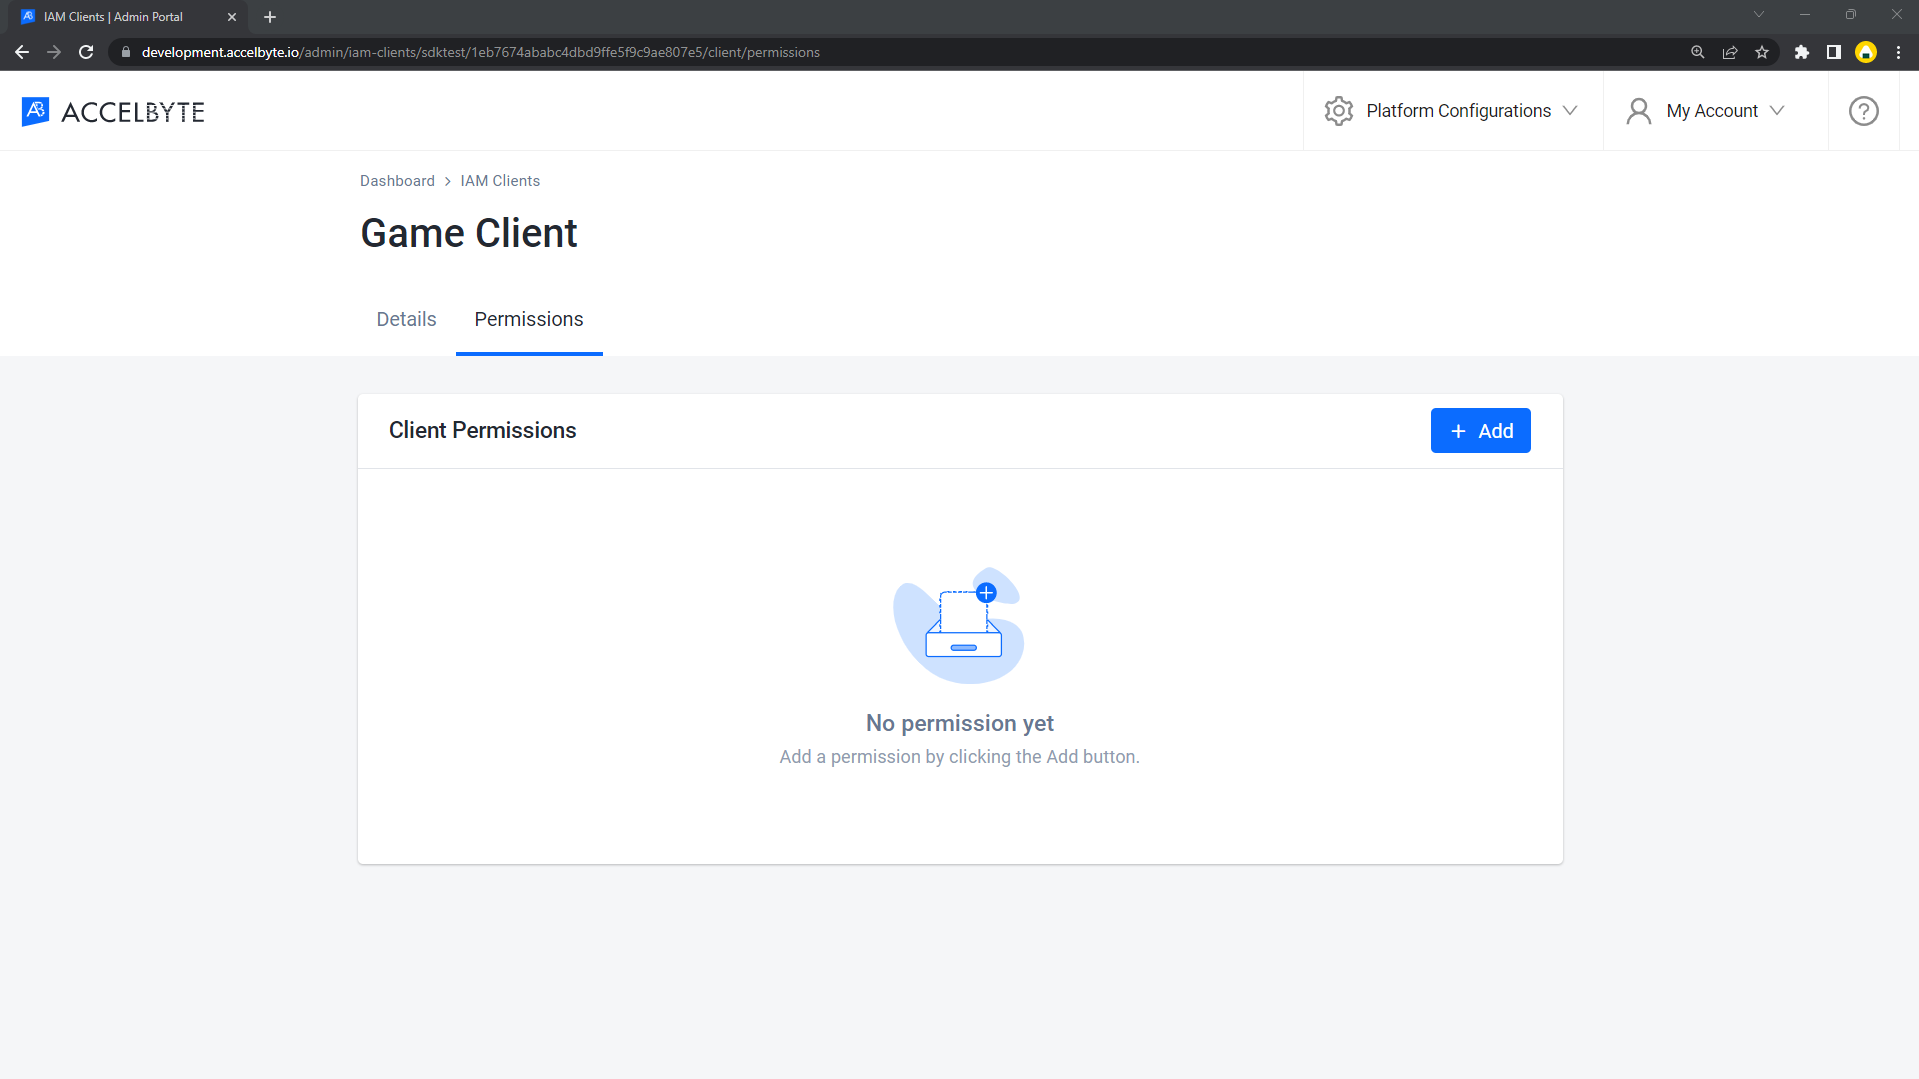
You will be redirected to the Client Detail page. Please set up the required permissions as you need. For more details about permissions, please refer to the IAM Client permission docs.
In-game login instructions
The setup for each game engine is different. Please choose your game engine from the available tabs.
- Unreal Engine instructions
- Unity Engine Instructions
Unreal in-game login integration
Preparation and configuration (Unreal)
Adding dependency
First, you need to add the public dependency modules called OnlineSubsystem and OnlineSubsystemGDK. These are all the dependencies needed for integrating your project to use the online subsystem for Xbox from within Unreal Engine.
public ABThirdPartyLogin(ReadOnlyTargetRules Target) : base(Target)
{
  PCHUsage = PCHUsageMode.UseExplicitOrSharedPCHs;

  PublicDependencyModuleNames.AddRange(new string[] { "Core", "CoreUObject", "Engine", "InputCore" , "AccelByteUe4Sdk", "Slate", "SlateCore" });

  PrivateDependencyModuleNames.AddRange(new string[] { "Json", "OnlineSubsystem", "OnlineSubsystemGDK", "HTTP" });

}
Add OnlineSubsystemGDK inside <YourProject>.Target.cs
public ABThirdPartyLoginTarget( TargetInfo Target) : base(Target)
{
  Type = TargetType.Editor;
  DefaultBuildSettings = BuildSettingsVersion.V2;
  ExtraModuleNames.AddRange( new string[] { "ABThirdPartyLogin", "OnlineSubsystem", "AccelByteUe4Sdk", "OnlineSubsystemGDK" } );
}
and <YourProjectEditor>.Target.cs
public ABThirdPartyLoginEditorTarget( TargetInfo Target) : base(Target)
{
  Type = TargetType.Editor;
  DefaultBuildSettings = BuildSettingsVersion.V2;
  ExtraModuleNames.AddRange( new string[] { "ABThirdPartyLogin", "OnlineSubsystem", "AccelByteUe4Sdk", "OnlineSubsystemGDK" } );
}
Also Add this to your <YourProject>.Build.cs file
PrivateDependencyModuleNames.AddRange( new string[]
{
    "OnlineSubsystem",
});

if (Target.Platform.Equals(UnrealTargetPlatform.XboxOneGDK))
{
    DynamicallyLoadedModuleNames.AddRange(new string[] { "OnlineSubsystemGDK" } );
}
Create a file on [ProjectPath]/Platforms/XboxOneGDK/Config/XboxOneGDKEngine.ini. Here is an example:
Unreal Engine project settings for Xbox
Inside your XboxOneGDKEngine.ini file, you need to add several variables for Xbox configuration. You need this configuration to make certain that, when opening the project, Xbox will initiate automatically by default.
To tell Unreal Engine to use Online Subsystem Xbox / GDK, add the following setting:
[OnlineSubsystem]
NativePlatformService=GDK
Now that you've told Unreal Engine that you want your application to use the GDK Online Subsystem, you'll need to configure the OnlineSubsystemGDK module by adding the following settings:
[OnlineSubsystemGDK]
bEnabled=true
LoginXSTSEndpoint="https://example.com"
Note: LoginXSTSEndpoint is the URL you registered on Xbox Live SSO.
Add and fill the tittleId, PrimaryServiceConfigId and PublisherName values as shown below from Microsoft Partner Center.
[/Script/XboxOneGDKPlatformEditor.XboxOneGDKTargetSettings]
TitleId="YOUR TITLE ID"
PrimaryServiceConfigId="YOUR SCID"
PublisherName="CN=<YOUR PUBLISHER NAME>"
Unreal Engine project settings for AGS
Change the DefaultPlatformService value and add the AccelByte credentials here on DefaultEngine.ini
[OnlineSubsystem]
DefaultPlatformService=GDK

[/Script/AccelByteUe4Sdk.AccelByteSettings]
ClientId=<Your IAM_Client_Id>
ClientSecret=<Your IAM_Client_Secret>
Namespace=<Your Namespace>
PublisherNamespace=<Your Publisher Namespace>
RedirectURI=
BaseUrl="https://demo.accelbyte.io"
IamServerUrl="https://demo.accelbyte.io/iam"
PlatformServerUrl="https://demo.accelbyte.io/platform"
Recommended Settings
At the end of this brief guide, your application's DefaultEngine.ini and XboxOneGDKEngine.ini file should look like the following setting block.
DefaultEngine.ini
[OnlineSubsystem]
DefaultPlatformService=GDK

[/Script/AccelByteUe4Sdk.AccelByteSettings]
ClientId=<Your IAM_Client_Id>
ClientSecret=<Your IAM_Client_Secret>
Namespace=<Your Namespace>
PublisherNamespace=<Your Publisher Namespace>
RedirectURI=
BaseUrl="https://demo.accelbyte.io"
IamServerUrl="https://demo.accelbyte.io/iam"
PlatformServerUrl="https://demo.accelbyte.io/platform"
XboxOneGDKEngine.ini
[/Script/XboxOneGDKPlatformEditor.XboxOneGDKTargetSettings]
TitleId="YOUR TITLE ID"
PrimaryServiceConfigId="YOUR SCID"
PublisherName="CN=MY PUBLISHER"

[OnlineSubsystemGDK]
bEnabled=true
LoginXSTSEndpoint="https://example.com"
Sample code implementation (Unreal)
Next step, we will show you how to implement the Xbox authentication method for your game with sample code below.
The IOnlineSubsystem reads the DefaultPlatformService value defined in DefaultEngine.ini. The IdentityInterface manages interactions with these services related to user accounts, enabling user authentication, and accessing token retrieval. Once the operation is successful, the LoginWithOtherPlatform function of the AccelByte SDK handles third-party platform login using the authentication token obtained from the Identity Interface.
FOnlineAccountCredentials Credentials;
Credentials.Type = TEXT("xsts");

UE_LOG(LogTemp, Warning, TEXT("%s"), TEXT("Begin Login"));
const IOnlineSubsystem* OnlineSubsystem = IOnlineSubsystem::Get();
if (OnlineSubsystem == nullptr) //will get active OSS Platform Service
{
  FString Message = TEXT("Cannot login with no online subsystem set!");
  UE_LOG(LogTemp, Warning, TEXT("%s"), *Message);
  OnActionInfoUpdated.Broadcast(Message);
  return;
}

const IOnlineIdentityPtr OnlineIdentity = OnlineSubsystem->GetIdentityInterface();
if (!OnlineIdentity.IsValid())
{
  FString Message = TEXT("Could not retrieve identity interface from native subsystem.");
  UE_LOG(LogTemp, Warning, TEXT("%s"), *Message);
  return;
}
APlayerController* MyPlayerController = UGameplayStatics::GetPlayerController(GetWorld(), 0);;

const ULocalPlayer* LocalPlayer = Cast<ULocalPlayer>(MyPlayerController->Player);
if (LocalPlayer == nullptr)
{
  FString Message = TEXT("Can only login with native platform for local players");
  UE_LOG(LogTemp, Warning, TEXT("%s"), *Message);
  return;
}
const FVoidHandler OnLoginSuccessDelegate = FVoidHandler::CreateLambda([=]() {
  FAccountUserData AccountUserData = FRegistry::Credentials.GetAccountUserData();

  FString AccountUserDataString;
  FJsonObjectConverter::UStructToJsonObjectString(AccountUserData, AccountUserDataString);

  FString Message = FString::Printf(TEXT("Login to AB Service Success : %s"), *AccountUserDataString);
});
const FCustomErrorHandler OnLoginErrorDelegate = FCustomErrorHandler::CreateLambda([=](int32 ErrorCode, const FString& ErrorMessage, const FJsonObject& ErrorObject) {
     FString Message = FString::Printf(TEXT("Error Login to AB Service : %s"), *ErrorMessage); //Failed Login to AB Service
});
const FOnLoginCompleteDelegate NativeLoginComplete = FOnLoginCompleteDelegate::CreateLambda([=]
(int32 LocalUserNum, bool bWasSuccessful, const FUniqueNetId& UserId, const FString& Error) {
  UE_LOG(LogTemp, Warning, TEXT("OnLoginComplete %s : %s"), bWasSuccessful ? TEXT("Success") : TEXT("Fail"), *Error);
  FString Message = FString::Printf(TEXT("OnLoginComplete %s : %s"), bWasSuccessful ? TEXT("Success") : TEXT("Fail"), *Error);
  OnActionInfoUpdated.Broadcast(Message);

  if (bWasSuccessful)
  {
     FString XboxToken= OSS->GetIdentityInterface()->GetAuthToken(0);
     UE_LOG(LogTemp, Warning, TEXT("PlatformToken : %s"), *PlatformToken);
     OnActionInfoUpdated.Broadcast(FString::Printf(TEXT("PlatformToken : %s"), *PlatformToken)); //Will Obtained Auth Ticket from OnlineIdentity

     FRegistry::User.LoginWithOtherPlatform(EAccelBytePlatformType::Live, XboxToken, OnLoginSuccessDelegate, OnLoginErrorDelegate);
     UE_LOG(LogTemp, Warning, TEXT("Request LoginWithOtherPlatform"));
     OnActionInfoUpdated.Broadcast(TEXT("Request LoginWithOtherPlatform"));
  } //this method will hitting the Accelbyte endpoint and will return value after success
});
OnlineIdentity->AddOnLoginCompleteDelegate_Handle(LocalPlayer->GetControllerId(), NativeLoginComplete);
const bool bWaitForDelegate = OnlineIdentity->Login(LocalPlayer->GetControllerId(), Credentials());
if (!bWaitForDelegate)
{
  FString Message = TEXT("The online subsystem couldn't login");
  UE_LOG(LogTemp, Warning, TEXT("%s"), *Message);
  OnActionInfoUpdated.Broadcast(Message);
}

FString Message = TEXT("Sending login request to native subsystem!");
UE_LOG(LogTemp, Warning, TEXT("%s"), *Message);
OnActionInfoUpdated.Broadcast(Message);
After adding this code to your project, compile your project, and then build and run it.
Project-packaging (Unreal)
Compile the editor and run it. Click on the Platforms section and Select XB1. Then, click on Package Project.
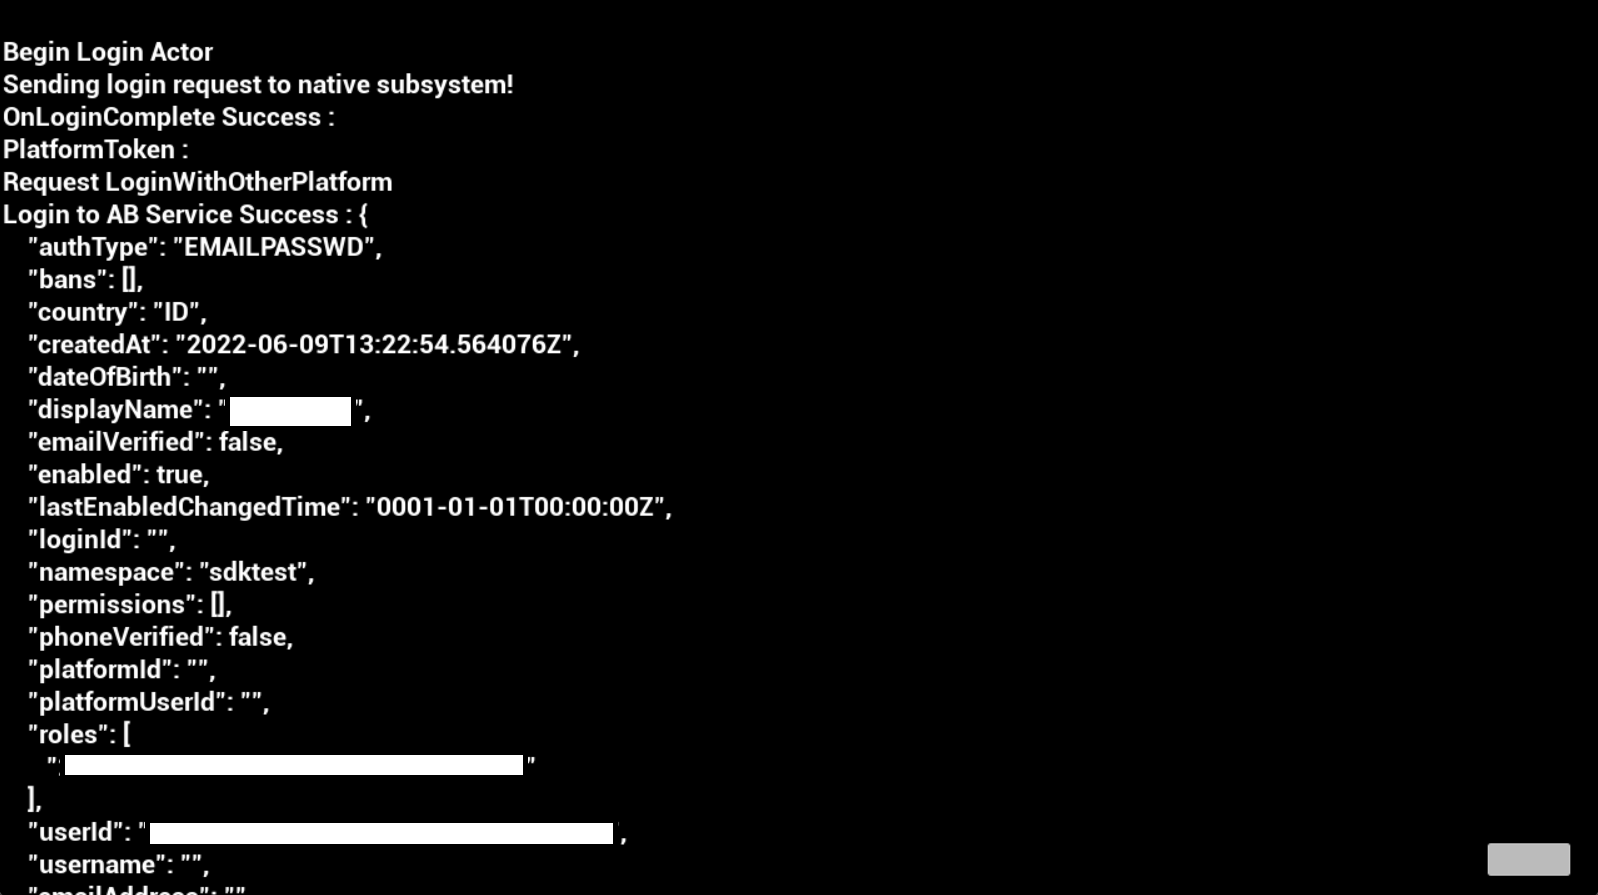
Sample code testing (Unreal)
Below we post a screenshot demonstrating that the code works and we are able to log in using an Xbox account on our test app.
Unity in-Game login integration
Preparation and configuration (Unity)
Unity project settings for AGS
- Create a new folder named Resources inside the Assets folder. All the AccelByte config files are placed in this folder.
- Create a file for the game client configuration named
AccelByteSDKConfig.json. - Fill in the
AccelByteSDKConfig.jsonfile using the information based on your game. Here is an example of the JSON file:
{
 "Default": {
    "Namespace": "Game Namespace",
    "UsePlayerPrefs": true,
    "EnableDebugLog": true,
    "DebugLogFilter": "Log",
    "BaseUrl": "https://demo.accelbyte.io",
    "RedirectUri": "http://127.0.0.1",
    "AppId": "",
    "PublisherNamespace": "Publisher Namespace"
  }
}
- Create a file called
AccelByteServerSDKConfig.json. - Update the
AccelByteServerSDKConfig.jsonwith the code below that will be used as the game server configuration. Here is an example of the JSON file:
{
  "Default": {
    "Namespace": "Default",
    "BaseUrl": "",
    "RedirectUri": "http://127.0.0.1"
  }
}
- Create two files named
AccelByteSDKOAuthConfig.jsonandAccelByteServerSDKOAuthConfig.json. Add both of these files to your project in the Assets/Resources directory. The contents of both these JSON files should be as follows:
{
  "Default": {
    "ClientId": "<OAuth Client ID>",
    "ClientSecret": "<OAuth Client Secret>"
  }
}
- Create a file called
AccelByteSDKOAuthConfigXSX.json. - Update the
AccelByteSDKOAuthConfigXSX.jsonwith code below that will be used as the game server configuration. Here is an example of the JSON file:
{
  "Default": {
    "ClientId": "<OAuth Client ID>",
    "ClientSecret": "<OAuth Client Secret>"
  }
}
Build configuration (Unity)
Change your build platform to Xbox.
Add Plugins.
- GameCore for Xbox
- AccelByte Plugin
Set your Title ID and Service Config ID(SCID). We modified
ScarlettGame.configfor our test. See the following example:<?xml version="1.0" encoding="utf-8"?>
<Game xmlns:xsd="http://www.w3.org/2001/XMLSchema" xmlns:xsi="http://www.w3.org/2001/XMLSchema-instance" configVersion="0">
<Identity Name="UnityTestRunner" Publisher="CN=Microsoft Corporation, O=Microsoft Corporation, L=Redmond, S=Washington, C=US" Version="1.0.0.0" />
<ShellVisuals DefaultDisplayName="UnityTestRunner" PublisherDisplayName="UnityTestRunner" StoreLogo="StoreLogo.png" Square150x150Logo="Logo.png" Square44x44Logo="SmallLogo.png" Description="UnityTestRunner" BackgroundColor="#000000" SplashScreenImage="SplashScreen.png" />
<StoreId>9N93MZXXXXX</StoreId>
<MSAAppId>0000000048xxxxxx</MSAAppId>
<TitleId>7BA2xxxx</TitleId>
<PersistentLocalStorage>
<SizeMB>256</SizeMB>
<GrowableToMB>512</GrowableToMB>
</PersistentLocalStorage>
</Game>
Game integration (Unity)
Get token:
public IEnumerator GetXstsToken()
{
    string xboxToken = string.Empty;

    string baseUrl = "https://demo.accelbyte.io/";
    while (string.IsNullOrEmpty(xboxToken))
    {
        XboxAdditionalInfoware gdkHelper = new XboxAdditionalInfoware();
        gdkHelper.Initialize(baseUrl);

        try
        {
            string fetchedToken = gdkHelper.DispatchTaksQueue().Result;
            if (fetchedToken.Contains("XBL"))
            {
                fetchedToken = System.Uri.EscapeDataString(fetchedToken);
                xboxToken = fetchedToken;
                AccelByteDebug.Log("Fetch GDK token result " + fetchedToken);
            }
            else
            {
                AccelByteDebug.Log("Failed to fetch GDK with error " + fetchedToken);
                throw new ArgumentNullException("Failed to fetch GDK with error " + fetchedToken);
            }
        }
        catch (System.Exception exception)
        {
            throw exception;
        }
    }
    yield return new WaitUntil(() => !string.IsNullOrEmpty(xboxToken));
}
Log in to AGS:
private IEnumerator LoginWithAB(string token)
{
    AccelByteDebug.Log("Login with other platform to AccelByte Attemp");
    var user = AccelBytePlugin.GetUser();
    Result<TokenData, OAuthError> callback = null;

    user.LoginWithOtherPlatform(PlatformType.Live, token, (Result<TokenData, OAuthError> result) =>
    {
        if (result.IsError)
        {
            AccelByteDebug.Log("Login Error : " + result.Error.error + " " + result.Error.error_description);
        }
        else
        {
            AccelByteDebug.Log("Login to AccelByte Success");
            AccelByteDebug.Log(result.Value.ToString());
        }
        callback = result;
    });

    yield return new WaitUntil(() => callback != null);
}
Test example log result (Unity)
[Verbose][<b>AccelByteSDK</b>][2023-05-23T09:00:05Z]HTTP Request:
---
POST https://development.accelbyte.io/iam/v3/oauth/platforms/live/token
X-Amzn-TraceId : 1-646C8095-79af8d3d3fa34817a8196c7c
cookie : device-token=unity_Console_GameCoreXboxSeries_XboxSeriesX
Content-Type : application/x-www-form-urlencoded; charset=utf-8
Accept : application/json; charset=utf-8
Namespace : sdktest
Game-Client-Version : 1.0
AccelByte-SDK-Version : 15.8.0
Authorization : Basic YTM0MmY1OWYzNDg5NDc2Y2EwMmQ3MDRjNzU4OTFhM2I6a0AjaCxHXVJeQzYxIzJkITUuWXVPIXdsV0R0Wz1JVEU=
Content-Length : 2389

platform_token=XBL3.0%2520x%253D2738139987992162178%253BeyJlbmMiOiJBMTI4Q0JDLUhTMjU2IiwiYWxnIjoiUlNBLU9BRVAiLCJjdHkiOiJKV1QiLCJ6aXAiOiJERUYiLCJ4NXQiOiJiLXRhUG5UUWFPenNENTNCcm5XeGdCTGxtZGcifQ.lWE8nMTWvFhDCoTKH9PZ0D6SC3pUJRCA0vBx4igmSMN6vQwDcrprqISWKpQZGqxq4pVy-J2V3D6skMvR3I4M36SwpO6rQb_AvyC2wzHOota1pSUKidPOfQiXEBhVihokfi4_a_CmVRwWg89OLpXm3QiFkQ4sqlnfXJRKjWSze6pGQQbqZToDKCJ97h2W8Uvfpmo8ML36UlH_2oF88-c-ZYS1unqMhAUmO2ZqsmrBF8E9EIMQgJyoKfgcJVWnQ86u6jYkbidHDK99rZJRpD6miNpabXy_bnUF_dBONjyhHdHR6S5BfnxSgjvhm_FK_U82GvWm8x8VCsdf8LFAsfr_zA.s2AdczUzhtonm00u--cpEg.Xo6OtlBUNrYaEx39uVxbXcRTTHXUre4kMpECxnYpzdox8sm8-0jhCeBBCrp1nKKbT7__3o3G7Cd3kUVNXOBbOPQLae51IwDOL75HR4IBzGqOE97eCB65ybGr_KU4B6o3An2KeUlu5oNoduepcKmwciplOBpXEiVzPZaSDXW6wtWyTwn84cYCOa55-O_qkR5ISvlVSXvIL7xrmC2gp1ml-TrozLJXvvZt6mx9f8lawIe9yYhON87kuxdn5B9DPmz1LB8smQe8jhuLf_jqqIf66HKlB9INK8cHXz_tc7fraQIiEkMANMwNztE_ch9kRW3V0HHBhllUdEIToZOltDH2OJSrCauD4oxW4YBw5-2Oojb7g58YTMO6sFYacfVbwT1n_TQ9w-gY2DUyXKZulpK8BuOJgBwx9LAU-QSSSY2UkKul_vWBCXUJ5pZz9WNzLEGDOQTi2M3DL6pEKH4Lh8pXZTqBP6LK1nPHEMxGyHcq2kz-fSGvrz1eOBTn8Xk9cC0acX7ROfoff72aBP_ZF56r3hjUDqw39_sgJ5iu9s-_lC_so4HiSszbg2Fz7D9jI8y2ODaHXIPD7DpbKipW41EwSf3vCnT7FYH318f2kq5h-QaiRrir1isa7pwjyJ4QqDWnkjJBQ8mI_Yyno7dXrirkpSaYIJNLxCAQNSgiBnO2SmZUBmaLsX_ahUFCHWqKAkfto6baVJ7QD-kTM4W6aquLqnhfCwqLm91foKvk8h9q5gmnFtYoVoVOJvheQ8z1tvIX6npqVyYs_loxPVOzg10sNkuvbvS8wD3OYF20jbM3Lde-Yq5Wnur1uncs7MFk44RncwhuLrqNFwEN_YimU_8RB3NbpK2Rophyyl0BilhCudQn8-_HsFYXduy800-IqtbyJxyBsHlRXilj5hOFx4CqaC4nVD-O_gZWMqYBdVKtGO5-LXMs4xAEX79zvQ71zvC39Tj7jgaKFvqihRoexkjJPCMXMxjSJIIacYJZR7vzicqhwkQvlyh_lVtvT6DAC4rjr22EhknPJdPgh14Q2YhjG_bQWTHjMLZI-HRklOqOU2RDsFZHj-mzJo-05YaYBUc4nNH3L4ijH-qNOF_DESC_ePov5dg2VKs7WnJXQOSUvzpQvaj1WhAF_DQxsXkAmmc-mJsvJtWDw8kCjMI6ryqj_bM6AwCjmqNLm9lqeeysTfPftoH-PS8Had1ZDhDGFqKRWTg-YCc-dcicpGu4OBXPnviTq2ZJ6exqLI-7V2nIYBkVWCmRmI0bJPwAFdXD_M-m7lTZxRGU4JvItQfyul3MjZqRwnXrKGegYRCreHeiTdmtAjvckOVB-TR1bQTGtIVtJEJZYoLHjNZm-KvTNS4bmvySZVtUSwpsIDlc0E4-AA4fJpToN0kjKMwrIIn89U0XsDlMch28VQuUtFSOPvr-djphTjfVzXrB4CuOqmP4Sumay4fqgixjkLBgbObf0sleXaSxD0p-M_3uN1j5VEQI_4GuouOJv5w2zJ6M_36CH_Pb6wiwAgb-wJ3nSpIlH8vi3tPEI7Ej-tT9oKhdXOtTYWKvkGSENnbtBRvHitqmwDX26N3ZS1KopBPacLONc8WLRq8dJJM7lZW2UABSTFOKMZ94BQD1Uv5bhc3u7kSYzcSpIJXxEosdGAVp7jPmdpN2aVBiu6eB0r0kaT8ILBwV3IjRB1kgwEUelYCn071y-g5s2RjJ5TINP-hAEuNuVlO6ra5R2E8gB68kZGPTghBuIdTLIBgEVAsXW5gpjcOZHe4.BtthS60bnD5WcVbwZ043lA&namespace=sdktest&createHeadless=true
---
[/Verbose]
UnityEngine.Logger:LogFormat(LogType, String, Object[])
UnityEngine.Debug:LogFormat(String, Object[])
AccelByte.Core.AccelByteLogHandler:PrintLog(AccelByteLogType, Object, Object)
AccelByte.Core.AccelByteLogHandler:InvokeLog(AccelByteLogType, Object)
AccelByte.Core.AccelByteDebug:InvokeLog(AccelByteLogType, Object)
AccelByte.Core.Report:GetHttpRequest(IHttpRequest, UnityWebRequest)
AccelByte.Core.<Update>d__4:MoveNext()
System.Threading.ContextCallback:Invoke(Object)
System.Threading.ExecutionContext:RunInternal(ExecutionContext, ContextCallback, Object, Boolean)
System.Runtime.CompilerServices.MoveNextRunner:Run()
System.InternalCancelHandler:Invoke()
System.Threading.ContextCallback:Invoke(Object)
UnityEngine.WorkRequest:Invoke()
UnityEngine.UnitySynchronizationContext:Exec()

[Verbose][<b>AccelByteSDK</b>][2023-05-23T09:00:06Z]HTTP Response:
---
HTTP/1.1 200
Date : 2023-05-23T02:00:06Z
Content-Length : 2680

{"access_token":"eyJhbGciOiJSUzI1NiIsImtpZCI6IjE1YjVlZGM4NjAzNjE5ODU4MWQ0ZDFlN2I3OTZlN2VjZTc0MTFjYWQiLCJ0eXAiOiJKV1QifQ.eyJiYW5zIjpbXSwiY2xpZW50X2lkIjoiYTM0MmY1OWYzNDg5NDc2Y2EwMmQ3MDRjNzU4OTFhM2IiLCJjb3VudHJ5IjoiSUQiLCJkaXNwbGF5X25hbWUiOiIyIERldiAxNTQ3NTcxOTMiLCJleHAiOjE2ODQ4MzYwMDksImlhdCI6MTY4NDgzMjQwOSwiaXNfY29tcGx5Ijp0cnVlLCJpc3MiOiJodHRwczovL2RldmVsb3BtZW50LmFjY2VsYnl0ZS5pbyIsImpmbGdzIjowLCJuYW1lc3BhY2UiOiJzZGt0ZXN0IiwibmFtZXNwYWNlX3JvbGVzIjpbeyJuYW1lc3BhY2UiOiIqIiwicm9sZUlkIjoiMjI1MTQzODgzOWU5NDhkNzgzZWMwZTUyODFkYWYwNWIifV0sInBlcm1pc3Npb25zIjpbXSwicm9sZXMiOlsiMjI1MTQzODgzOWU5NDhkNzgzZWMwZTUyODFkYWYwNWIiXSwic2NvcGUiOiJhY2NvdW50IGNvbW1lcmNlIHNvY2lhbCBwdWJsaXNoaW5nIGFuYWx5dGljcyIsInN1YiI6IjdhMWJlZTAyZjEyMzRjYjlhN2QxMjgzNTBjMzQ5Yjc5IiwidW5pb25faWQiOiI3ODdmZDQzNjYxNzk0Y2FjODg5ZmEzNWFmZWFhNThkMiIsInVuaW9uX25hbWVzcGFjZSI6ImFjY2VsYnl0ZSJ9.g80mmXGnV4n-El07h8bhqr8hYEKy73zjk1rW33_VcuOYmc0B57X-wFU1qBHjyBCAWZxJPpccP1Athv_vdU-h_es6JWdR65wqXHP1HQX3tXIX8HSzpzqQE6Uk7EwvCylrI3fyCScHWwreaykMWfM7qxbZowsSZivNZeqNkVaNozu-BGwP9DDMySApqa0jkqDJT831htb8s7-Ts6vgpBgx-2i9M9DYhksar0mGegMT1V1NykYWA8Yb-eb4YeJ4tDTPlZ79Ji2gb98PpUqXJSkKM4UaTmQFEtAptnoKarhozPb5K3i7bMooYwOZb_yVM2ZjQ6EySfeHDytU6FLd-muRdQ","bans":[],"device_id":"374f5e69a9fce9b0bebf5f9a6fdf73427ee1de905ae848f18d0c3a2aa1f604cea65cc94cb2927d3d1239f4d2ea26dc7a","display_name":"2 Dev 154757193","expires_in":3600,"is_comply":true,"jflgs":0,"namespace":"sdktest","namespace_roles":[{"roleId":"2251438839e948d783ec0e5281daf05b","namespace":"*"}],"permissions":[],"platform_id":"live","platform_user_id":"B954906B003D548DDC679B8FC6526DAFBB077370","refresh_expires_in":86400,"refresh_token":"eyJhbGciOiJSUzI1NiIsImtpZCI6IjE1YjVlZGM4NjAzNjE5ODU4MWQ0ZDFlN2I3OTZlN2VjZTc0MTFjYWQiLCJ0eXAiOiJKV1QifQ.eyJjbGllbnRfaWQiOiJhMzQyZjU5ZjM0ODk0NzZjYTAyZDcwNGM3NTg5MWEzYiIsImRldmljZV9pZCI6IjM3NGY1ZTY5YTlmY2U5YjBiZWJmNWY5YTZmZGY3MzQyN2VlMWRlOTA1YWU4NDhmMThkMGMzYTJhYTFmNjA0Y2VhNjVjYzk0Y2IyOTI3ZDNkMTIzOWY0ZDJlYTI2ZGM3YSIsImV4cCI6MTY4NDkxODgwOSwiaWF0IjoxNjg0ODMyNDA5LCJpc3MiOiJodHRwczovL2RldmVsb3BtZW50LmFjY2VsYnl0ZS5pbyIsIm5hbWVzcGFjZSI6InNka3Rlc3QiLCJwbGF0Zm9ybV9pZCI6ImxpdmUiLCJzdWIiOiI3YTFiZWUwMmYxMjM0Y2I5YTdkMTI4MzUwYzM0OWI3OSJ9.XTVIRlPF6jp88n9eySvLoPYanJNSPmlqWq28zaJde7QysFya_KMmCovElgNh2YN1buP_GYkAH-I5J6_cwx3auYmrQtchTp_c1_n6sEtFy73baCD3qMltR-aJc2uIZxVpCFHwLCd7UeO4Ify8Gp3BksvrlSgffO3lC4xnpXLiySHDEMm1rA8xVW0gkvoXGqAYmI-VA4gblzfYkhdjRnAdOk5GVDxhRqRclwjOXmtABXEgAl4PnwayuKY8VvlY_PL8YNqQtMCQoPFI_Sy6PYr4_xTMyPNTvwAtabAIxDajcxEgUvUaqEtg02sQqri_Uxsv9eLknw3UjDKE6oKBuHsToA","roles":["2251438839e948d783ec0e5281daf05b"],"scope":"account commerce social publishing analytics","token_type":"Bearer","user_id":"7a1bee02f1234cb9a7d128350c349b79"}

---
[/Verbose]