Getting started with the event handler
The Extend Override and Events Handler are in Open Beta for AGS Premium Clients! This means Extend available for you to try on your development environment. You can submit your feedback through this link.
Overview
This document provides a step-by-step guide on how to use AccelByte Gaming Services (AGS) events handler to listen on the UserLogin event and grant in-game entitlement whenever a user login event is triggered.
Prerequisites
- Go
- C#
- Java
Windows 10 WSL2 or Linux Ubuntu 20.04 with the following tools installed:
- Make
- Docker v23.x
- docker-compose v2
- Go v1.20
Windows 10 WSL2 or Linux Ubuntu 20.04 with the following tools installed:
- Bash
- Make
- Docker v23.x
- docker-compose v2
- .NET SDK 6.0
Windows 10 WSL2 or Linux Ubuntu 20.04 with the following tools installed:
- Bash
- Make
- Docker v23.x
- Docker-compose v2
- JDK 8
Access to the AccelByte Gaming Services demo environment.
- Base URL: https://demo.accelbyte.io.
- Create a game namespace if you don't have one yet.
Keep the
Namespace ID. - Create an OAuth Client with
confidentialclient type. Keep theClient IDandClient Secret.
The
extend-helper-clidownloaded, installed, and set up. Download here.- To use this tool, please follow its documentation on Github
- Be aware that from this setup you will add more permission to your
Client IDandUser ID.
Download the sample app
- Go
- C#
- Java
Clone the event handler sample app.
git clone https://github.com/AccelByte/extend-event-handler-go.gitIn the sample app repository, open the
README.mdfile, then follow the Setup, Building, and Running sections.
Clone the loot box roll function gRPC plugin sample apps.
git clone https://github.com/AccelByte/extend-event-handler-csharp.gitIn the sample app repository, open the
README.mdfile, then follow the instructions in the Setup, Building, and Running sections. Alternatively, you can use thedotnetcommand shown below to run the server. Ensure that the server is running locally before moving onto the next section.From sample app root directory:
cd src/AccelByte.PluginArch.EventHandler.Demo.Server
dotnet run
Clone the event handler sample app.
git clone https://github.com/AccelByte/extend-event-handler-java.gitIn the sample app repository, open the
README.mdfile, then follow the instructions in theSetup,Building, andRunningsections.
These steps are mandatory as you will need to add the following additional permission to the Client ID you're using.
ADMIN:NAMESPACE:{namespace}:USER:*:ENTITLEMENT [CREATE]
Run and test Extend app locally
- Go
- C#
- Java
To develop the Extend app faster, you can test it using grpcui.
For more details, refer to the README.md file in Extend sample app for golang.
To have faster iteration on developing the Extend app, you can test it using grpcui.
For more details, refer to the README.md file in Extend sample app for C#.
To have faster iteration on developing the extend app, you can test it using grpcui.
For more details, refer to the README.md in Extend sample app for Java.
Register and integrate Extend sample app to AGS
In the AGS Admin Portal, go to the
namespacewhere wish to create yourgRPC Plugin.On the sidebar menu, hover over Extend and click Event Handler.
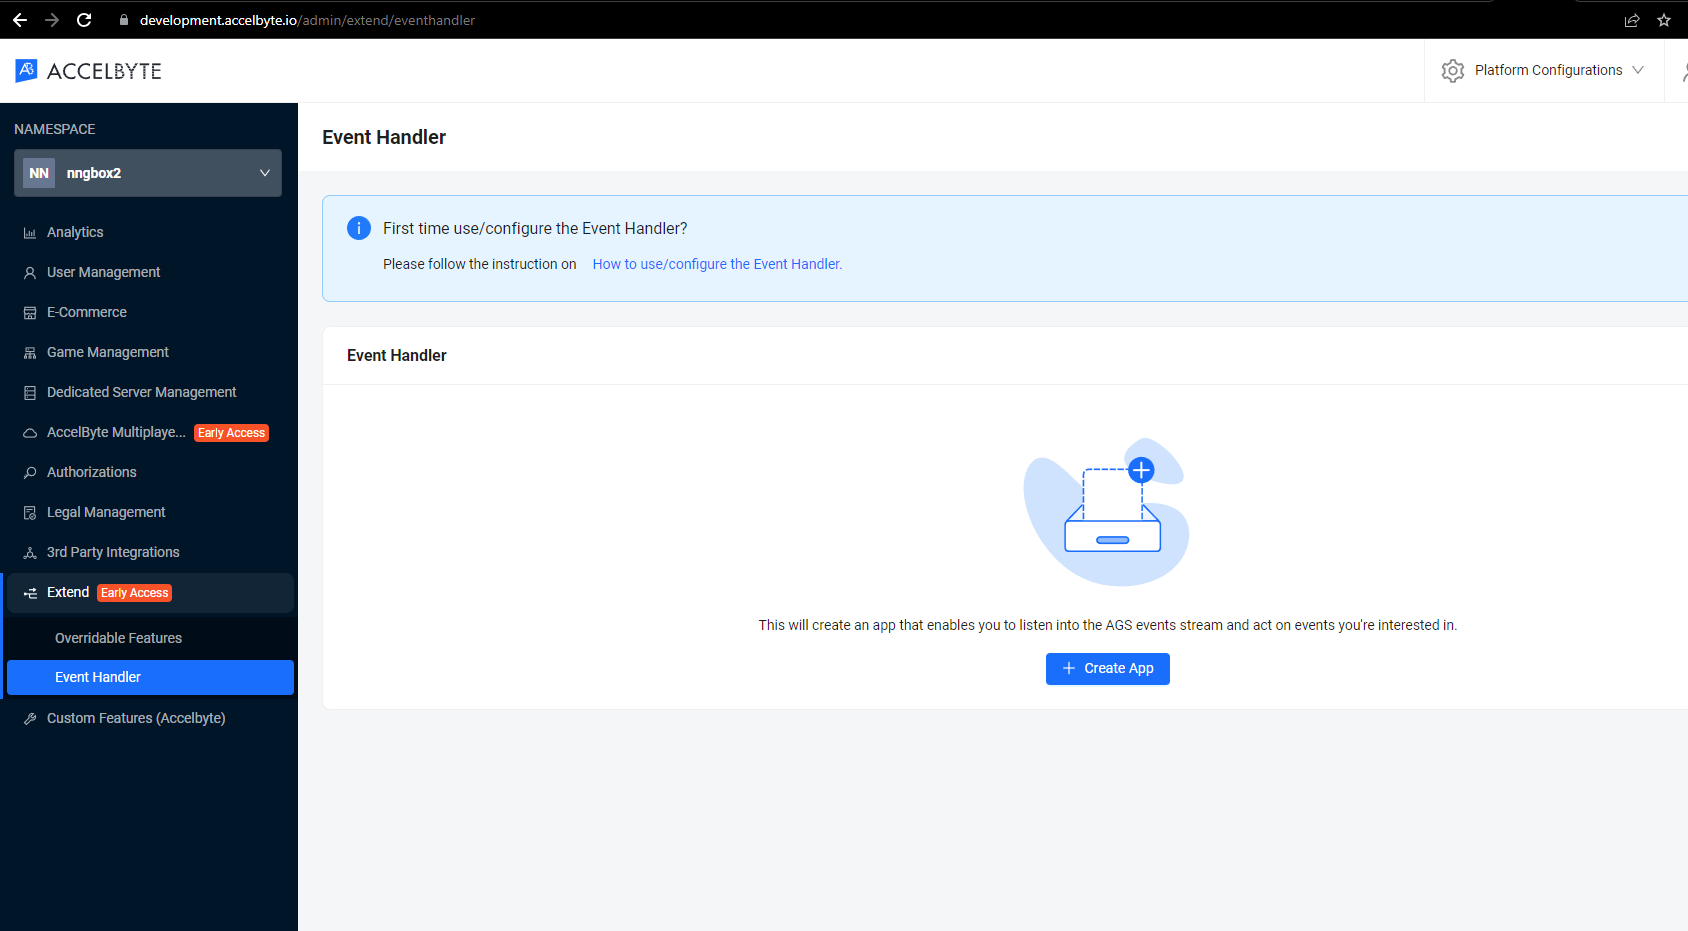
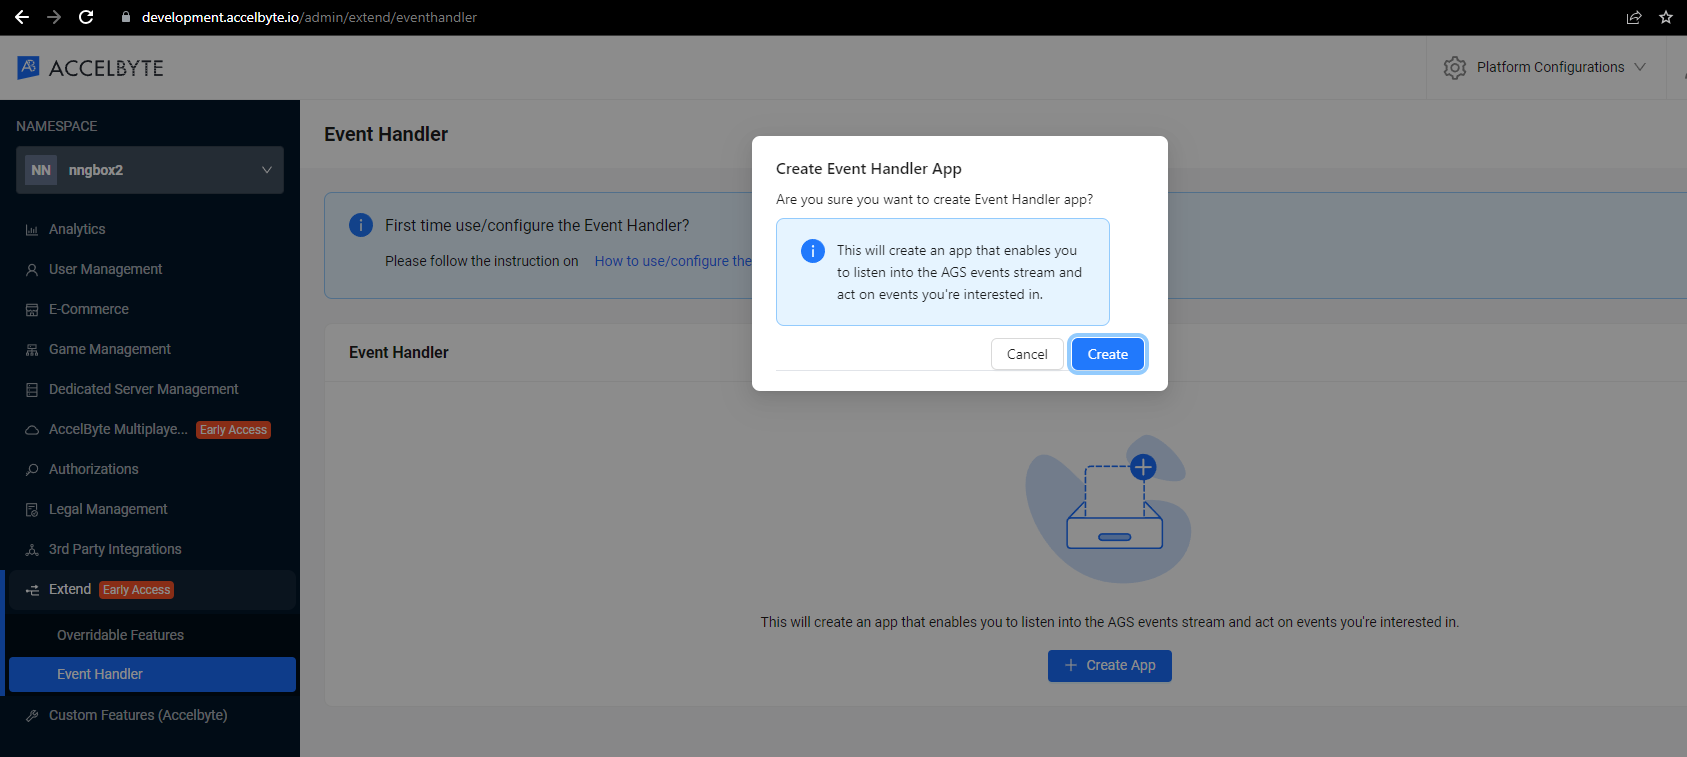
The following pop-up appears. Follow the steps on the pop-up to create the app.
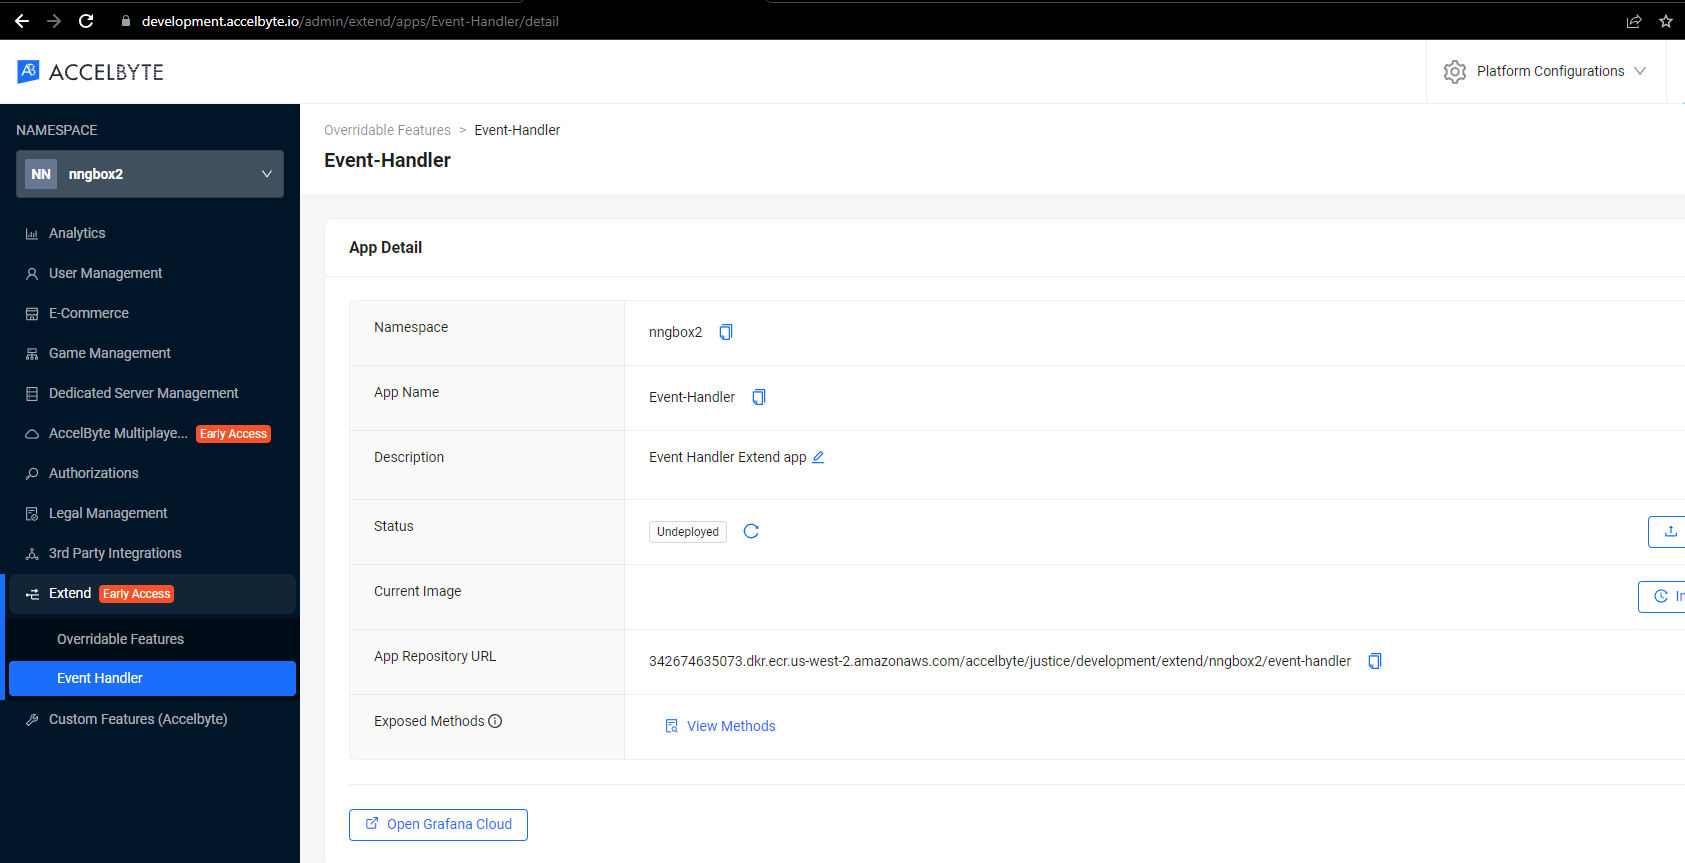
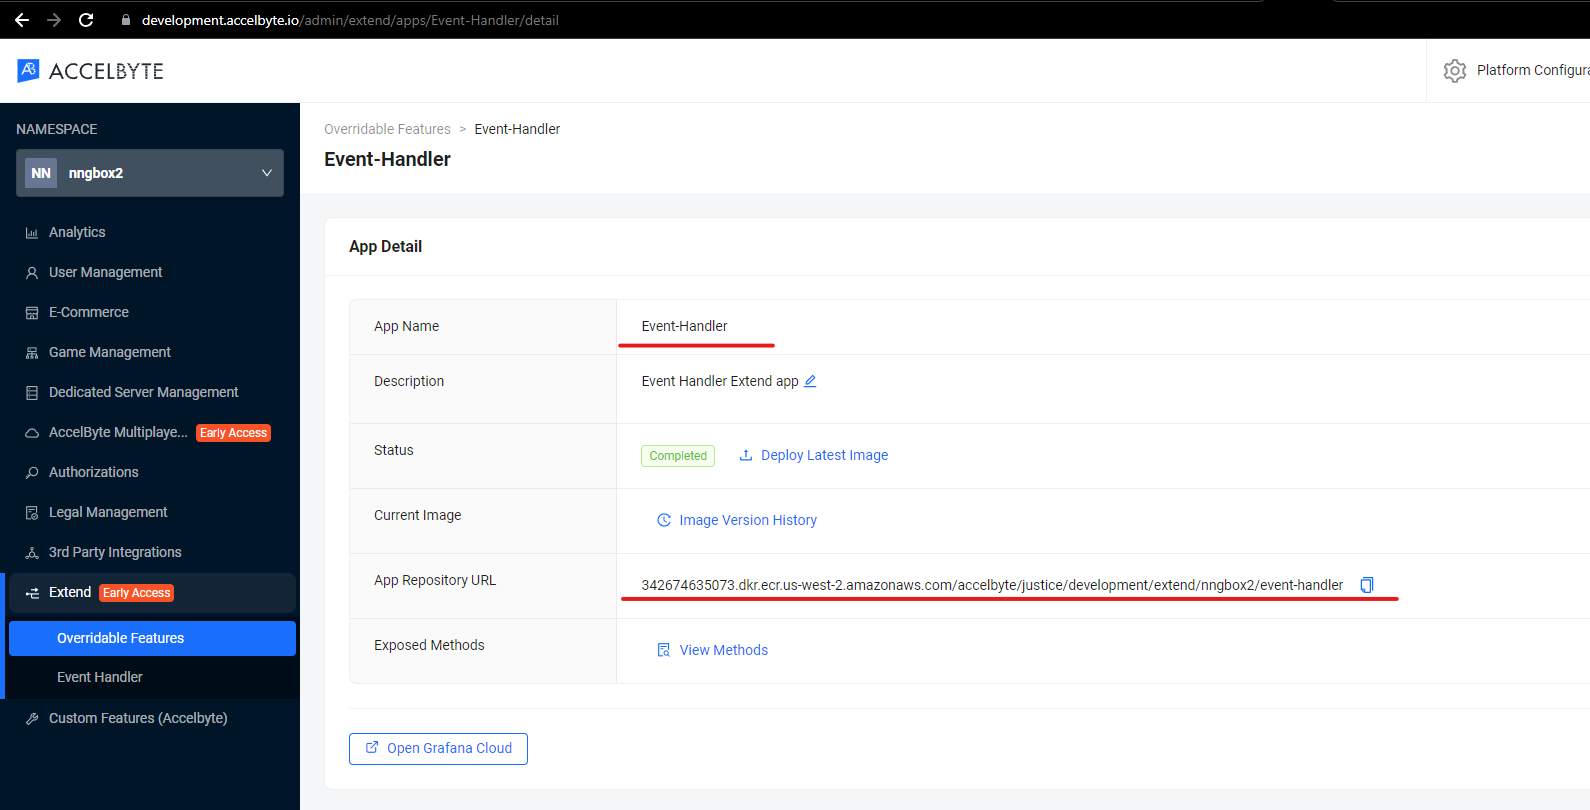
After you create the app, you will see the details of your app in the Event Handler page.
Create an Extend app that listens to the UserLogin event
In this tutorial, we will create an Extend app that will listen to UserLogin event then grant an entitlement to that user on that specific namespace.
Set up and publish the store
Create a new store if the same namespace as this app. You can use your existing store if you already configured your own. For more details about creating and publishing stores, see Store and Entitlements.
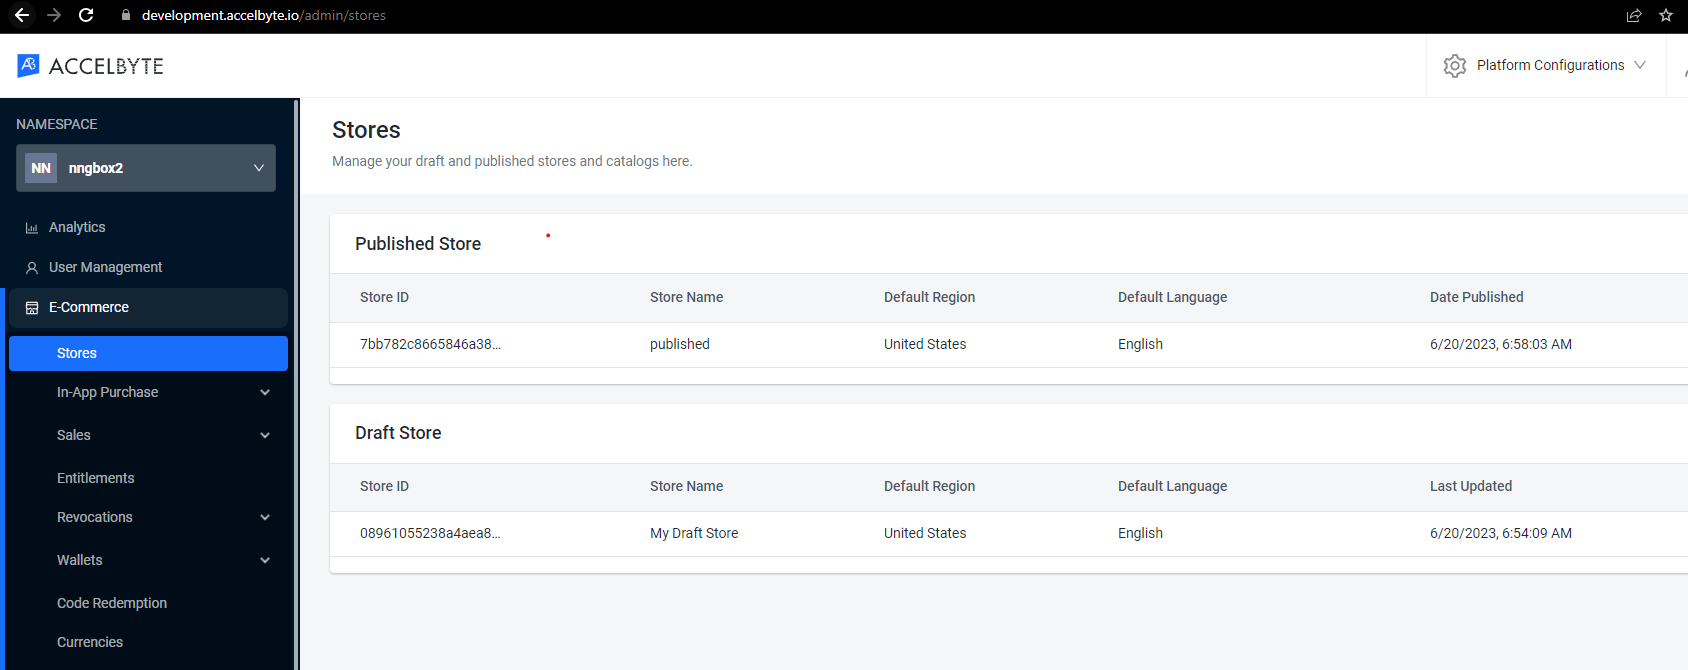
After you've created and published your store, copy the item ID in the published store you want to grant as an entitlement.

Walkthrough of the Extend app
- Go
- C#
- Java
As covered in the previous topic about AGS events' descriptor using protobuf file, this sample app will show you how we leverage that protobuf file.
Now, let's get back to the sample app we've cloned previously.
In the sample project, you will have the pkg/proto and pkg/pb, what we need to do is just put any directory containing protobuf we've mentioned on previous chapter as needed. In this case, we only interested on UserLogin event, so we only put the iam directory to pkg/proto
...
├───pkg
│   ├───proto
│   │   └───accelbyte-asyncapi            # Place the proto file from previous chapter here.
│   │       └───iam
│   └───pb
│       └───accelbyte-asyncapi            # This is where the generated code from protobuf will be placed.
│           └───iam
...
To generate the protobuf code you can run this command
make proto
As covered in the previous topic about AGS events' descriptor using protobuf file, this sample app will show you how we leverage that protobuf file.
Now, let's get back to the sample app we've cloned previously.
In the sample project, you will have src/AccelByte.PluginArch.EventHandler.Demo.Server/Protos directory. What we need to do is just put any directory containing protobuf we've mentioned on previous chapter as needed. In this case, we only interested on UserLogin event, so we only put the iam directory to src/AccelByte.PluginArch.EventHandler.Demo.Server/Protos
Then, you need to include the exact protobuf file to be generated by .NET gRPC Tool. Modify src/AccelByte.PluginArch.EventHandler.Demo.Server/AccelByte.PluginArch.EventHandler.Demo.Server.csproj file and add or update following block.
<ItemGroup>
    <Protobuf Include="Protos\iam\account\v1\account.proto" GrpcServices="Server" />
</ItemGroup>
You can include more than one protobuf file. Just add more <Protobuf> lines inside <ItemGroup>.
To generate the code, just run dotnet build.
To put your logic in the code, follow this example file.
To learn more about how to create gRPC service .Net, see Microsoft's gRPC services with C# guide.
As covered in the previous topic about AGS events' descriptor using protobuf file, this sample app will show you how we leverage that protobuf file.
Now, let's get back to the sample app we've cloned previously.
In the sample project, you will have the src/main/proto and target/protoGen, what we need to do is just put any directory containing protobuf we've mentioned on previous chapter as needed. In this case, we only interested on UserLogin event, so we only put the iam directory to src/main/proto
...

├── src
│   ├── main
│   │   ├── proto                      # Place the proto file from previous chapter here
│   │   │   └── accelbyte-asyncapi
...
└── target
    ...
    ├── protoGen
    │   └── main
    │       ├── grpc                   # This where the generated code from protobuf will be placed
    ...
To generate the protobuf code you can run this command
make build
Prepare the required parameters for building and deploying the Extend app
Before we can build and deploy the Extend app, we need to note required parameter to our build tools in the next step.
Go to the Event-Handler page where we previously registered our Event Handler app.
Now, let's note the App Name and App Repository URL
Build and upload the Extend app
After we're ready with our sample app and all required parameters already prepared, let's build and deploy it.
First of all, we need to configure the extend-helper-cli stated in the prerequisites, since we will use it
to deploy our sample app.
We will only put brief description on how we used the extend-helper-cli here, please refer to full documentation
mentioned in prerequisites.
$ ./extend-helper-cli-linux_amd64 dockerlogin --namespace nngbox2 --app Event-Handler -p | docker login -u AWS --password-stdin 342674635073.dkr.ecr.us-west-2.amazonaws.com/accelbyte/justice/development/extend/nngbox2/event-handler

INFO[0000] signing in to https://development.accelbyte.io
INFO[0001] getting docker credentials...
WARNING! Your password will be stored unencrypted in /home/xyz-abc/.docker/config.json.
Configure a credential helper to remove this warning. See
https://docs.docker.com/engine/reference/commandline/login/#credentials-store

Login Succeeded
After you've successfully logged in using extend-helper-cli, you can upload the sample app.
We're using the makefile script in the sample app to upload the sample app.
make imagex_push IMAGE_TAG=v0.0.1 REPO_URL=342674635073.dkr.ecr.us-west-2.amazonaws.com/accelbyte/justice/development/extend/nngbox/event-handler
The REPO_URL can be copied from the app detail page App Repository URL.
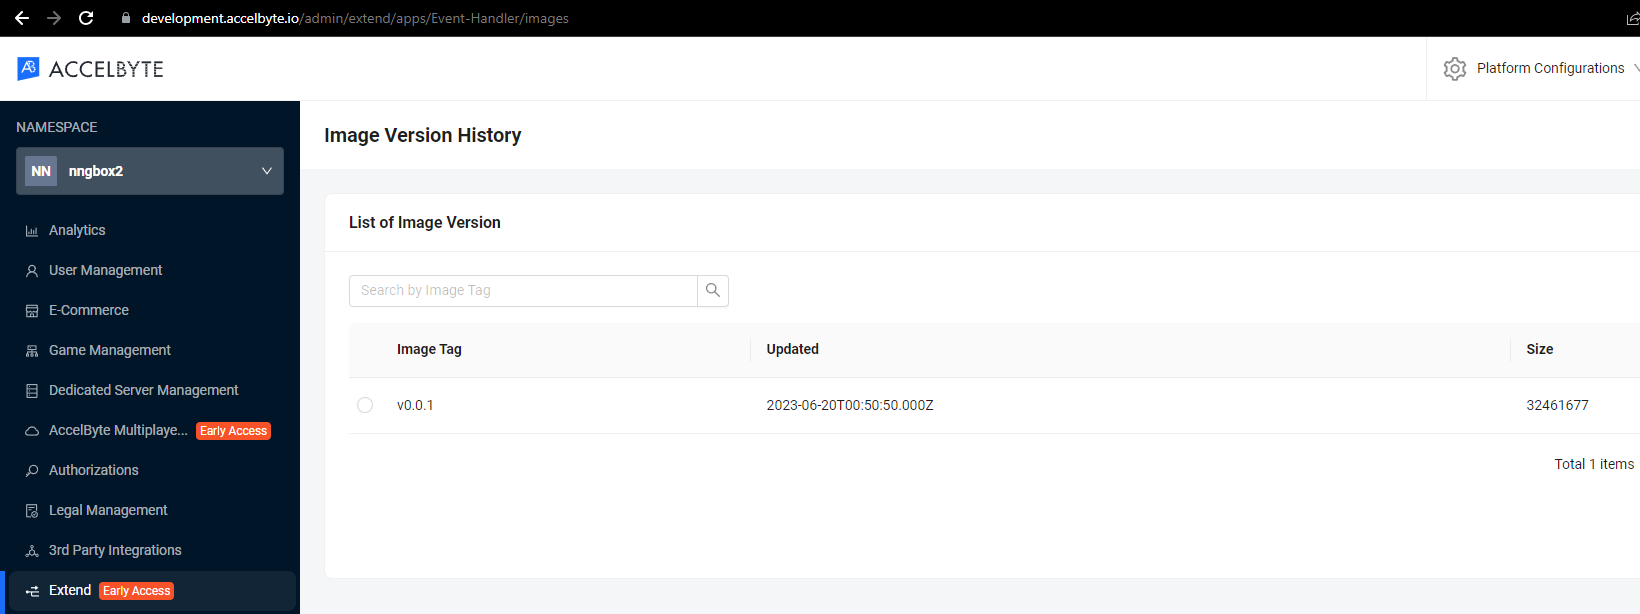
If your images are successfully uploaded, you will see an image with version v0.0.1 in the Image Version History page.
Deploy the Extend app
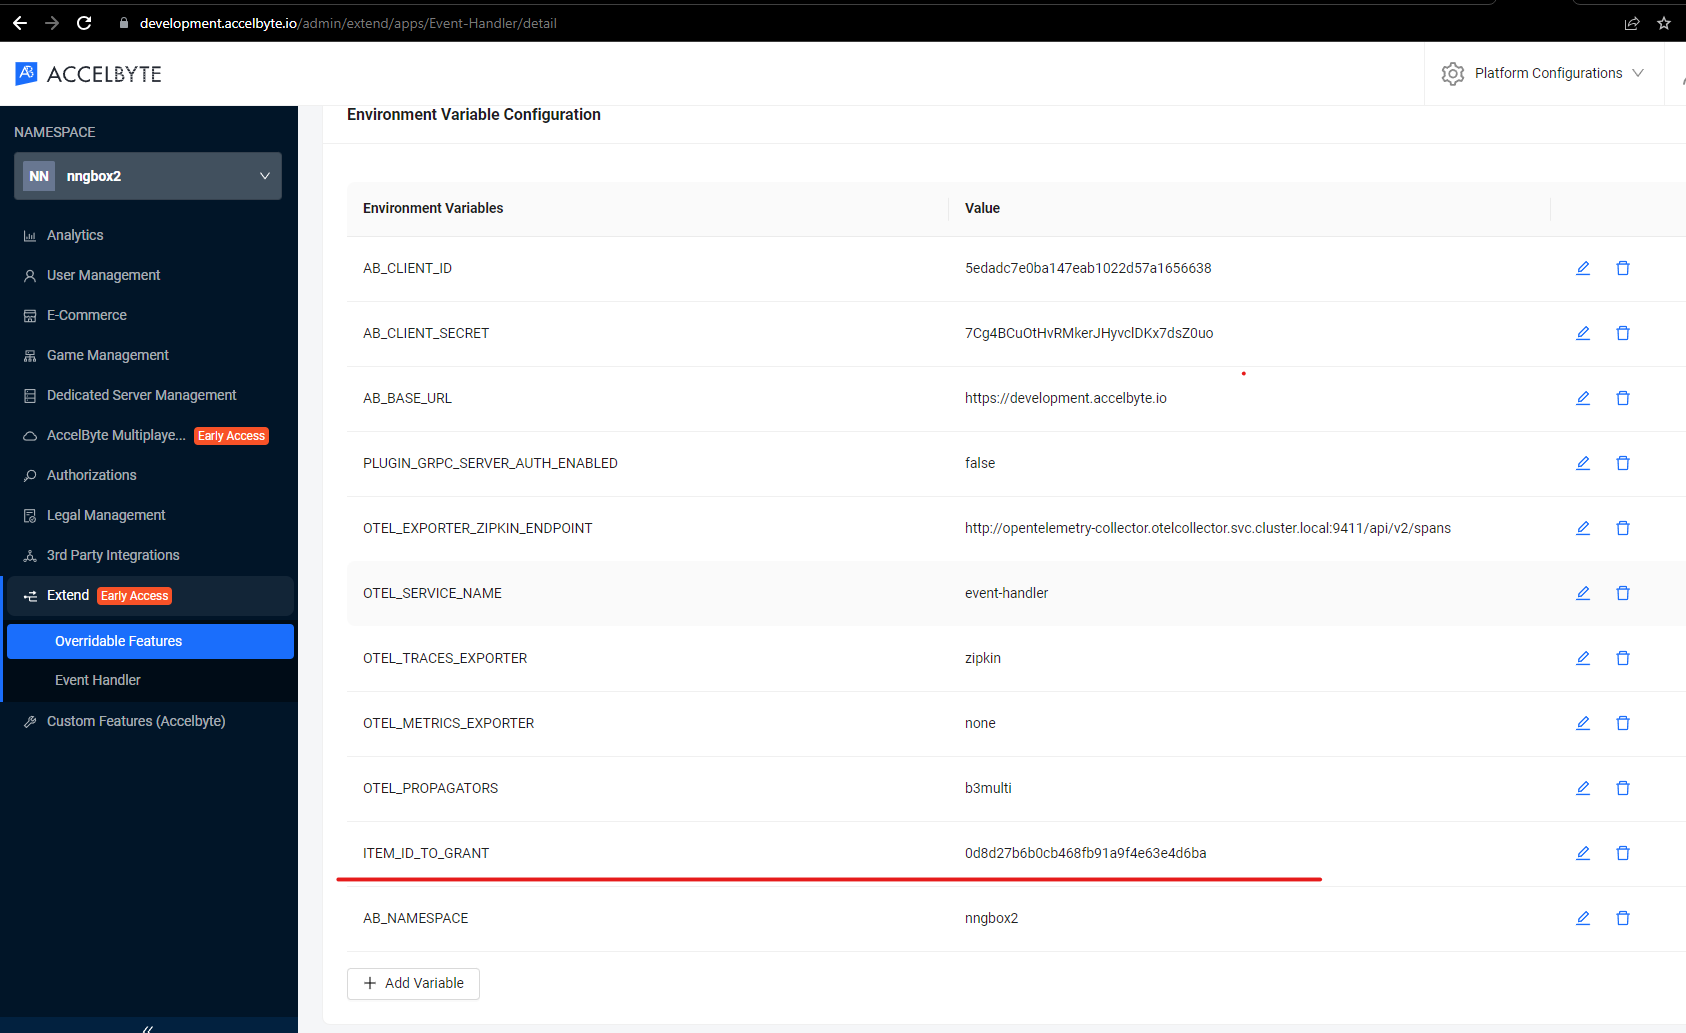
Before we deploy the app, let's configure the item ID we noted on the previous step.
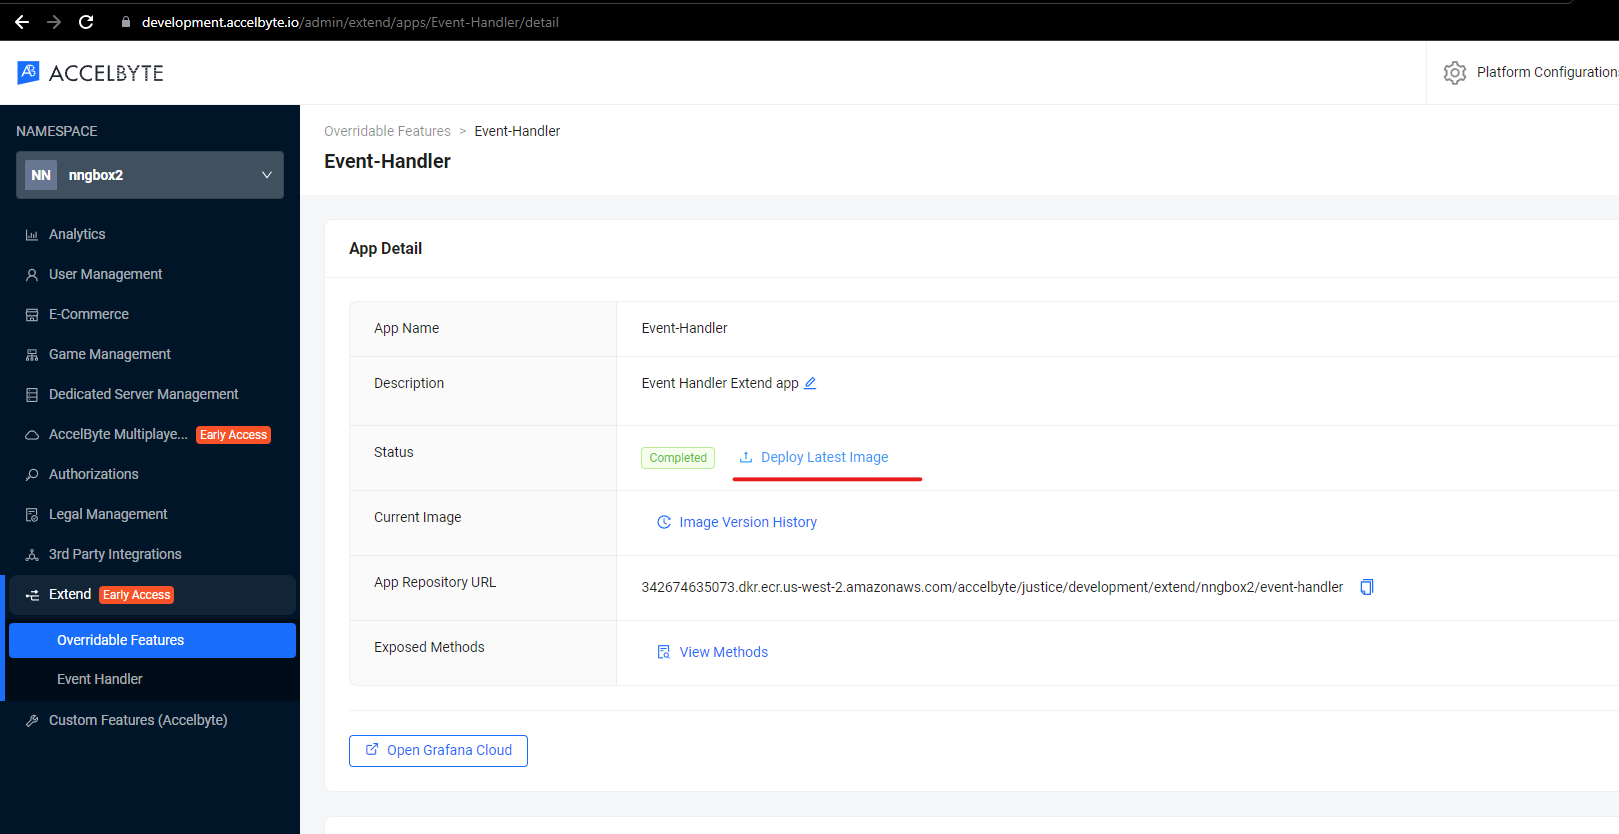
To deploy the Extend app, click Deploy Latest Image.
Test the deployed Extend app
We can see a change in user's entitlement since we granted an entitlement for any user in that namespace that has successfully logged in

A note on Event Handler behavior
When initiating the Event Handler app, especially for a new deployment or after extended breaks, there might be instances where certain events don't trigger their expected callbacks.
This behavior is tied to specific lifecycle moments of the service. It's recommended to introduce a short delay before sending new events during these pivotal times. This ensures all components are ready for optimal event handling. To learn how to check whether the app is up and running, see Event Handler observability.
In the deployment setup, there's a timeout mechanism for the gRPC Event Handler app managed by Envoy. This timeout occurs when there's no incoming/outgoing data or request, allowing the system to free up resources. By default, the timeout duration is 300s for streamIdleTimeout and 30s for routeTimeout.
For a deeper understanding and recommended practices, refer to the Event Handler behavior documentation.