Unreal Engine Module - Login with Device ID - Add a Login menu
What's on the menu
In this section of the tutorial you will learn how to prepare a simple login menu widget, so later it can be used to send login requests to AGS.
The login menu is already created but needs some additional code to add before we can use it to connect with AccelByte OSS.
The files are available in the Resources section. The login menu consists of 2 parts:
- The first one is C++ class
LoginWidget_Starterwhere most of our implementation will be in.- Header file:
/Source/AccelByteWars/TutorialModules/Access/AuthEssentials/UI/LoginWidget_Starter.h - CPP file:
/Source/AccelByteWars/TutorialModules/Access/AuthEssentials/UI/LoginWidget_Starter.cpp
- Header file:
- The second one is the widget blueprint class
W_Login_Starterthat is created and designed using Unreal Motion Graphics (UMG) built-in to the engine.- Widget Blueprint file:
/Content/TutorialModules/Access/AuthEssentials/UI/W_Login_Starter.uasset
- Widget Blueprint file:
For more detailed info about UMG please go to UMG UI Designer.
This simple login menu has 3 states:
- Default: showing the available login methods (for now it only has Login with Device ID option),
- Logging In: the login request already sent to AGS and waiting for the response, and
- Failed Login: the login response is failed, the widget will show the option either to retry login or quit the game.
If the login response result is successful, then the game will direct the user to the main menu.
The state changes are possible using the Widget Switcher component that is included in the Login. The UI component in each state, group up together under the Vertical Box component as the children of Widget Switcher. It basically works just like a tab control, and it switches through its children.
Here is the declaration of the Widget Switcher component in the C++ header file.
private:
    UPROPERTY(BlueprintReadOnly, meta = (BindWidget, BlueprintProtected = true, AllowPrivateAccess = true))
    UWidgetSwitcher* Ws_LoginState;
To be able to change the state using the Widget Switcher we are using the following helper function. We also set the controller focus to the button that lives under the selected active widget. Ignore the FTEU functions. Those are specifics to Byte Wars, as the name suggest, to handle the first time user experience UI.
void ULoginWidget_Starter::SetLoginState(const ELoginState NewState)
{
    Ws_LoginState->SetActiveWidgetIndex((int)NewState);

    switch (NewState)
    {
    case ELoginState::Default:
        Btn_LoginWithDeviceId->SetUserFocus(GetOwningPlayer());
        InitializeFTEUDialogues(true);
        break;
    case ELoginState::LoggingIn:
        DeinitializeFTUEDialogues();
        break;
    case ELoginState::Failed:
        Btn_RetryLogin->SetUserFocus(GetOwningPlayer());
        DeinitializeFTUEDialogues();
        break;
    default:
        Btn_LoginWithDeviceId->SetUserFocus(GetOwningPlayer());
        InitializeFTEUDialogues(true);
        break;
    }
}
For more detailed info about Widget Switcher please read more at Unreal Engine API Reference.
Default state
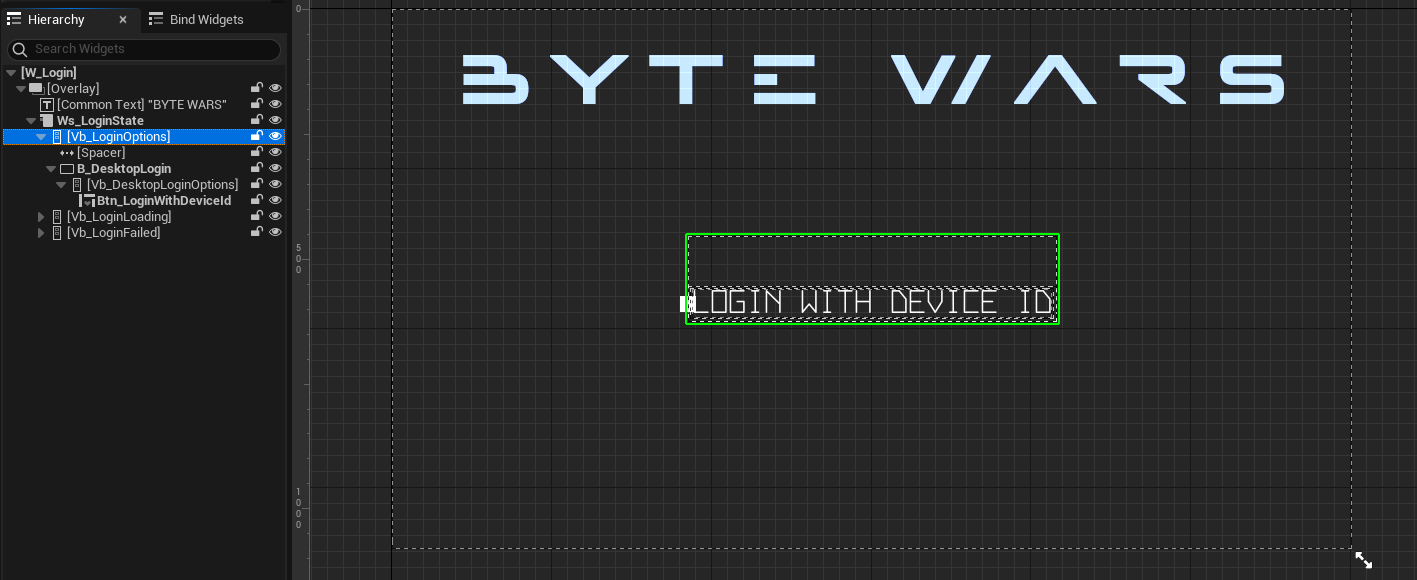
Default state displays a button to login called Btn_LoginWithDeviceId and is bound to the C++ parent class.
It uses Common Button Base as the button type.
The code below is the button declaration in the header file class.
private:
    UPROPERTY(BlueprintReadOnly, meta = (BindWidget, BlueprintProtected = true, AllowPrivateAccess = true))
    UCommonButtonBase* Btn_LoginWithDeviceId;
And here is the widget blueprint preview of the default state.
Logging-in state
Logging In state displays a text and a spinner when the login request is in progress.

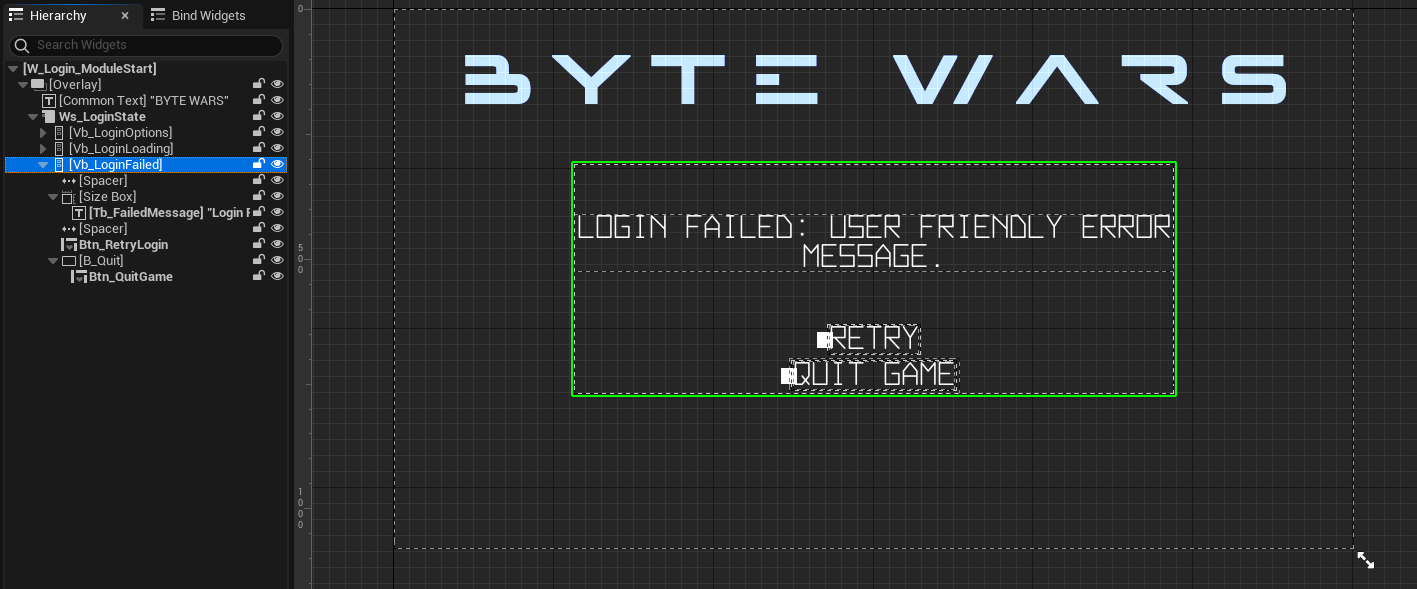
Failed state
Failed state displays error messages when the login fails where both Btn_RetryLogin and Btn_QuitGame buttons are.
private:
    UPROPERTY(BlueprintReadOnly, meta = (BindWidget, BlueprintProtected = true, AllowPrivateAccess = true))
    UCommonButtonBase* Btn_RetryLogin;

    UPROPERTY(BlueprintReadOnly, meta = (BindWidget, BlueprintProtected = true, AllowPrivateAccess = true))
    UCommonButtonBase* Btn_QuitGame;
There is also a Text Block component to display error messages coming from the AccelByte OSS later.
private:
    UPROPERTY(BlueprintReadOnly, meta = (BindWidget, BlueprintProtected = true, AllowPrivateAccess = true))
    UTextBlock* Tb_FailedMessage;
Ready the UI
Here in this section, we are going to prepare the UI for AccelByte OSS Login integration.
Open
AccelByteWars.slnusing Visual Studio, then from Solution Explorer open theLoginWidget_Starterclass CPP file. Then, add the following code to theOnLoginWithDeviceIdButtonClicked()function. This code sets the login state to logging in and bind a delegate to retry login with Device ID.void ULoginWidget_Starter::OnLoginWithDeviceIdButtonClicked()
{
SetLoginState(ELoginState::LoggingIn);
OnRetryLoginDelegate.AddUObject(this, &ThisClass::OnLoginWithDeviceIdButtonClicked);
// TODO: Later, you will send login with Device ID request here.
}Next, build the AccelByteWars project and open it in Unreal Editor.
Open the AccelByteWars project on Unreal Editor. From the Content Browser then navigate to
/Content/TutorialModules/Access/AuthEssentials/UI/and openLoginWidget_Starterby double-clicking on it. A new menu will appear in the UMG editor. Make sure that all widgets are bound properly in the Bind Widgets tab and Parent class for the Widget Blueprint are set toLoginWidget_Starterclass.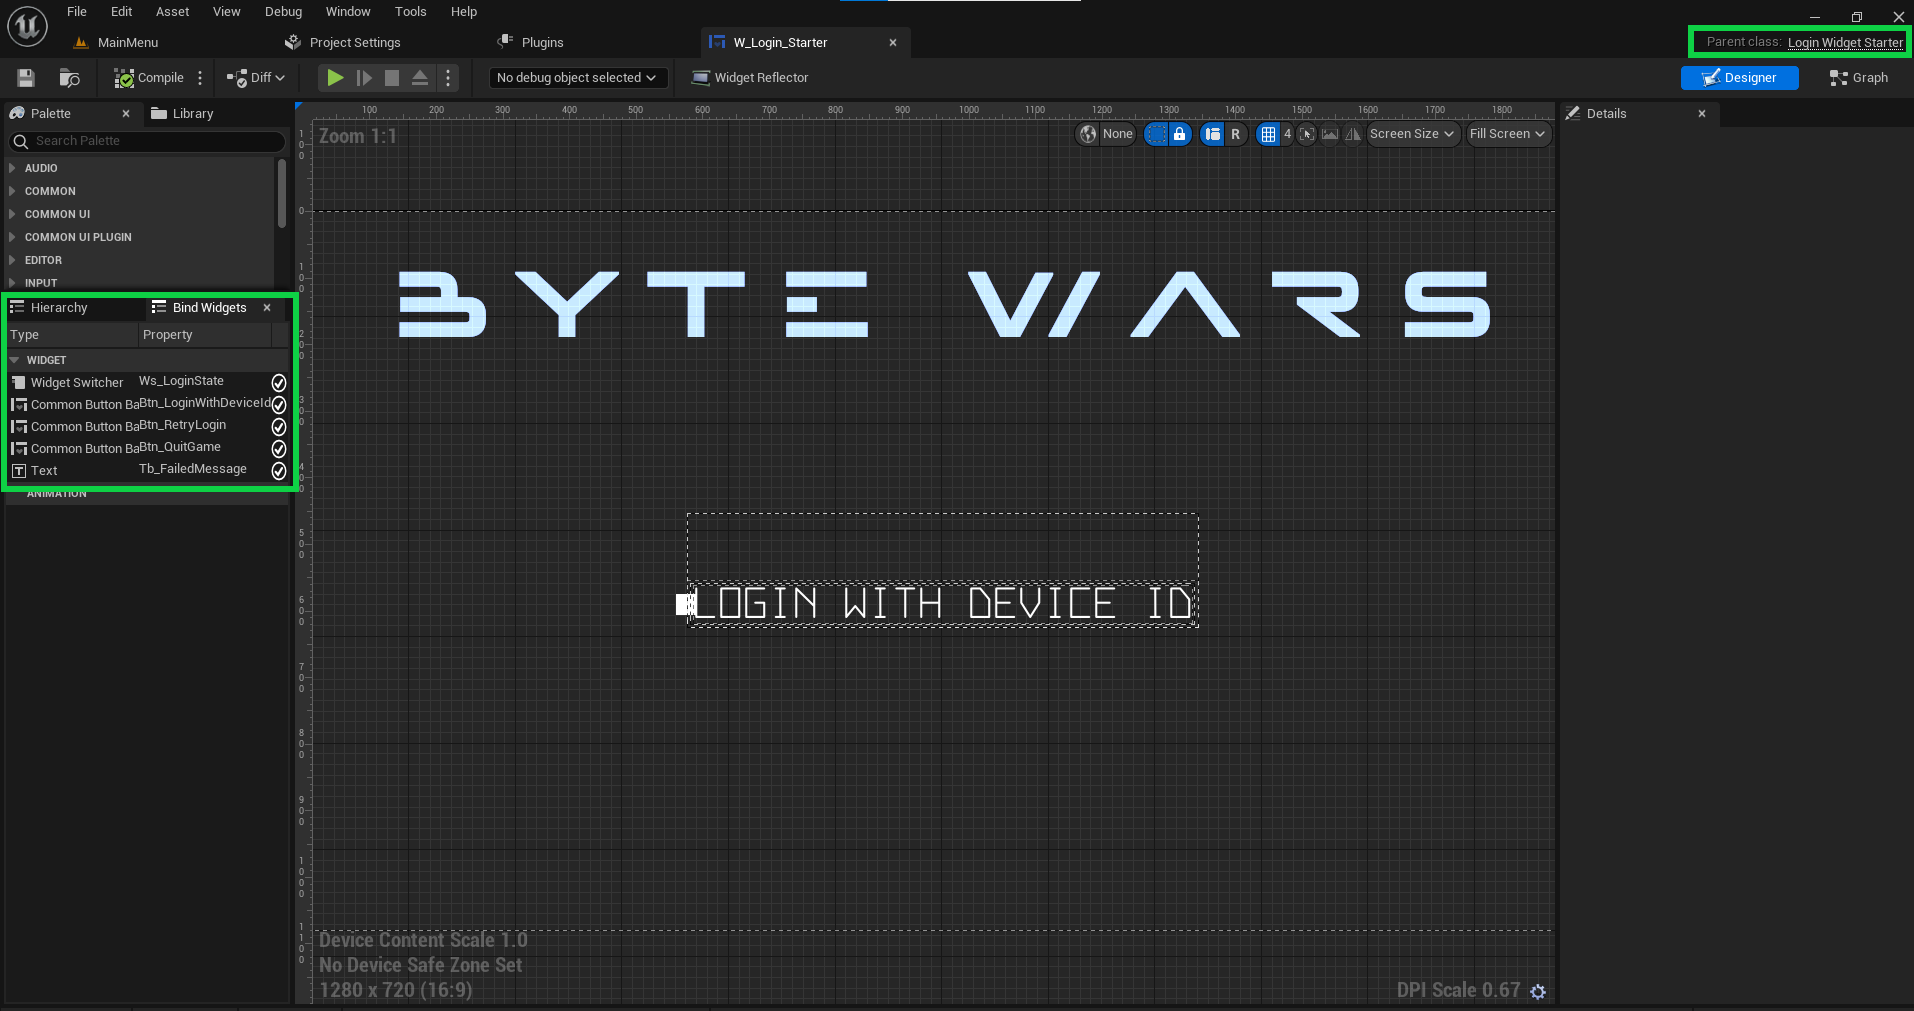
To test out the Login widget, from Content Browser open
Content/TutorialModules/Access/AuthEssentials/DA_AuthEssentials.uassetand enable theIs Starter Mode Active. Then, save the Data Asset.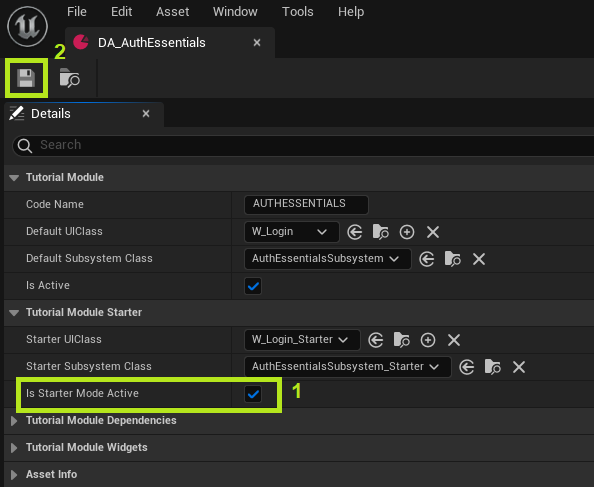
Try to play in the editor and the game should run using the widget that we just created. On Login with Device ID clicked, it should change state to logging in.

There you have it! You have learned to prepare your simple login menu widget to later connect to AccelByte OSS. On the next page, you will learn how to set up the Device ID login method.
Resources
- The files used in this tutorial section are available in the Byte Wars GitHub repository.
- AccelByteWars/Content/TutorialModules/Access/AuthEssentials/DA_AuthEssentials.uasset
- AccelByteWars/Content/TutorialModules/Access/AuthEssentials/UI/W_Login_Starter.uasset
- AccelByteWars/Source/AccelByteWars/TutorialModules/Access/AuthEssentials/UI/LoginWidget_Starter.h
- AccelByteWars/Source/AccelByteWars/TutorialModules/Access/AuthEssentials/UI/LoginWidget_Starter.cpp